Stacks is a new feature introduced by Apple in its new version of macOS – macOS Mojave (Ver. 10.14). It basically automatically organizes your desktop files into similar groups and make you desktop look clean and tidy. Well, it is just for desktop and not for individual folder. It’s the best and fastest way to clean your desktop from file clutter. In this post, we will learn Stacks in macOS Mojave, how to enable it, what all stacks can do for your Mac?
What is Stacks in macOS Mojave?
If you are a desktop freak and save all your stuff on desktop, no matter where you get a file from. Either you download a files from internet, or transfer photos from a camera, or create text editor file, word processor file and PDFs, you save them all on your desktop. Though you like this system and its easy for you to find a file. However, as time goes by, you pile up a lot of files on your desktop and sometimes it becomes so cluttered that you can’t even find the file for daily work. macOS Mojave is going to solve your problem a lot. By enabling the Stacks, your desktop will automatically group the files of similar kind into a “Stacks”. All PDFs will be grouped together into its stacks, all video files, music file, Spreadsheets, Word processor files, photos, screenshots, PSD files, app file or downloaded apps, they all will be grouped separately into their own stacks.
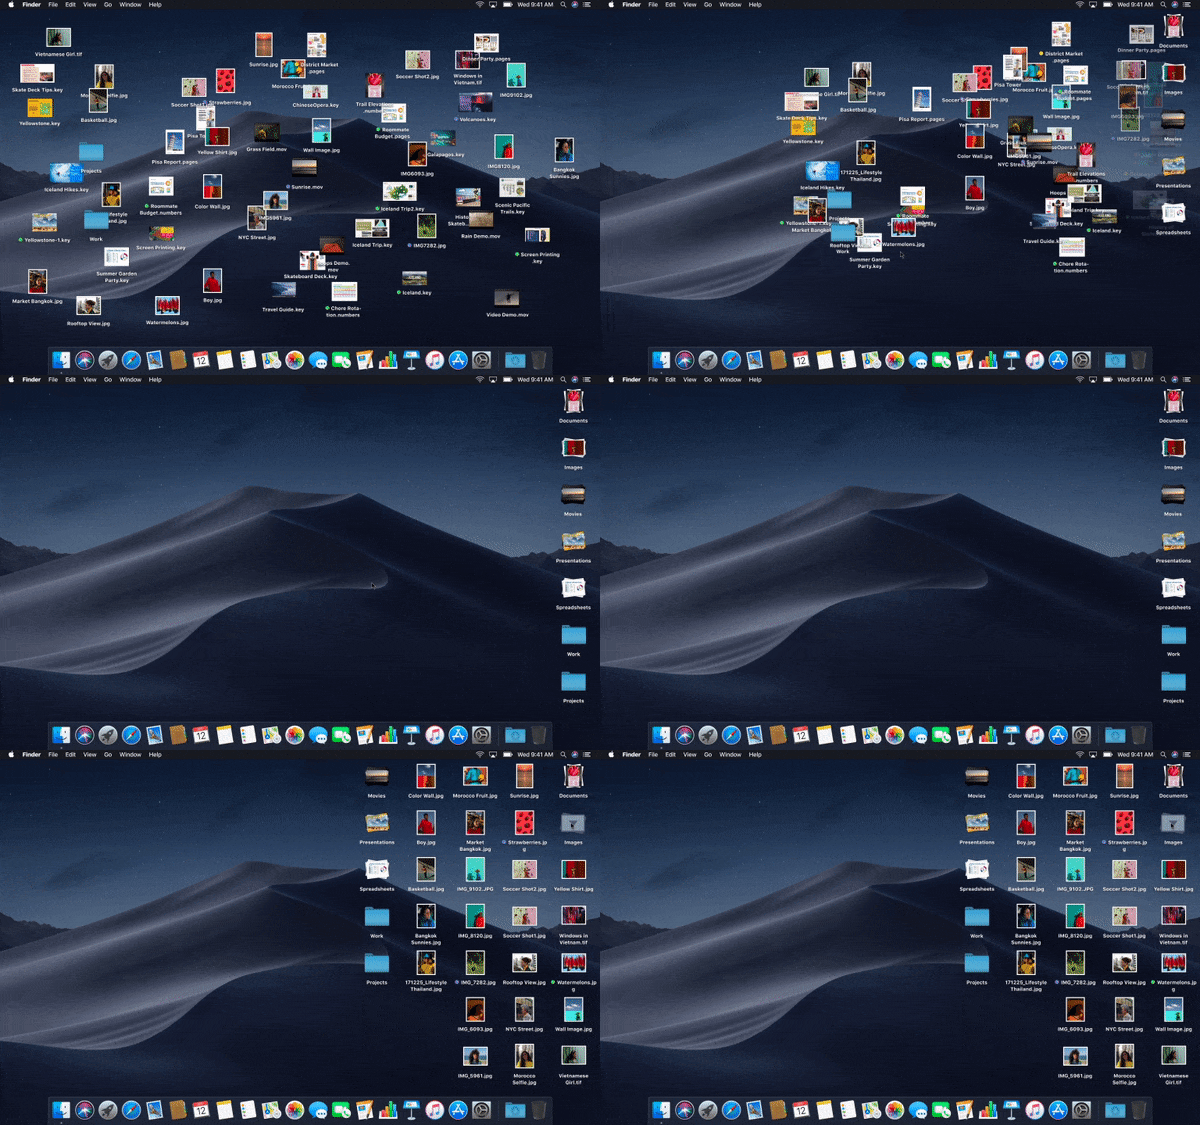
When you enable Stacks, by default, files are grouped by their kind(types). However, you can change the way files are grouped or stacked. Once the ‘Stacks’ is enabled, you can change the groups creation process by the date files are opened, by date modified, by date added, or by tags. The most interesting part is that, you can scrub each stacks and flip through the thumbnail of files each ‘Stacks’ contains. It can help you find a file quickly.
#1. How to enable Stacks on macOS Mojave?
Enabling or disabling the stacks is very simple and just two clicks away. Simply right click on your desktop and select “Use Stacks” and you are done. So, here is how we enable and disable Stacks in macOS Mojave.
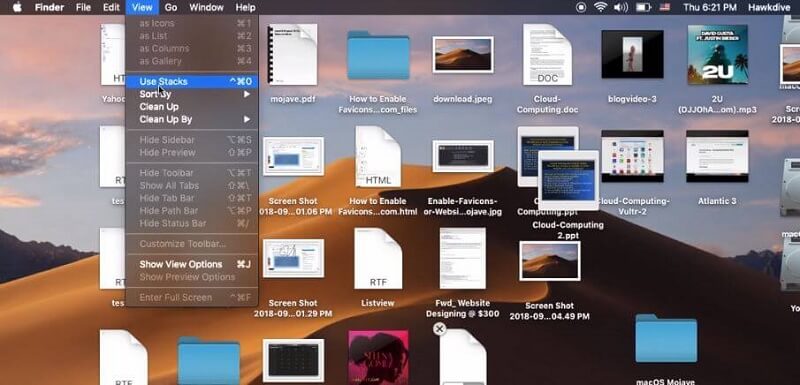
- Open Finder and click on View menu across the top.
- Select “Use Stacks“.
- To disable it simply go to the View menu again and uncheck the option “Use Stacks”. It will disable the Stacks and revert back to your cluttered desktop.
#2. How to organize the file by using Stack differently?
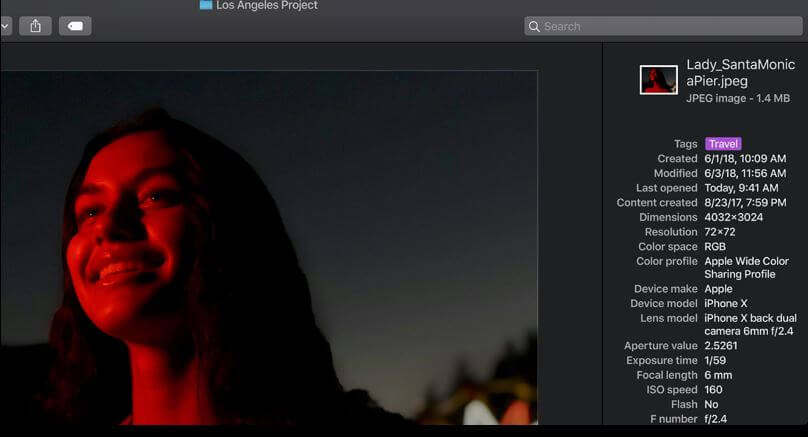
As you read earlier, by default, macOS Mojave create Stacks by file type which is known as Kind. Once the Stacks is enabled you can change the way files are grouped or the Stacks are being created. Simply right click on the desktop and select “Group Stacks By” and choose one of the options from – (1). Date Last Opened (2). Date Added (3). Date Modified (4). Date Created (5). Tags.
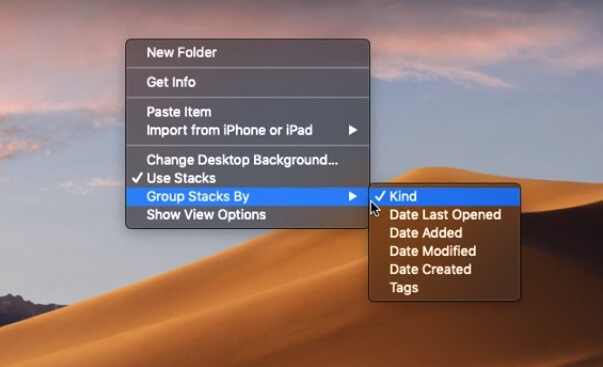
Tags can be an amazing option for you, if you are tagging files with project specific meta data such as Client name, Camera name and Model, or Travel, Health, Entertainment, etc. This is how we organize or Sort Stacks.
- First of all enable the Stacks as per the steps mentioned in 1st question above.
- Go to the View menu in Finder again or simply right click on your desktop and select “Group Stacks By“.
- Then choose one of the five ways to sort the stacks.
#3. How to open or View a file in a Stacks?
Now because all of your files are grouped together in a stack and not showing up directly on the desktop. How will you open a file or view it in Stacks?
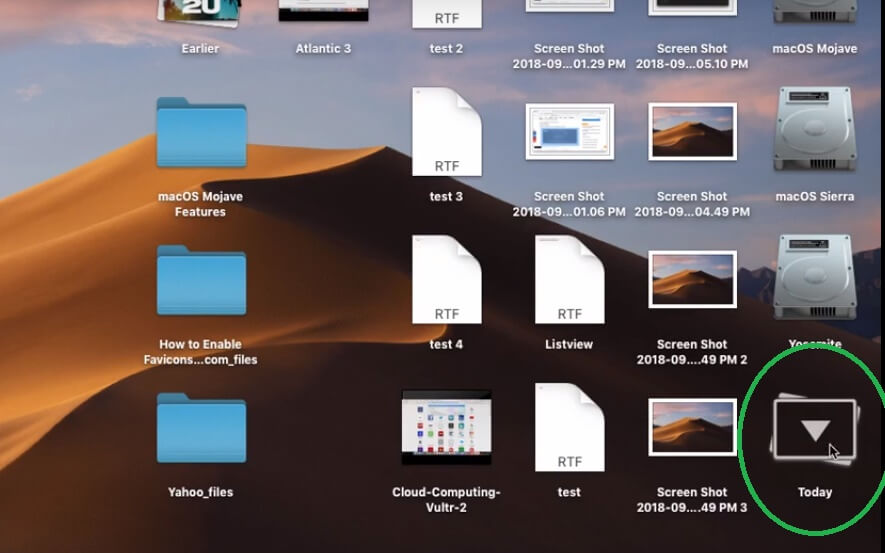
Opening file in Stacks is again a simple task and you can achieve it by different ways. You can click on the Stacks of file types or Stacks grouped by Tags, and it will expand to show all of the files it contained, in columns. The Stacks, which is currently opened will have a down arrow sign on it. Clicking on the down arrow icon or opened Stacks icon will collapse or close the Stacks.
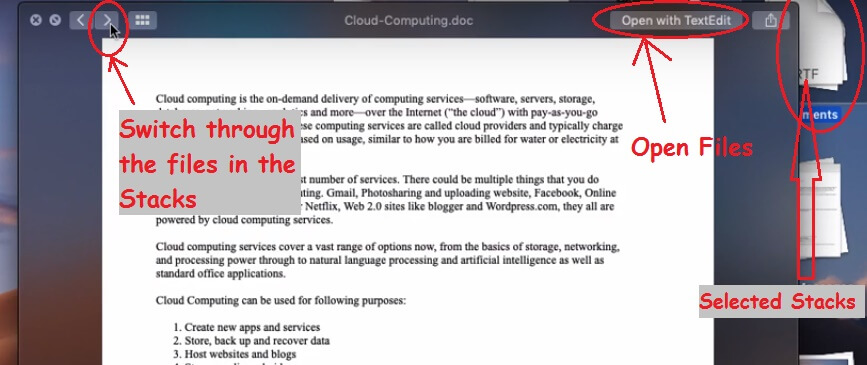
Another easy way to open or view files in a Stacks is highlight the Stacks icon on the desktop by pressing the left, right, up or down arrow keys on the keyboard and then press the Space-bar to open the Quick Look of the Stacks. Quick look of the Stacks shows content of the files and you can also switch through or flip through the files by clicking next or back button at the top left. Once you get the file you want, simply click on the Open button on the top right of the Quick Look window.
Note:- If you click on any Stacks by holding the ‘Option Key’ down it will open all of the Stacks at the same time. And clicking any one of the opened Stacks icon while holding the ‘Option Key’ down again will close or collapse all the opened Stacks together at once.
#4. How to Scrub Stacks?
Scrubbing a Stacks means you can peek at or flip through the files what are contained within the Stacks without even opening the stacks. It actually flips through the thumbnails of the files grouped inside a Stacks and you can easily find out what all files you have in that Stacks. To Scrub a Stacks:
- Hover the mouse cursor over a Stacks.
- Using two fingers, Swipe up or Swipe right on the trackpad. It will scrub the Stacks and show you what is contained within. You clearly see the small thumbnails of all the files flipping through the ‘Stacks’ icon. If it is a Multi-Touch mouse then use one finger to swipe up or swipe horizontally.
- If you are using a normal scroll wheel mouse then you can simply hover the mouse over the stacks and scroll up to flip through the thumbnails of files. You can also watch this YouTube video to see how the Stacks are scrubbed?
This is really an amazing feature introduced in macOS Mojave and you are going to love it. That was all about Stacks in Majave, I hope you found it helpful. You may also want to read about all the new features in macOS Mojave.


