Annoyed because you are unable to create a new folder in Windows 11? We’re here to help.
Like any other version of Windows, folders are an important part of Windows 11. It allows you to segregate your files and organize them in the Files Explorer for easy access. When you organize your files and group them into separate folders, it is easy for you to search for them later. We know you are so used to creating folders in the files explorer; just right-click the space in the files explorer window and choose the Add New > Folder option from the context menu.

But what if you are unable to create a new folder in Windows 11 no matter how many times you try? We know you will be frustrated and helpless. If you are here, it means you are also facing this issue after you’ve upgraded to Windows 11 recently.
In this article, we are presenting several methods that can help you troubleshoot this issue so that you are back to creating new folders in Windows 11 as you should. So without wasting any time, let’s take a look at them.
Also Read: How To Fix Low Microphone Volume Issues In Windows 11
Scan your Computer for Malware
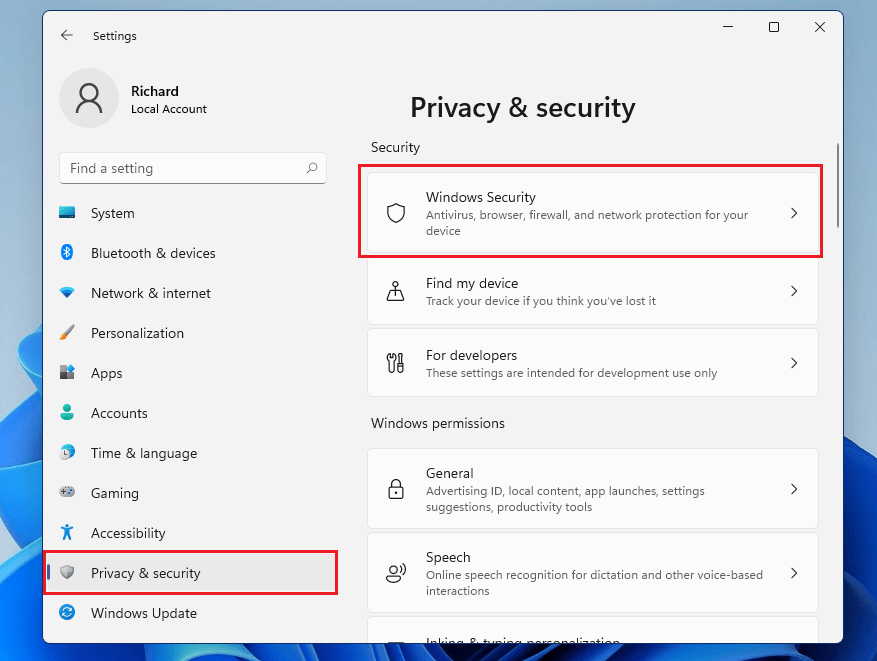
When you start experiencing such weird issues on your PC, the most probable reason behind this issue can be a virus infecting your PC. The first thing you need to do is to make sure your antivirus is up and functional. You should also run a quick scan to make sure your PC is potentially safe and any such threats. If possible you should also run a deep scan.

Make sure to update your anti-virus regularly so that the virus definitions are updated on the regular basis. This is to make sure no virus misses the eyes of your anti-virus.
After you’ve done everything said above, try creating a new folder again. If you are unable to do so, move on to the next fixes.
Upgrade Windows 11
Since Windows 11 is currently in the initial phase, it is bound to cause some random glitches and issues. To avoid facing such issues, you should regularly update your Windows 11 PC to upgrade to the latest stable Windows 11 build released by Microsoft.
Here’s how to upgrade your PC to Windows 11:

- Use the Windows+I shortcut to open the Settings App on your Windows 11 PC.
- In the Settings Window, Choose the ‘Update & Security option from the left pane.
- Next, click on ‘Check for Updates.
- You’ll see whether new updates are available or not. If any new update is available, click on download.
- Once the upgrade is downloaded, restart your PC to finish the installation process.
Reset the System Properties
If you haven’t had any luck until now, you need to reset the properties of your Windows 11 PC. This will hopefully let you create a new folder on your PC.
- For this, use the Win + R shortcut keys to open the Run dialog box.
- In the run search box, enter the ‘sysdm.cpl’ and press the enter key.
- As soon as you press the enter key, you will be taken to the ‘Advanced’ tab of the System Properties of your Windows 11 PC.
- Next, choose to open the Settings in the Performance section of the System Properties.
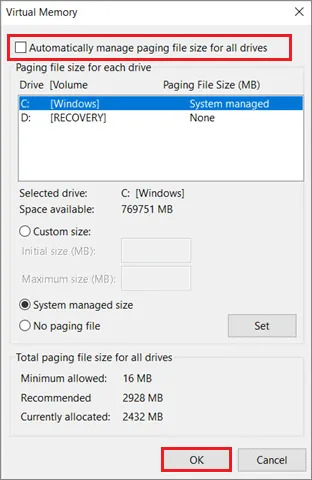
- Once in the Performance tab, head to the ‘Advanced’ tab and look for the Virtual Memory section. Click the Change button under it.
- Uncheck the ‘Automatically manage paging file size for all drives checkbox in the Virtual Memory pop-up.

- After this, press the OK button to save the changes. Now go back and see if you can create a folder or not.
Uninstall the Recently Installed Updates
Do you think you are unable to create a new folder after you installed a Windows update? If yes, this means there is some bug in the update so you need to uninstall it to restore the proper functionality of your PC. Let’s see how to remove the recently installed updates to fix the issue.
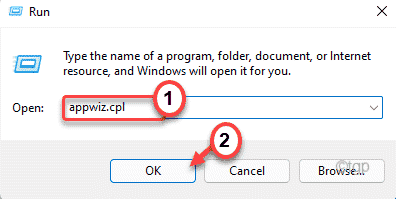
- Open the Run dialog box and type ‘appwiz.cpl’ to visit the Programs and Features settings.

- Look for View installed updates in the left panel and click it.
- When you are in the Installed Updates window, you can double-click the update you want to remove.
- A pop-up will appear to confirm the action. Press the Yes button.
- Now wait until the updates are uninstalled. Once completed, you need to reboot your PC to apply the changes.
Use The Registry Editor
Here’s how to use the registry editor to fix the issue in creating a new folder:
- Open the registry editor following this path.
Computer\HKEY_CLASSES_ROOT\Directory\Background\shellex\ContextMenuHandlers - Next, choose ContextMenuHandlers from the left panel and right-click the space, and choose New > Key. Rename it to ‘New key’.
- Now choose this key and double click the right to show up the Edit String window
- Next, type this registry key data in the Value Data box to create a new folder.
{D969A300-E7FF-11d0-A93B-00A0C90F2719} - Now go back and see if you can create a new folder using the standard method or not.
Conclusion
That was a quick guide to fix the unable to create a new folder in Windows 11’ issue. Most of the time, running an anti-virus scan or updating your PC will set things right. Which of these methods let you fix the issue on your PC? Let us know in the comments below.
Also Read: How To Debloat Windows 11


