What is Print Screen on Mac?
Print Screen is a Windows keyboard key dedicated to capture the whole screen upon pressed. If you look at the upper right side of a windows keyboard you will find this key labelled as “Print Screen” or “Prt SC”. As the name suggests, it captures the entire desktop screen and prints it into the clipboard which you can paste anywhere into an application or a file on Windows. Surprisingly, there is no “Print Screen” button on your Mac keyboard but that does not mean that you can not Print screen on Mac. In fact, Mac has more advance and smarter way to do this and gives you more control over the ways screenshot is taken or the location where it has to be saved and whether to print the whole screen or selection of the screen.
You may also like : How to record Mac Screen? – 8 Best Screen recorder for Mac
Print Screen on Mac is normally known as Screenshot, Screen Captures or Screen Grab and in order to Print Screen on Mac you’ll need to hit a set of keys to capture the screen in various ways. This is both smarter and much more powerful in Mac as it gives you 8 different ways to take screenshot. You can choose from capturing the entire Mac display, selection of the screen or just an active window or you can even set a timer for Print screen and it automatically captures the screen after the timer expires. This post is typically aimed at new Mac users who have recently switched over from Windows and wondering where is the print screen on Mac. Here I will explain to you the procedure to take screenshot or print screen on Mac in details.
How to Print Screen on Mac?
Take the Print Screen (Screenshot) of your entire Mac screen
This method will capture the whole screen and all open windows and running apps and save it into .PNG image file extension on your desktop . You can generally use this to capture video frames, Online payment receipt, game scores or an error message. Here are the steps to do this:
- Press Command + Shift + 3 all at the same time.
- You’ll hear a camera shutter sound, and your screenshot will be saved on your desktop in .PNG format automatically, with the name Screen Shot [Date + Time].
- If you do not wish to save the Screenshot to your Desktop but just want to copy the Screenshots to the Clipboard and paste it into a document, hold down the control key in addition to Command+Shift+3. For example, if you want to Print a screenshot of your entire Mac screen into a Word document, press Command-Control-Shift-3, go to your Word document, then paste the screenshot where you want it.
How to Print Screen (Screenshot) selection of your Mac screen
In case you just want to Print Screen a part of your Mac screen, you should follow this step. You can use it for capturing a pop up message, App Menus, an specific app Window in Mac, an image on the web, or a part of your chat.
- Open the window or pop up or chat screen you want to take the screenshot of and arrange them exactly the way you want to see them in Screenshot.
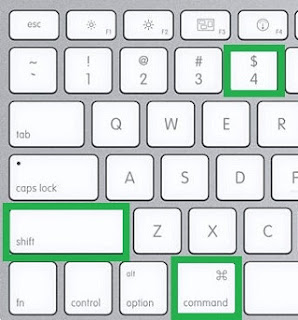
- Press Command + Shift + 4 all at the same time. The mouse pointer will turn into a crosshair.

Print Screen a part of your Mac screen - Place the new crosshair cursor at one corner of the area you want to capture (for example, top left), then click and hold.
- Drag the crosshair over the area of the screen you want to capture.

Crosshair for Print Screen on Mac - You can also Hold down Option key to change the lock point to the center of the area or hold down Shift to lock all sides but the one in the direction you’re currently moving.
- When you’re done with the selection of the area, just let go of the mouse button or trackpad. Whatever is covered by the outline generated by crosshair will be saved as a screenshot.
- You’ll hear a camera shutter sound, and your screenshot will be saved on your desktop in .PNG format automatically, with the name Screen Shot [Date + Time].
- Again you may hold down the control key in addition to the shortcuts mentioned above, in case you just want to Print Screen to the Clipboard and paste it into a document directly.
Print Screen a specific window on your Mac screen
- Open the application window or click on it to make it active.
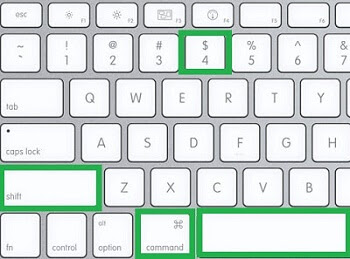
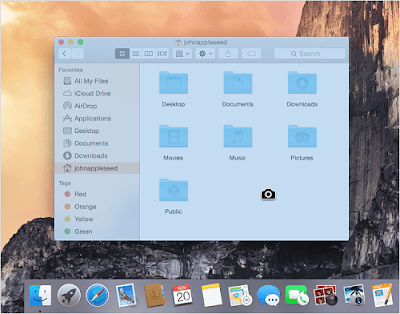
- Press Command + Shift + 4 all at the same time and then press the Spacebar, the cursor will turn into a camera and the current window will be highlighted in light blue to make sure it’s the selected one.

Print Screen a specific window on your Mac - To select a different window, Simply move the cursor over that window and Place the camera cursor on top of the window you want to Print Screen.

Print Screen a specific window on your Mac :The mouse cursor changes to a Camera Icon - Once the desired window is selected just click to take its screenshot.
- You’ll hear a camera shutter sound, and your screenshot will be saved on your desktop in .PNG format automatically.
- Again you may hold down the control key in addition to the shortcuts mentioned above in case, you just want to Print Screen to the Clipboard and paste it into a document directly.
Print Screen With Timer
 |
| Print Screen on Mac using Grab Utility |
 |
| Print Screen on Mac using Grab Utility |
 |
| Print Screen on Mac With Timer |
How about taking the screenshot of an entire webpage
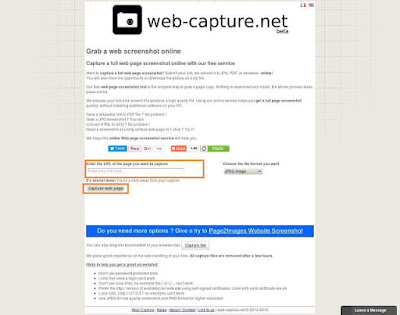 |
| Screenshot of a Long Web Page |





I really appreciate this post. I’ve been looking all over for this! Thank goodness I found it on Bing. You’ve made my day! Thanks again!