Due to the increasing frequency of hacking incidents and compromised passwords, it is essential to protect your online accounts with two-factor authentication (2FA). Two-factor authentication (2FA) is available from most major social media sites, email providers, and IM programmes to keep your account safe from hackers. Get two-factor authentication working on your Mac with these instructions.
Data leaks, identity theft, account hacking, etc., are now commonplace events. Two-factor authentication (2FA) and similar user security measures are, thus, a good idea. Perhaps that’s why Apple’s latest operating systems, macOS Monterey, iOS 15, and iPadOS 15, all include support for two-factor authentication.
Two-factor authentication (2FA) mobile apps let you set up passcodes on your iOS or Android device. However, it’s not always practical to utilise a mobile device when working on a Windows computer or a Mac. Two-factor authentication using iCloud Passwords is now feasible with the release of macOS Monterey and a new companion app. Codes can also be generated using third-party services. To find out what we can do, let’s look at options
Two-factor authentication (2FA) benefits and how to set it up on a Mac.
An additional layer of security, two-factor authentication consists of a verification code, such as an OTP, used in conjunction with a password. Think of it as an extra layer of protection for your online accounts and their information.
You should use two-factor authentication to safeguard your most sensitive accounts. This isn’t necessary for every single online profile in the modern era. The necessary code can be generated with the help of a password manager app or a third-party device.
As with macOS Monterey, iCloud Keychain may generate two-factor authentication codes and log into many services, apps, and websites (Passwords feature).
Codes created on a Mac can be used on an iPhone, and vice versa, because the feature is synchronised between devices. In addition, Safari’s autofill feature eliminates the need to copy and paste the code manually.
Two-factor authentication on macOS Monterey: Setup Instructions
To illustrate how to implement two-factor authentication on a Mac, you can use it on a website. However, while the fundamental ideas are consistent across all platforms, the specifics of how they are implemented may change.
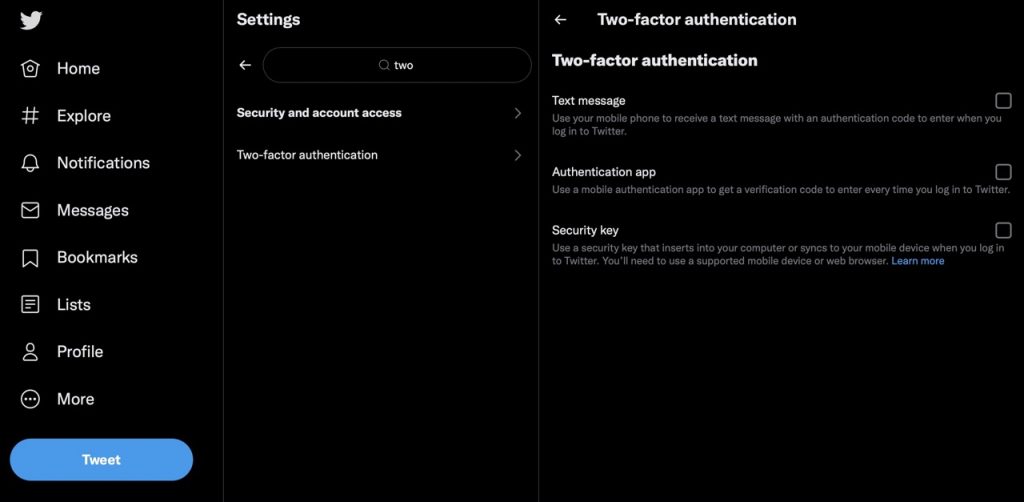
- The website’s 2FA configuration page may be accessed via the web interface by clicking Settings > Security > Two-Factor Authentication.

- To obtain the QR code, use the Authentication app by picking it from the list of alternatives and following the on-screen instructions.
- For a streamlined setup, simply right-click (or control-click and hold) the QR code in the window, choose Set Up Verification Code, and follow the on-screen prompts. If this isn’t a viable choice, proceed to the following section.
- Input Method: Click Here for Manual Configuration It is impossible to scan a QR Code and then copy the code that appears.

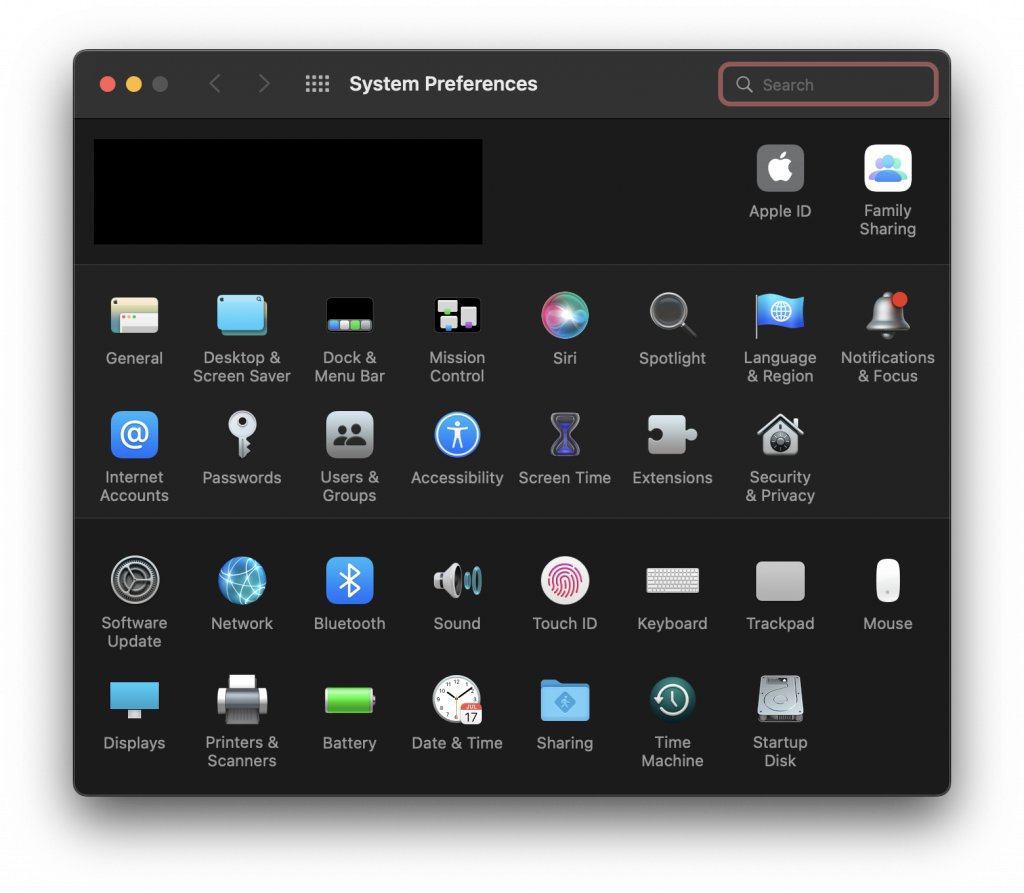
- Right-click the Apple menu at the top, select System Preferences, and click Passwords.

- Find your website’s login information or make a new one.
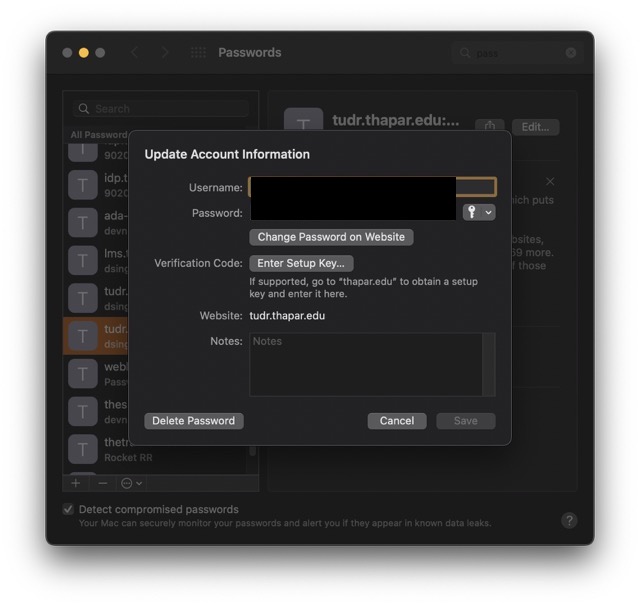
- To make changes, select the “Edit” button.
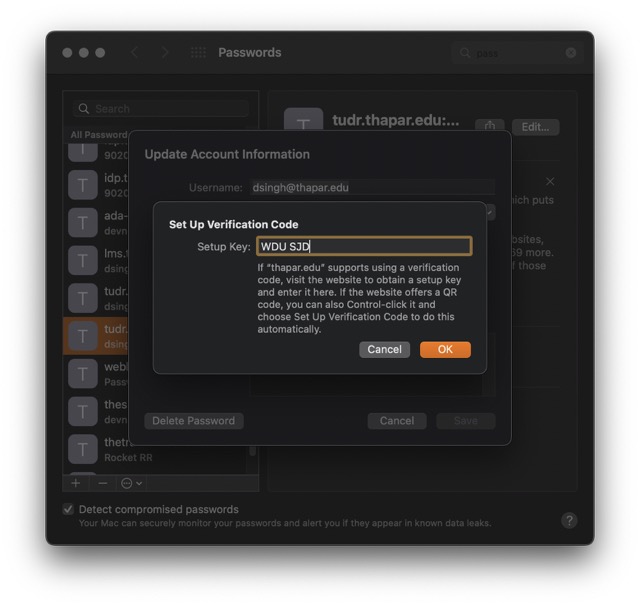
- Next to Verification Code, select Enter Setup Key.

- Copy and paste the code here, then press OK.
- Click Save to go back to the main window after the code generator has finished running.
- Get a copy of the current code and then return to the website to click the Next button.
- Just type in the six-digit code and hit the Verify button.
- After verification, a backup code will appear; make sure to save it somewhere secure.
It’s important to remember that not all Mac-compatible apps, websites, or services allow two-factor authentication. At the time of this writing, for instance, Instagram’s web version does not support enabling an authentication app; this option is only available on mobile devices.
You Can Now View and Copy Passwords
Whether accessed through Safari or the System Preferences, the new password manager maintains its uniform appearance. Your saved login information will be alphabetically sorted in the left pane; a search bar will allow you to zero in on a single entry quickly.
You can see the username, password (by hovering over the Password column), and any notes associated with an entry by selecting it. If you control-click on the entry, you’ll see a menu of options that includes a copy to clipboard command. However, Safari allows you to fill in these fields for you automatically.
When Apple compares your passwords to breaches in the public record, the ones that are the easiest to guess, the ones you’ve used before, or the ones that have been breached will appear first. They should be updated as soon as feasible.
Change or Delete Passwords
Passwords can be saved automatically in Safari after being created or filled in for the first time. Still, you can also use a password manager to save them directly to Apple Keychain. To do this, click the plus sign (+) in the window’s lower-right corner, enter the relevant information into the corresponding fields (Website, User Name, Password), and click Add Password.
At the same time, you may want to delete “Never Saved” entries or old passwords from Safari. You can accomplish that by clicking the Minus button after selecting the desired entry in the left pane. When you delete a password in iCloud Keychain, it is also deleted from all of your other.
Change Passwords and Enter Notes
The new password editor in macOS Monterey makes changing passwords simple and fast. If you want to change your account details after selecting an entry, click the Edit button in the window’s upper-right corner. Then, edit as necessary and hit the Save button. Alternatively, you can visit the site and log in with the new password, then ask Safari to change the password for you automatically.
You can use the Notes box to store encrypted text while modifying passwords. You can enter information such as the answers to security questions, a set of backup codes, your account’s original purpose (in case you forget it), and so on.
Also, You can enter the site-specific two-factor setup key by clicking the Enter Setup Key button. Further information on this is provided below.
Passwords can be imported and exported.
Passwords can be exported as a CSV (comma-separated values) file. Which can be used as a backup or to import the data into another password manager. You can do so by going to the More (three dots) button in the lower left corner of the password manager window, then selecting Export All Passwords, and then choosing a destination to save the passwords.
You may do the opposite and import passwords from CSV files into Apple Keychain. Select the More button once more, but this time go with the option labelled “Import Passwords.”
Wrapping Up
Mac OS Monterey’s new Password Wrapper in Safari is an excellent upgrade, but it can’t compete with standalone password managers.


