Learn the cause and solution for iOS Email notifications not working on your iPhone or iPad in this blog post. Provided here all viable options for fixing mail not loading on iPhone. Determine where the issues are in your installed iOS/iPad OS version. Multiple customizable settings on Disable/Enable email notifications with distinct notification tones are essential for quickly identifying which email account inbox received fresh mails. Users keep it deactivated, however, we can enable email notifications for key accounts and messages. Then, use the below troubleshooting steps to resolve any iPhone or iPad Notification difficulties.
Check out the settings to modify the Mail notification Appearance, Sound, and Customization for the selected mail account.
Also Read:7 Methods To Fix iPhone Keeps Asking For Apple ID Password
1. Push Email Notification Not Working So iPhone & iPad Are Not Receiving Emails
In any case, you did not receive an email in your inbox. There are two sorts of fetch conditions in the iPhone/iPad mail settings that can be configured. The first is an auto push, and the second is Fetch.
The Auto Push operates automatically, and you receive alerts and notifications I enabled) in the iPhone Mail app. iOS users disregard these capabilities to conserve battery life.
Fetch: Fetch is a manual operation that retrieves new email from the server and copies it to your iPhone or iPad. Every time we need to read a new email, we move our finger down on the mail app’s inbox.
- Change iPhone Mail App New Email Push and Fetch From Settings.
Change iPhone Mail App New Email Push and Fetch From Settings.
In case if your mail is not loading on iPhone, then you should try this.
Launch the Settings app on your iPhone and navigate to Mail.
For [iOS 13 and Earlier iOS & iPadOS], now scroll to Accounts & Password Option.
Select Fetch New Data from the Accounts menu.
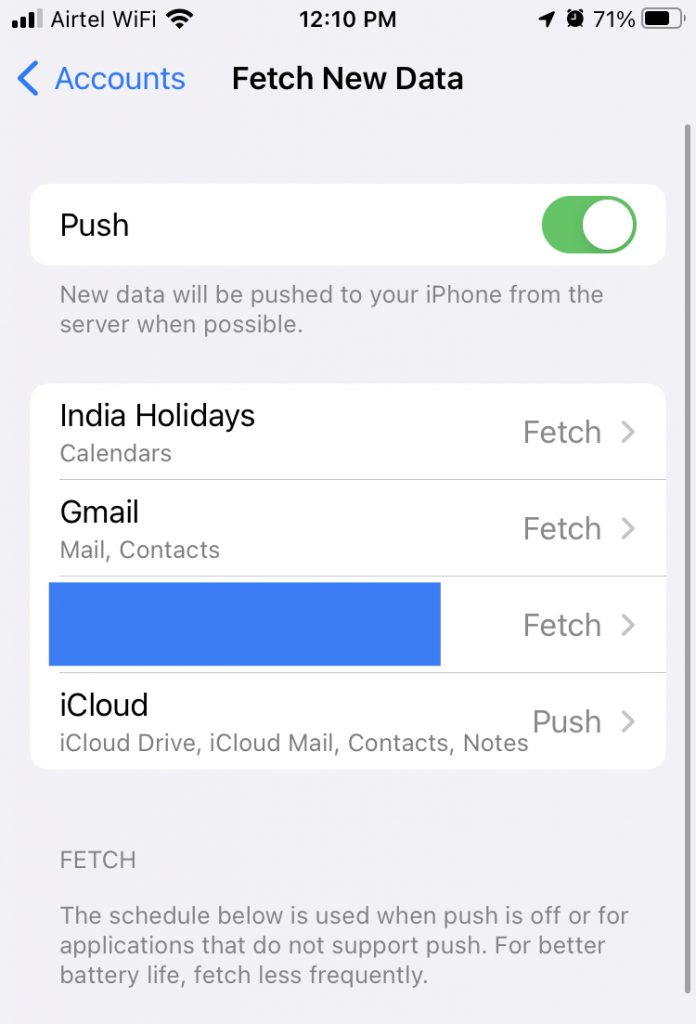
Scroll to Last “Retrieve New Data” Next, display Scroll and Locate all Email accounts installed on your iPhone or iPad. Now We can administer the individual Notification account.
Tap on the account name and change the Mail Notification type [Push notification will receive your iPhone as your Mail server sends, but the Fetch option will allow you to check your iPhone on Mail Server through a manual request].
Configure Fetch Mail on iPhone for New Email
Do you receive the email messages but not the notifications, or do you not receive the email messages until you manually refresh the iOS mail app?
Enable Fetch for all Mail; before enabling this option, ensure that it will take more energy since periodic checks are performed on the mail server when the option under the Fetch section is enabled. Additionally, fetch will only function if the Push option is deactivated. Turn off Push Toggle and select the Fetch settings, as shown in the image below.
- Settings app on the iPhone/iPad > Accounts & Passwords > Select Fetch New Data > Disable the Toggle Push.
- See the Fetch Section and select the time for Automatically, Manually, Hourly, Every 30 Minutes, and Every 15 Minutes.
Also Read:How To Protect iPhone From Blocking And Hacking
2. Remove Email Account and Re-Add Account in iOS Mail
You can also try this method if the mail is not loading on iPhone. Changes were made to other systems’ login credentials, including the Mail Web account. Or perhaps the SMTP Mail server details have changed. Remove the existing Account and replace it with a new one.
Navigate to the Settings app > Passwords & Accounts > Manage Passwords. Select an Individual account. 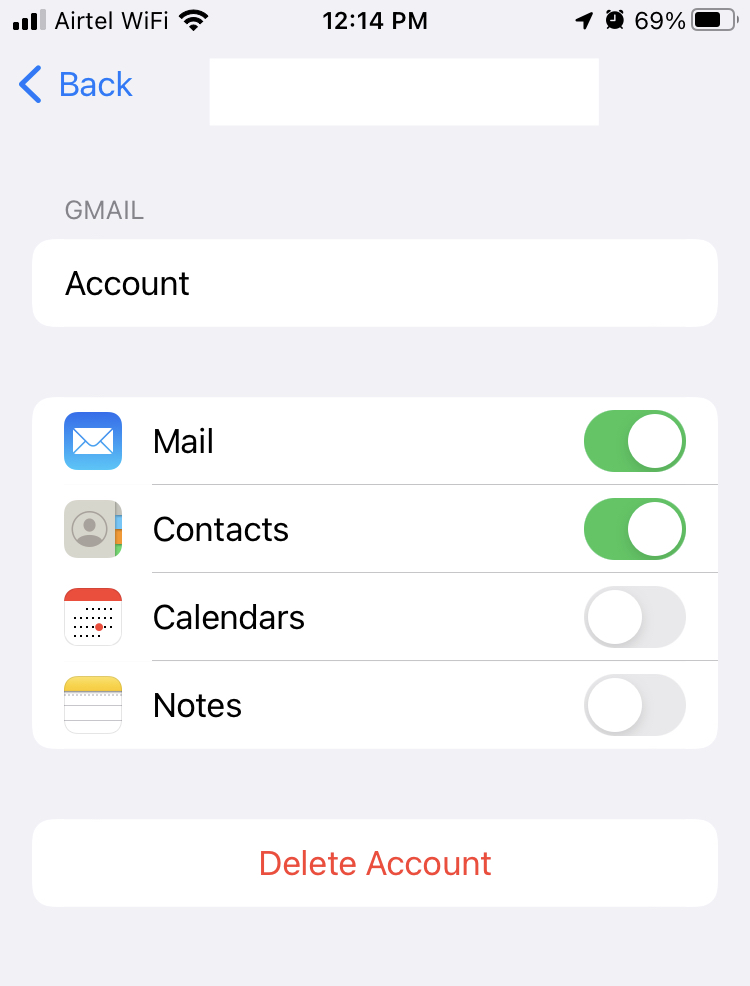
Find the Delete Account option by scrolling down in the iPhone mail app.
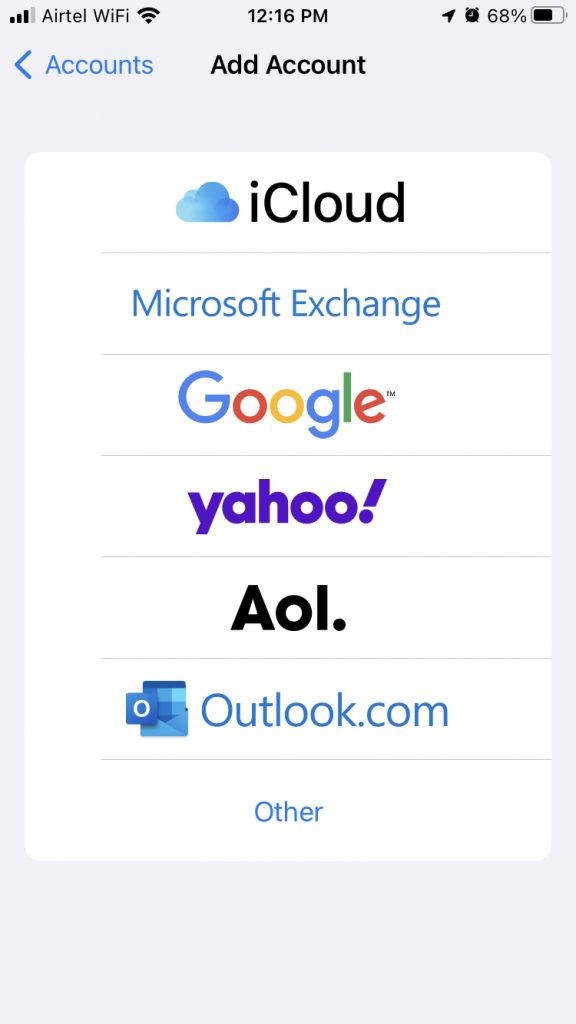
Re-include deleted account, Navigate to Settings > Passwords & Accounts > Add New Account.
3. Outlook Notification Settings for iPhone
Outlook notifications can also be managed from the app. Here are the methods to access your iPhone outlook mail app and enable it to appear on the lock screen. Additionally, enable notification sound to receive an alarm.
Launch the Outlook mail app on your iPhone > Tap on the Profile symbol > Select the Settings gear.
View all Outlook settings. Tap Notifications and enable Notifications for “Focused Email” email types.
Scroll and locate Sound for new Emails. Configure or activate Sound for new email.
Additionally, enable Notifications from the iPhone’s settings: Open Settings app on iPhone > Notifications > Outlook > Enable Allow Notifications and Banner style, Sounds, and Notification Previews.
Also Read:iPhone 14 And iPhone 14 Pro Leaks- Everything We Know So Far
4. Enable VIP Email Notifications 
- Launch the iPhone’s Settings application.
- Navigate to the Notifications settings.
- Next, navigate to the Mail option.
- Select Customize Notifications.
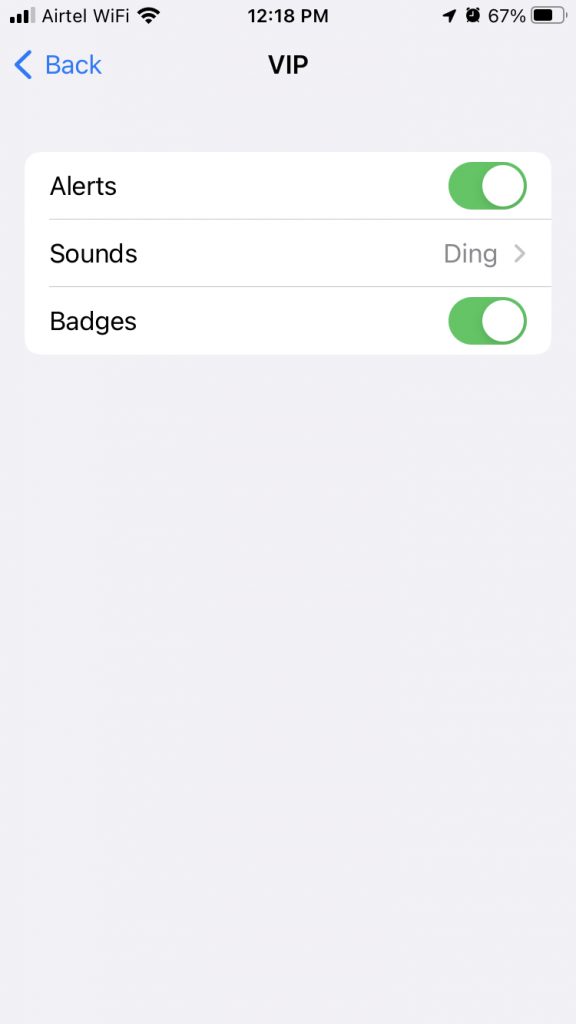
- Navigate to the VIP area, and toggle Enable Alerts to the green position.
- Additionally, ensure that the Sounds not setting is set to None, and on the final round, toggle the Badge switch to the Green/ON position. The Mail app icon will display count numbers for upcoming emails using the badge icon.
If VIP mail alerts are not working on your iPhone, I hope you find this useful!
5. Enable Mail Notification on iPhone and iPad
- Navigate to Settings > Mail > Notifications.
- Explore other notification options and Set Sound, Turn on/off the Notification layout on the locked or unlocked iPhone screen.
6. Disable Low Power Mode
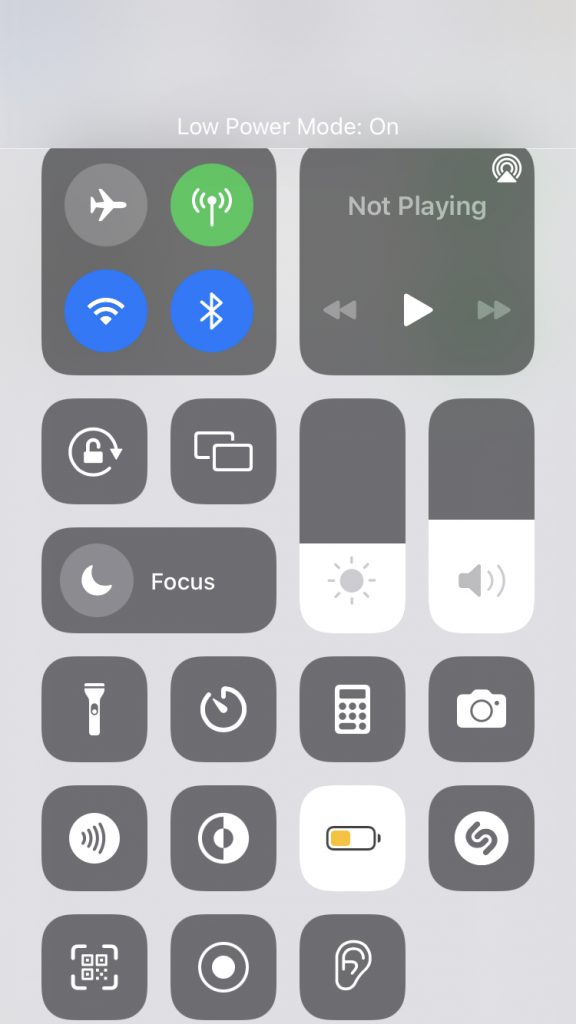
The active Low Power Mode (LPM) feature in iOS disables battery-draining functions in email push notifications. If LPM is activated on your iPhone, you cannot automatically retrieve new Mail; consequently, disable Low Power Mode to restore email notifications.
Turn on and off Low power mode on the control panel
Here’s how to add iOS’s Low power option to Control Center
Also Read:How To Check if iPhone Or Android Has Been Hacked
7. Turn off Do Not Disturb on the iPhone.
Do Not Disturb and Do Not Disturb While Driving simultaneously restricts incoming phone calls and notifications. I, therefore, advise utilizing DND with caution. The brand-new focus mode conceals DND mode in iOS 15 and later software updates.
- Quickly from the control center: Swipe down to activate the control center, then turn off Do Not Disturb mode and Do Not Disturb While Driving mode
Or
- From iPhone settings: The Settings app > Do Not Disturb > Disable “Do Not Disturb” Toggle. in addition to “Schedule toggle.”
8. New Mail Sound or Set a Different Tone
To create email app notifications, we can utilize the iPhone Custom ringtone or Create Ringtone with GarageBand.
- Navigate to the Settings App > Notifications > Email.
- Tap Account to modify or set a personalized ringtone. Sounds are a choice.
- Tap Sounds > Find little Alert tones or Ringtones.
Additionally, explore additional email notification options such as (Show in notifications center, Show on the lock screen, or Unlocked screen style)
Also Read:[100% fixed] iPhone Won’t Ring When Facebook App Is Open
9. Delete and reinstall the Mail application.
Although the Mail app is a default iPhone app, Apple allows users to delete it. If the Mail app stops functioning after the iOS 15 upgrade, you can uninstall it and reinstall it from the App Store.
- Long-press the Mail app icon on the Home screen of your iPhone.
- Select “Delete App” and confirm your selection.
- Then navigate to the App Store to reinstall the app on your iPhone.
10. Examine iPhone Storage
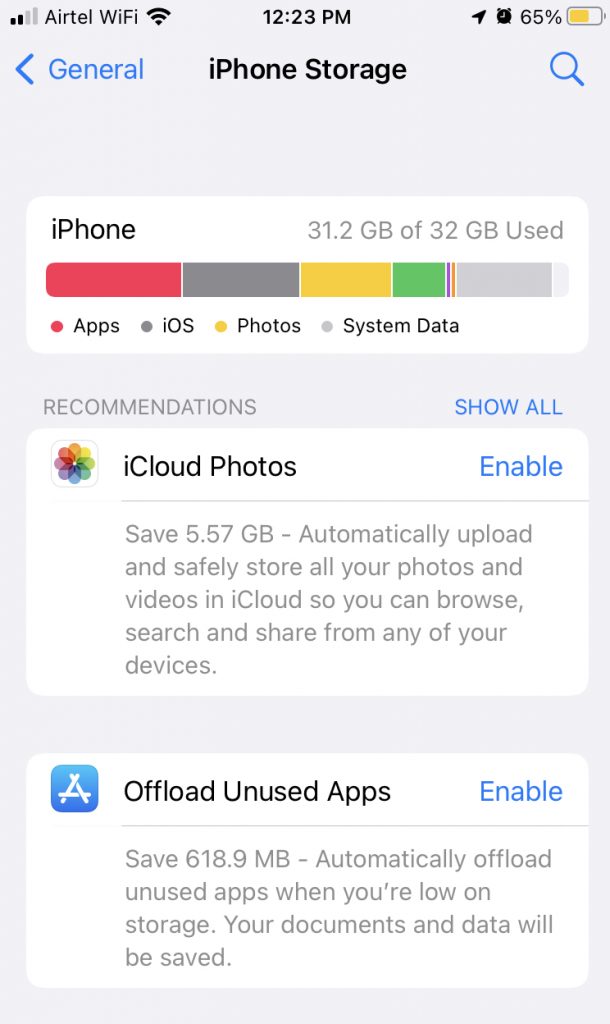
If the Mail app has utilized excessive storage space in the background, it may become inoperable. You can quickly delete Mail app data from your iPhone’s storage to resolve the issue in such a circumstance. Here is how to accomplish it:
- Go to Settings > General > iPhone Storage on your iPhone.
- Tap the Mail app after scrolling down to locate it.
- Then select “Offload” to release the storage space occupied by the Mail app.
11. Apple Support
If the guide mentioned above does not resolve the issue with your Phone Mail notifications, I’m sorry to tell you that you will need to contact Apple Support for assistance.
Final Considerations
The methods above are all valid options for iOS 15’s Mail app malfunction. Implement the chosen solution as outlined above to achieve the desired outcome.


