In this guide, we will help you fix the iMessage not syncing after the password change.
Apple allows you to sync your message across your iPhone devices running on iOS, iPad, and macOS. Syncing your messages via iCloud is probably one of the best ways to manage your messages. Not only the chat history is available this way but also you can access your messages on any of the Apple devices.
Besides, it can act as a backup if you tend to lose your iMessage on one of your devices. However, many iPhone users are having a hard time syncing their iMessages. To be more specific, it is hard to sync iMessage after a password change of Apple ID.
To assist the users in solving this unexpected issue, we tried several ways that can help sync the iMessage after the password change. In this troubleshooting guide, we have put down the tried and tested fixes that can help you solve the iMessage not syncing after the password change issue. So, keep scrolling to check them out one at a time.
Also Read: How To Set Up And Use iMessage On Mac
Step 1- Ensure that you are logged in the same Apple ID on all devices
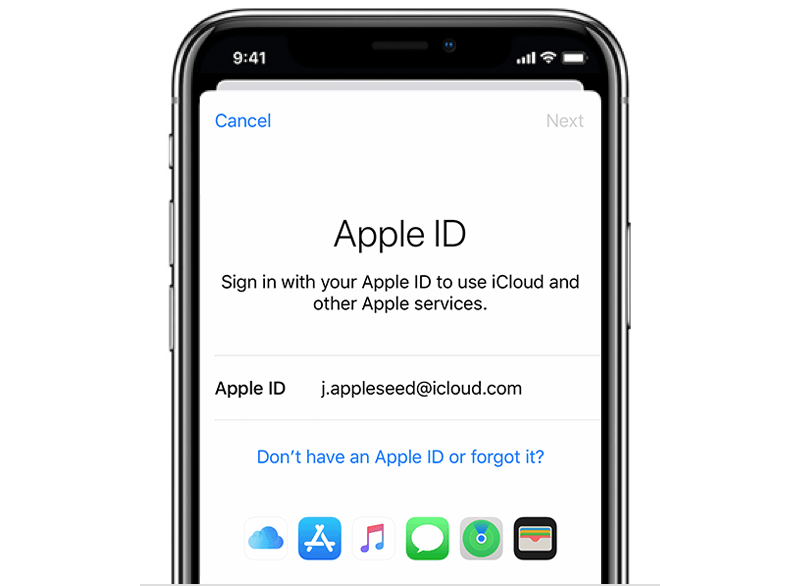
First of all, you need to make sure that you are currently using the same Apple ID across all the Apple devices you own. If you are not sure about which Apple ID you are using on your Apple devices, follow the steps below:
- First of all, go to the Settings app on your iPhone or iPad.
- Now tap your name on the top and sign in the Apple ID.
- If you own a Mac, tap the Apple logo on your screen and then open System Preferences.
- Now sign in to your Apple ID on your Mac.
Step 2- Make sure the Two-Factor Authentication is Enabled
If you are still unable to sync messages on your iPhone, iPad, and Mac, there is a good chance that it is because the 2FA is not enabled. You need to enable two-factor authentication on your Apple ID to sync your iMessages on all your devices. If you have no clue what 2FA is, it is an additional security layer that prompts you to enter the OTP after you try to sign in your Apple ID by entering the login credentials.
Apple recommends you enable the 2FA on your Apple ID. Follow the steps given here to enable Two Factor Authentication on your Apple ID:
To enable 2FA on iOS and iPadOS devices,
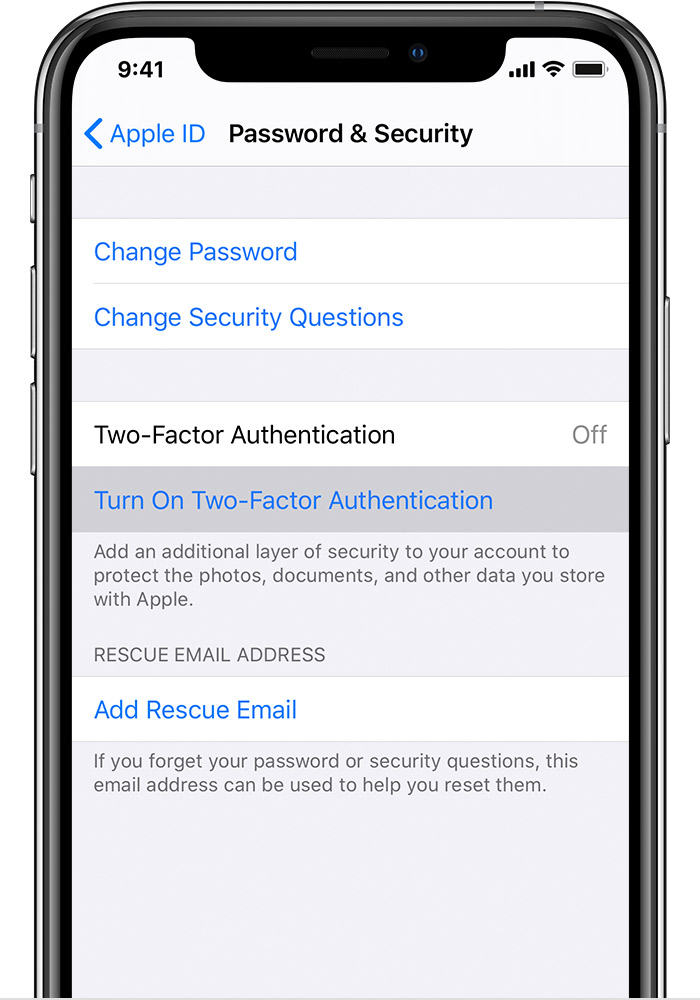
- Go to the Settings app on your device and tap the Profiles option.
- Now tap Password and Security and ensure that the Two-Factor Authentication option is enabled on your device.
On macOS, tap the Apple logo on the top left of the menu bar.
- Now click on System Preferences followed by Apple ID.
- Next, click on Password & Security present in the left pane and turn on the Two-Factor Authentication.
Also Read: How To Fix iTunes That Won’t Open On Mac?
Step 3- Ensure that you are using the correct email address
iMessage enables you to set up a phone number and email address where users can reach you. You can provide these details within the settings option of the iMessage on your Apple, iPad and Mac. So you need to make sure you have put the correct phone number and email address on your iOS and Mac devices. Besides, it is essential to enable phone numbers and email addresses in the first place.
For iOS and iPadOS device
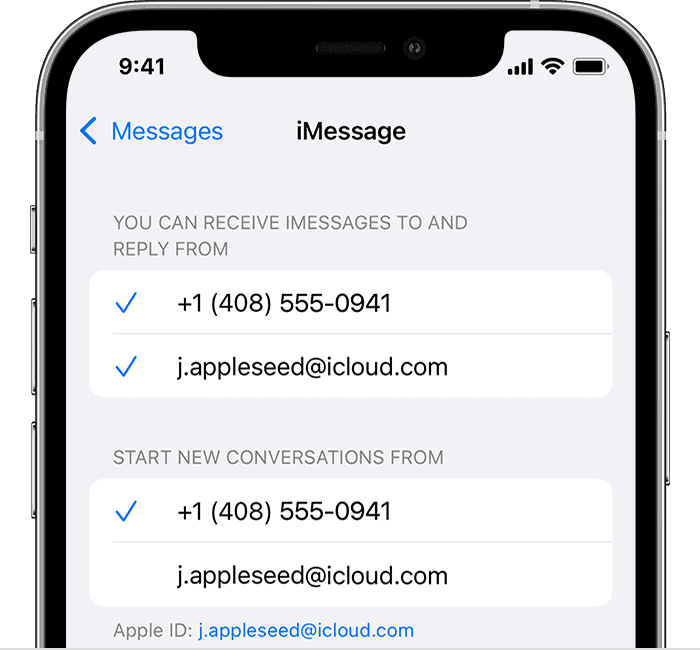
- Firstly, you need to go to the Settings App and then tap Messages.
- Now access the Send and Receive settings.
- Here you need to ensure that the email address and phone number listed here is legitimate. Most importantly, make sure that the checkbox preceding it is enabled. If it is not tap the check box to enable it.
For Mac
- Go to messages ap and click on Messages > Preferences.
- Now switch to the accounts tab and make sure to check the email address and phone number option. Besides, ensure that all the devices are using the same contact details.
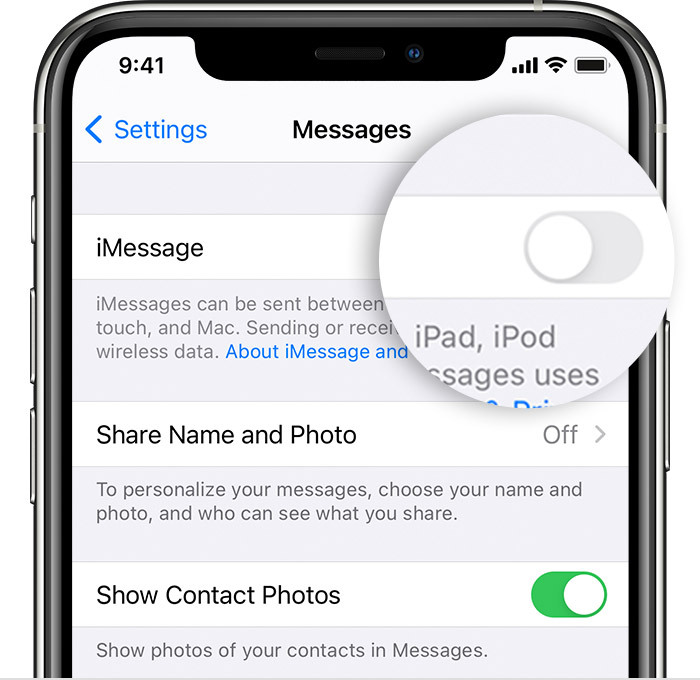
Step 4- Disable and Enable iMessage
This is one of the simplest methods to fix the issues and it is known to solve the problem in most cases. All you have to do is to disable iMessage and enable it again.
On your iOS and iPadOS devices,
- Open the Messages app and switch the toggle for it to the off position.
- Now wait for at least 30 seconds and enable the iMessage app as before.
On Mac
- For mac devices, click on the Messages app and then Preferences.
- Now remove the check in the checkbox for Enable this account.
- Wait for some time and check this box again.
After doing this, restart your iPhone and see if the iMessages sync as they should.
Also Read: How To Disable iMessage Without iTunes Account
Conclusion
Hopefully, the annoying iMessage not syncing after the password change issue is fixed now. If not, you should also try to log out of the Apple ID on your iDevices and then sign back in. Now that the iMessage syncing problem is fixed, don’t forget to share this article with others.


