Apple is all set to roll out the iOS 15 updates in fall 2021 with all of the useful and amazing features. In this software update, Apple will introduce some advanced privacy features such as iCloud Private Relay and Homekit Secure Video.
Apple is also concerned about the email privacy of the users hence, it has also added a standalone feature known as ‘Hide My Email’ in iCloud+ which will give total control to the users to maintain their email privacy. Let’s learn more about Hide My Email and how to use it in iOS 15.
Also Read: How To Fix Mac Screen Flickering In 2021?
Hide My Email
In 2019, Apple first introduced the ability to protect your email during the Sign-in process. But in 2021, Apple is set to up its game by offering the ‘Hide My Email’ feature with manual control in Cloud+. From iOS 15 onwards, Apple’s all paid iCloud plans will be bundled up together in iCloud+. This means you have to subscribe to iCloud+ plans to avail of this exclusive feature.

Hide My Email feature will let you create a random auto-generated email address on your Apple device. This email address will mask your personal email and will forward all received emails into your personal inbox. Secondly, when you will send an email, the receiver will see your proxy email address instead of your original email.
This ability will let you hide your personal email address while sending an email to any marketing agency or third party. This will protect you from spam and unwanted emails that clog your personal inbox.
Let’s see how to use the ‘Hide My Email’ feature to generate your random email.
Also Read: How To Fix 502 Bad Gateway Error On Your Website?
How to Generate a random Email Address Using ‘Hide My Email’
Follow these steps to generate a random email address using Hide My Email on iPhone and iPad running on iOS 15.
- Open the ‘Settings’ app on your Apple device.
- In the Settings menu, look for your Apple ID and tap on it.
- Tap on iCloud on the next page.
- Tap on ‘Hide My Email’.
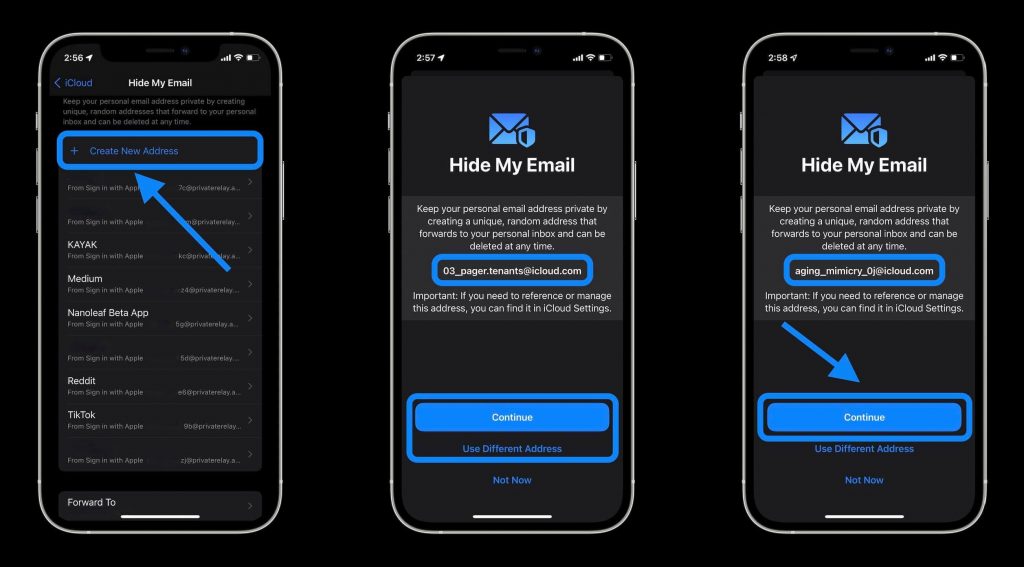
- Click on ‘Create new Address’ to create a unique and random email address
- Click Continue once you are done
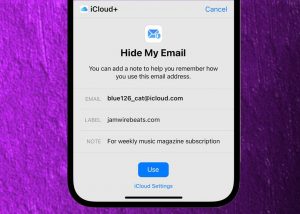
- On the next page, you have to give a label to remember your newly generated email.
- You can also add a note to it.
- After Adding the label and note, tap on the Next button.
- Click ‘Done to confirm the random email address.

Now your new email address is created and you can either use it as your default email address or only for some specific email addresses.
Also Read: Here’s What You Can And Can’t Do With Offline Siri In iOS 15
How to Change the Forwarding Address of ‘Hide My Email’?
Follow these steps to change the forwarding address of the random email generated through ‘Hide My Email’:
- Open the ‘Settings’ app on your Apple device.
- In the Settings menu, look for your Apple ID and tap on it.
- Tap on iCloud on the next page.
- Click to open Hide My Email.
- Click on ‘Forward to’ at the bottom of the Address List.
- Now enter your email address and click on ‘Done’.

How to Deactivate your Random Email Address in ‘Hide My Email’
If you don’t want to use the random email address for some time you can deactivate it temporarily. Here’s how
- Open the ‘Settings’ app on your Apple device.
- In the Settings menu, look for your Apple ID and tap on it.
- Tap on iCloud on the next page.
- Click to open ‘Hide My Email’.
- Choose the email address that you wish to deactivate temporarily.
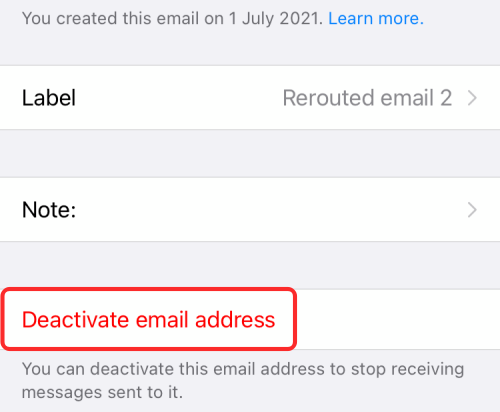
- Choose the ‘Deactivate email address’ option.
- Confirm to Deactivate the Email Address.

Now this email address is deactivated and you will not receive emails on this address. However, you can reactivate this email anytime by going to the ‘Inactive addresses’ section. You can find it at the bottom of the list of active addresses. Look for the email address and click on ‘Reactivate Address’. You can also delete this random email permanently by clicking on the Delete Address option.
Read: How To Transfer Files From Mac To iPad Or iPhone And Vice Versa.
Conclusion
This is how you can utilize this useful feature to hide your personal email address from spammers. The Hide My Email feature is very flexible so you can choose whether to use the random email or original one every time you send an email. Now you don’t have to worry about receiving numerous spam emails because now you can choose whether you want to share your email address with someone or not.
Also Read: How To Use Tags In Reminders On iOS 15


