In the previous post we learned how to Register a Domain and Point it to the Hosting server. So by Now we have got our website address, the Name has been decided and registered and we have also booked a space on the web server or created a free hosting account with 000webhost.com to keep our web-pages. So now is the time to upload your webpages to the server so that your website can be accessed from anywhere and you can convey the message that you want to from your website.
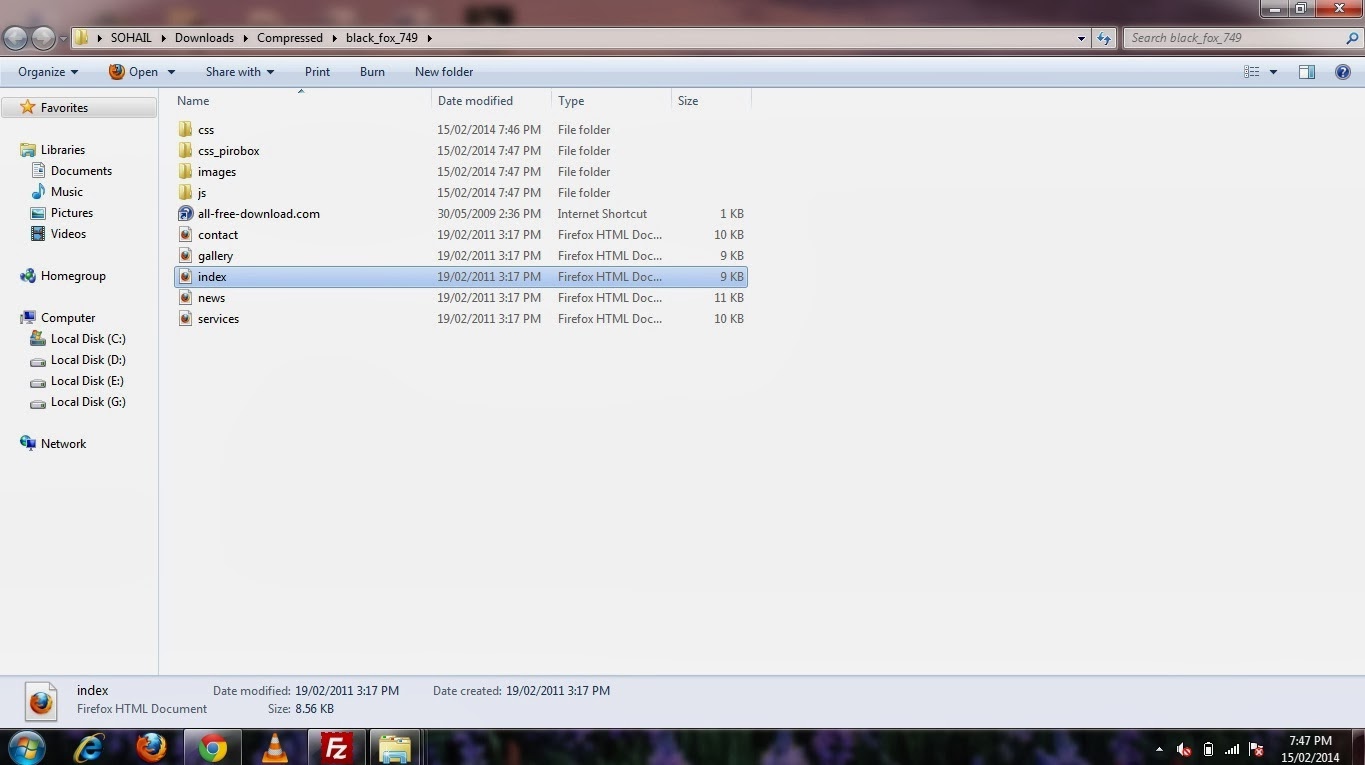
So first you have to make sure you have all of your webpages at the same location i.e. in a same folder and keeping images in a separate sub folder is a recommended way. So look at the Picture below as I have arranged all the files related to my website in one location with a separate images folder.


Now this folder has a file named index.html which is the homepage of my website so your homepage must have file named as index.html. Because this is the file a web server look for when it receives a request from any user.
So you have to upload all the files and folder with same file/folder structure to the web server.
Now the question is how to upload these files to the web server?
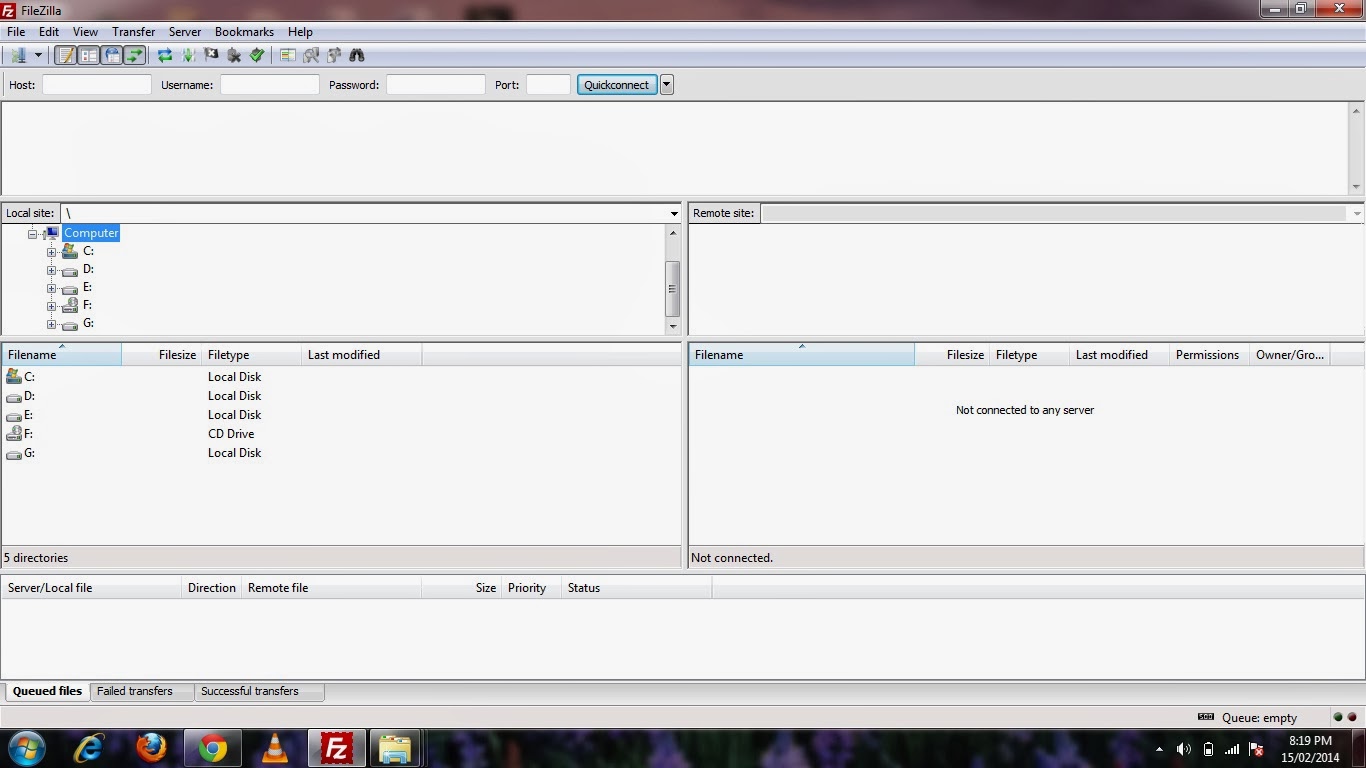
To upload files to web server there are multiple software available and they are known as FTP client. I found FileZilla the best so I am gonna use the same to show how to upload the webpages with the help of FileZilla. You can also download it by clicking here. Install the filezilla and open it, it would look like the picture below.

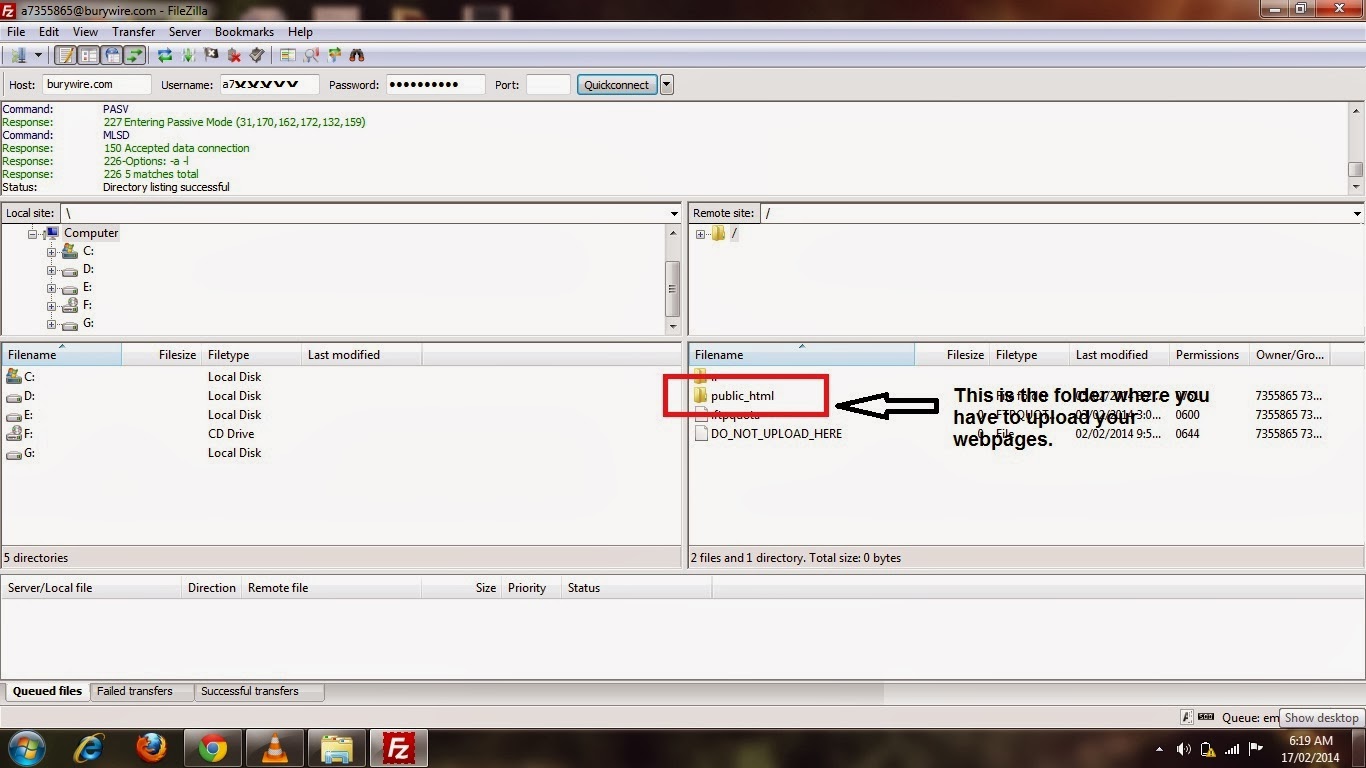
Picture 2(bb) shows how does it look like after logged into the FTP server.
Now in the Picture above left hand side file/folder structure shows files/folders in your local computer while the File/folder on the right hand side shows the files/folder structure of Remote server.
Every web server or the hosting server will have a folder named “public_html” or “/html/www/” which is the default folder under which you have to upload your webpages for you domain (burywire.com in my case).

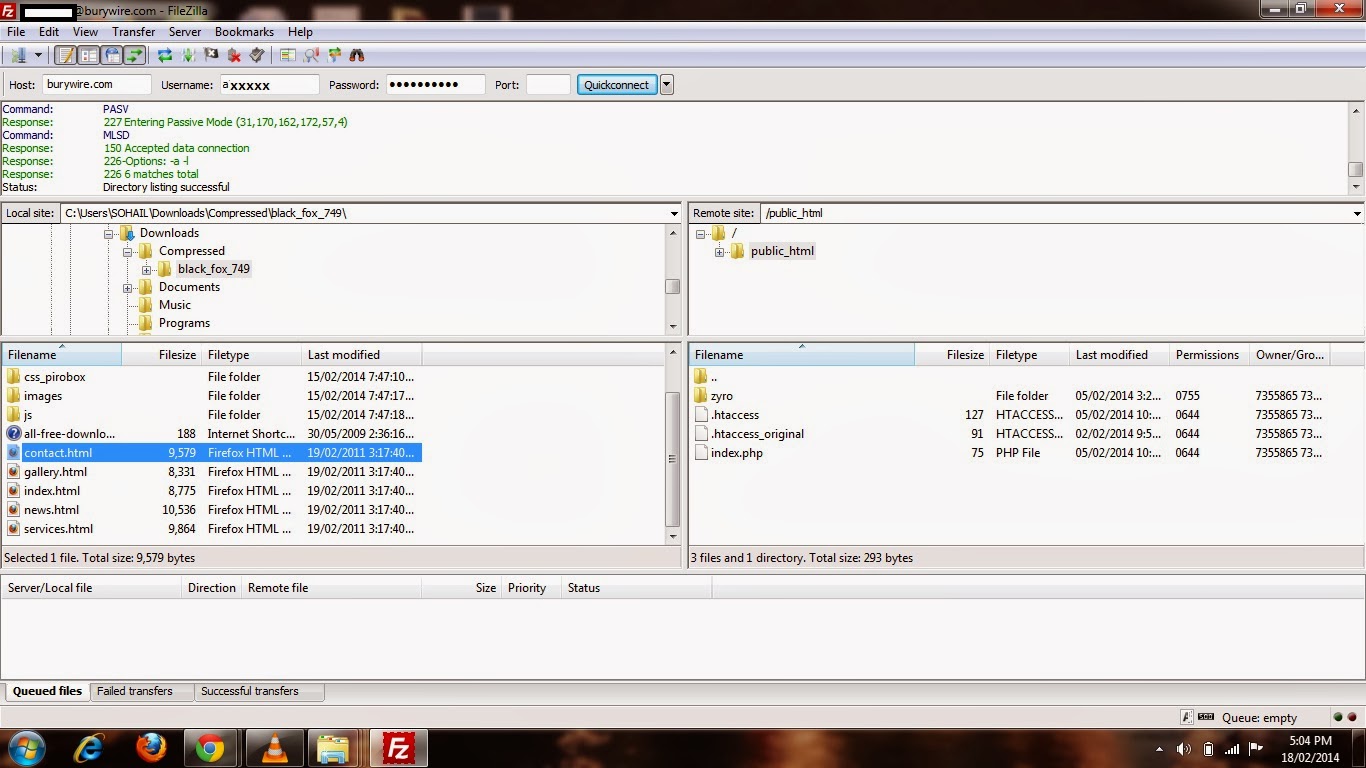
To upload files using FileZilla u just need to drag and drop them to this folder. Or open this folder “public_html” by double clicking on it and on the left hand side browse the folder you have all your web-pages kept. And then start dragging and dropping them into the public_html folder one by one as shown in the pic 2-(cc) and once all the files and folders have been uploaded, Visit your website by just typing the url like www.burywire.com in any browser and your website is ups and running.
Bingo….
You have successfully uploaded your website. In my next post I am gonna talk about how to create your Email Ids associated with your domain like yourname@burywire.com. So stay connected to the blog.


