Apple laptops have a unique feature called the Target Disk Mode. The Target Disk Mode allows the transfer of heavy files from one Mac to another. In this mode, your Mac becomes like an external storage drive for your other Mac.
To understand it better, see it like this, you take out the hard drive or SDD from your Mac, enclose it and connect it to another mac for storage purposes. Target disk mode acts like a similar state wherein you don’t have to remove anything from your laptop or disassemble it. Moreover, using this feature, you can also boot your Mac from another mac internally.
Also Read: How To Use Focus Sessions To Boost Productivity In Windows 11
What Do You Need For Your Mac To Transfer Files Via Target Disk Mode?
Since this is not an in-computer process and requires a secondary mac, there are a few things you need to take care of.
- 2 Mac computers: To transfer files from one Mac to the other, having two fully functional Mac is the first step. Ensure that both of them have either a Thunderbolt port or a Firewire port.
- A Firewall or Thunderbolt Adapter Cable: A regular USB port will not be enough for this kind of file transfer as these macs have Thunderbolt or Firewall ports. So make sure that you have an adapter cable that can connect to these ports. And if one of your macs has a Thunderbolt port and the other has a Firewall one, you will need a Thunderbolt-to-Firewire Cable and vice versa. Moreover, if both have a thunderbolt or Firewall, then you need that sort of wire.
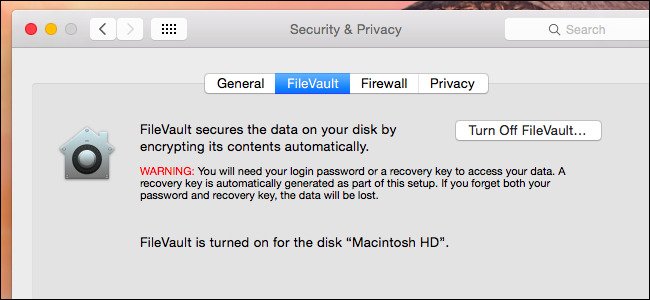
- Disable File Vault: By default, all Macs now have file vault encryption to prevent anyone from accessing home directories over Target Disk Mode. So, you have to disable this option. And to do that, start the Mac usually, go to System Preferences, choose Security and Privacy. Furthermore, select file vault and switch it off temporarily. Enable it again after using the Target Disk Mode.
- Remove Firmware Password: Disable the firmware password for a while till you are using Target Disk Mode.

How To Enter Target Disk Mode In Mac?

Step 1: Go to the Apple Menu and choose System Preferences.
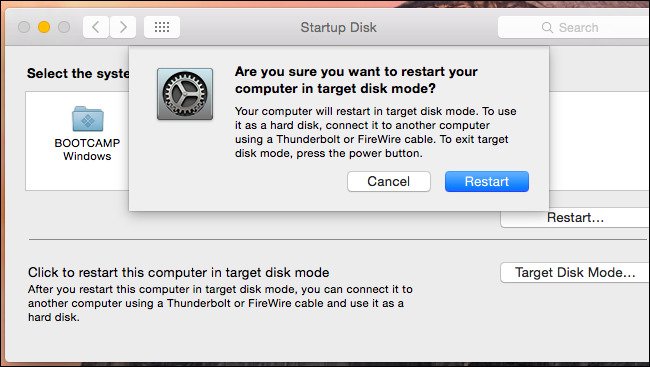
Step 2: Hover over the Start-Up Disk icon and click on the Target Disk Mode.
Step 3: Moreover, you can use a shortcut if your Mac is not on. Reboot mac and long-press the T button from the keyboard.
Step 4: Connect it to another laptop through a Firewire or Thunderbolt cable just as your Mac is rebooting.
Also Read: How To Share Live Location With Someone In iMessage On iPhone
How To Access Files From Another Mac Via Target Disk Mode?
After you have connected both the macs via an adapter cable, the Mac in Target Disk mode will appear on your other Mac. It will mostly appear in the form of an external drive, just as any of your storage devices would. You have to go to the Finder to locate it. It will appear in the name of Macintosh HD, from where you can transfer and receive files just as you would with any storage device.

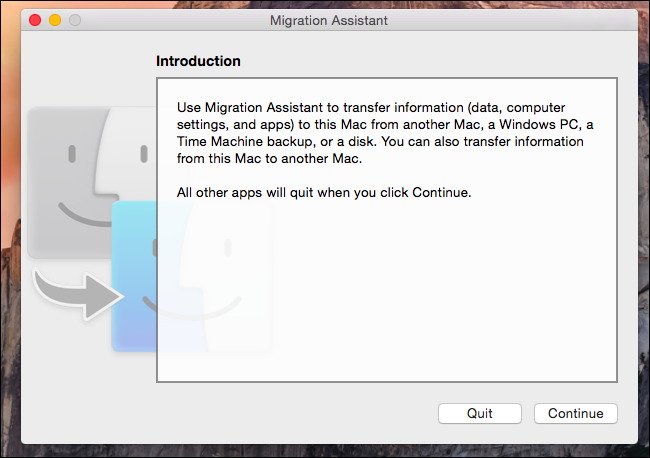
Moreover, you can transfer files from your old Mac to a new one with an even more straightforward process. Use the migration assistant to make the process of file transfer smooth and quick. When you point the migration assistant towards the Mac in Target Disk Mode, it will automatically import files from the source to your Mac.
Also Read: How To Use Split Screen Feature On Mac
How To Boot From An Internal Drive To Another Mac?
Step 1: Set one of your Macs into a Target Disk Mode.
Step 2: Connect to a second Mac.
Step 3: Long press the option key while rebooting the second Mac.
Step 4: After that, the first Mac will appear as a boot device on the second one. Choose it, and the first one will boot on the second one.
Step 5: After the process is over, right-click on the hard drive of the first Mac and choose Eject.
Step 6: Exit Target Disk Mode on the first Mac by holding down the Power Button and reboot it.
Conclusion
It is possible that during the connecting process, one of your Macs may run into some of the other problems. Mostly, the problem comes from the file encryption vault. Therefore, you must use both the Macs of the same model.
Read: Hands-on with all the HomeKit changes in iOS 15


