Windows 11 has been officially released now and it is rapidly gaining popularity. The modern and rounded corner window interface is very pleasing to the eye. Microsoft has also introduced some of the thoughtful features like Focus Mode in Windows 11. It will also support a wide range of widgets and snap layouts in comparison to Windows 10.
Despite all these features, several Windows Users are facing system performance issues after upgrading to Windows 11. There are lots of apps and functionalities in Windows 11 that are causing the system to slow down.
But it is incredibly easy to speed up your system after upgrading its operating system. In this article, we’ve put down several effective tips that can boost up your PC’s performance. Let’s take a look at them one by one.
Also Read: How To Flush DNS Cache In Windows 11

Disable Startup Programs in Windows 11
Whenever you boot your Windows 11, startup programs or applications start running automatically. These programs start running in the system background even if you didn’t open these applications manually.
These startup applications gobble up your system’s memory and other resources thus your system starts lagging significantly.
Hence, it’s best to prevent these startup applications from loading on your desktop whenever your computer boots. Follow to steps to do it:
- Simply right-click your Windows 11 Taskbar and click Task Manager. You can also use the ‘Ctrl + Shift + Esc’ shortcut to quickly launch the Taskbar.
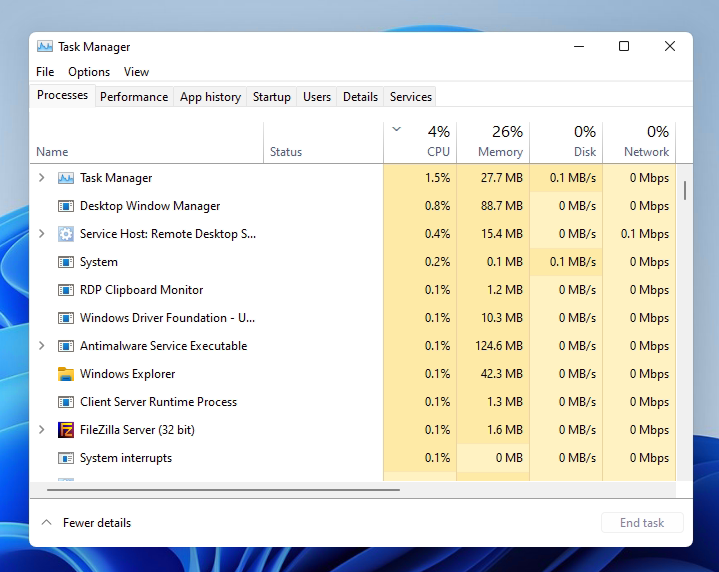
- Now navigate to the ‘Startup’ tab and click the ‘Startup Impact’ label. Here you’ll find lists of several unnecessary apps that are heavily impacting the system.
- You can disable these applications by right-clicking on them and clicking the ‘Disable’ option.
Disable Background Apps in Windows 11
Similar to startup apps, certain background apps keep running on the Windows 11 PC and keep looking for updates and notifications.
While some background apps like Email are essential, there is a long list of unnecessary apps like Calculator that utilize a significant amount of system resources while running in the background. These apps use the network bandwidth and take a toll on your desktop battery. So it’s a wise decision to disable these apps to save your system’s resources. Let’s see how to do it:
- First of all, go to Windows Settings and open the Privacy menu.
- Now scroll down in the Privacy tab and choose the ‘Background apps’ option from the left sidebar.
- Look for the ‘Let apps run in the background option on the top. Turn the switch next to it in the off position.
- You can also disable each background app individually.
Also Read: How To Share Files Via Nearby Sharing In Windows 11
Block Apps from restarting after you reboot your PC
Blocking apps from starting automatically as soon as you reboot can also speed up your Windows 11 PC. Some of the services of Microsoft apps restart automatically after reboot so the apps are ready to be used anytime.
However, this depreciates the system’s performance significantly. Let’s see how to block these apps from restarting their services:
- Press the Windows key on Windows 11 keyboard and type ‘restart apps’ in the search box.
- Now open the app and sign into it.
- After logging in, turn off the switch next to ‘Restart Apps’ and you’re done.
Also Read: How To Install Windows 11 On An Unsupported CPU?
Disable Cortana
Cortana lets you perform searches outside of your local PC but if you’re someone like me who likes to confine the searches within your PC, you should disable it. Cortana is a memory hogger and eats the important resources. Here’s how to disable Cortana on your Windows 11 PC:
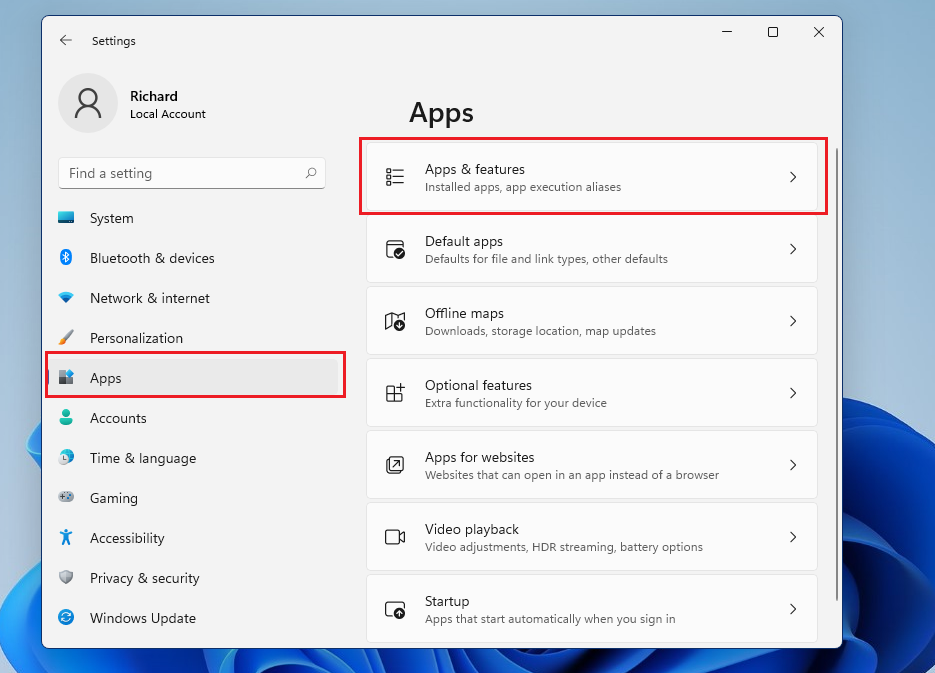
- Go to Windows 11 Settings > Apps > Apps & features’.
- Scroll down the apps and click the three dots and click advanced.
- Finally, disable the toggle for ‘Run at Login’ under the Cortana section.
- Now restart your Windows 11 PC and you’ll see that Cortana is disabled.
Remove Junk Files from your PC
To speed up your PC, it is always recommended to trash your junk files regularly. These are the junk files that take up your disk space and slow down your PC. Here’s how to remove the temporary files in Windows 11 PC:
- Tap the Windows key and search for ‘Storage Settings’.
- Now select Temporary files.
- Finally, click the ‘Remove Files’ option.
Also Read: How To Check If Your PC Can Upgrade To Windows 11?
Adjust Visual Effects settings in Windows 11 PC
Visual Effects in Windows 11 degrade the work performance of the CPU if your desktop does not have a powerful GPU. Here’s how to disable it:
- Head to the Systems settings on your Windows 11 PC.
- Navigate to ‘View Advanced System Settings.
- Go to ‘Performance Section’ and click on ‘Settings’.
- Now click the ‘Adjust for best performance’ button and then ‘Apply’ the changes.
Disable Game Mode on your Windows 11 PC
If you’re not fond of playing games on your PC, it’s best to turn off the ‘Xbox Game Mode’ on your Windows 11 PC. The ‘instant screen, video, and audio capturing’ features of Game Mode eat up system resources. Here’s how to disable the Xbox Game Mode:
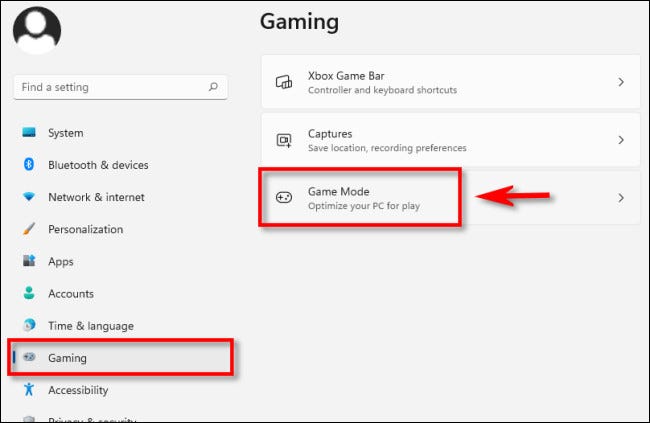
- Press the Windows key and type ‘Game Mode’ in the search bar.
- Now go to the ‘Game Mode Settings’ and turn off the toggle next to ‘Game Mode’.
- Next, move to ‘Xbox Game Bar’ and click on ‘Captures’ settings.
- Now disable all the options in this window.
Read: How to Free Up Disk Space After Upgrading To Windows 11
Conclusion
So these are some essential tweaks that you need to make on your desktop running on Windows 11. All these tried and tested tricks will surely cure your system’s lagging problem after you’ve switched to Windows 11. Are you aware of some other hacks that can boost your system’s performance? Mention them in the comments below.


