We often need to sign digital documents like agreements, receipts, invoices, and even self attest documents. However, we do not know how to create a signature and sign the documents digitally. Apple allows us to sign our documents using iPhone, iPad, and Mac using many ways.
In this article, we have mentioned all the ways by which we can sign a document on iPhone 13, iPad, and Mac. Let’s go through them one by one.
Also Read: How To Fix Apple CarPlay Not Working In iPhone 13?
How To Sign A Document On iPhone 13, iPad, And Mac
Using the Markup Tool, it is simply to create your handwritten signature on iPhone and iPad. You can choose any of the following methods which may seem suitable to you:

Use Files app to Sign a Document
Here’s how to sign a Document using the Files App:
- Open the PDF document on the Files App.
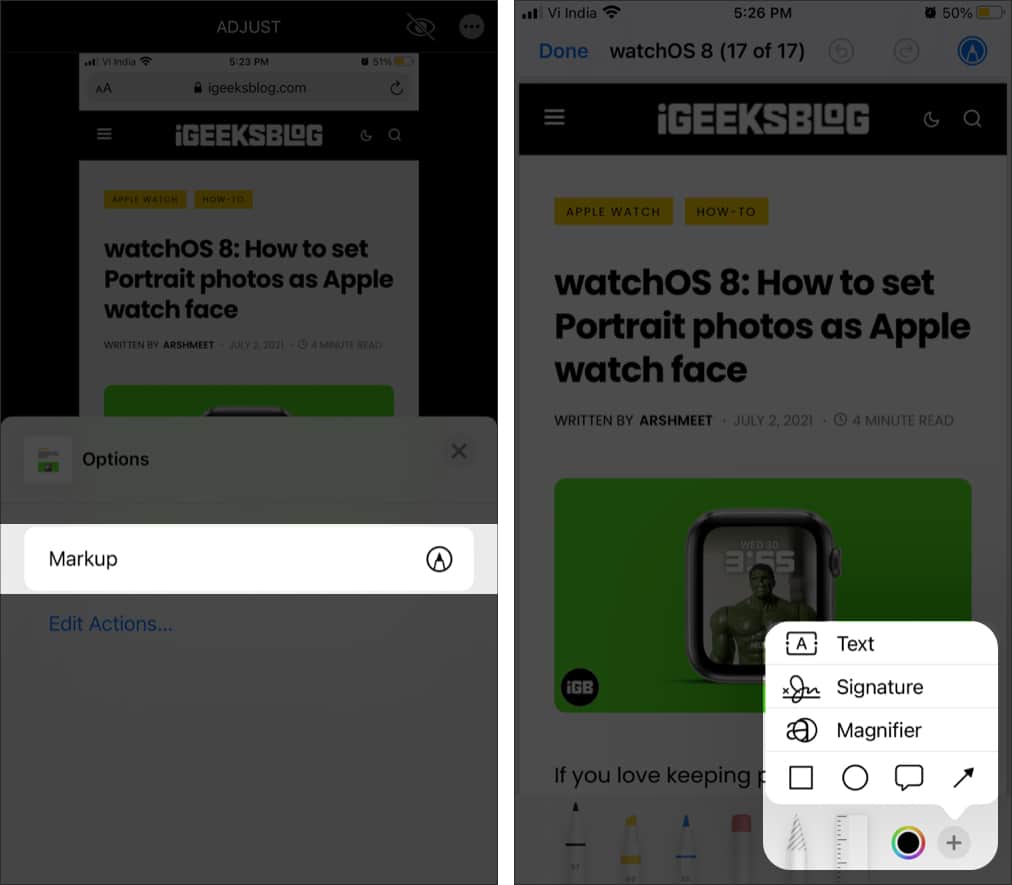
- Choose the Markup tool by tapping on the icon.
- Not tap the + icon and select the ‘Signature’ option.
- Not you can either use a finger or a stylus to create your signature.
- Clear the signature to try again.
- Once you are happy with your signature, press the ‘Done’ option.
- After pressing the ‘Done’ option, you’ll see that the signature has appeared on the document.
- You can easily resize the signature and drag it to the new location.
- You also get an option to Cut, Copy, Delete and Duplicate the signature by long-pressing the signature.
- At last, you have to press the Done option to save the changes.
- After signing the document, you cannot revert the changes so it is better to duplicate the document before signing it.
If you want to add more signatures, follow the steps below:
Files app → PDF → Markup icon → + icon → Signature → Add Signature → + icon → sign → Done.
Also Read: How To Factory Reset iPhone13 And iPad
Use the Notes App to Sign a scanned document
This option is only available for scanned documents or a PDF in the Notes app.
- First of all, open the scanned file or PDF in the notes app.
- Now choose the Share option from the top right of the screen.
- Choose the Markup from the share sheet in the Notes App.
- Tap the + icon at the bottom and add a signature.
- Here, you can either create a new signature or choose from the already saved signature.
- Now tap Done to save the changes.
Sign a document in the Photos App on iPhone/iPad
This option is helpful if you want to self attest an ID proof or a photo of any receipt. You can also screenshot the document and using the Photos App to sign the screenshot. Here’s how to do it.

- Launch the Photos App on your iPhone or iPad
- Open the picture which you want to sign.
- Tap the ‘Edit’ option from the top right of the Photos App.
- Tap the 3 dots on the top right.
- Choose the Markup tool and tap the + icon.
- Choose the ‘Add Signature’ option.
- Now the further steps are the same as the previous sections, Signature > Edit > Done.
- Press ‘Done to confirm the changes.
How to sign a document on Mac
Similar to iPhone and iPad, the Markup tool helps you to sign your documents on Mac as well. But the problem is: How to create the signature without touching your Mac screen. To overcome this issue, Apple has given us 3 methods to sign the documents on Mac Preview. Let’s check out how to use these options on Mac Preview.
- Open the Document in Mac Preview and scroll down to the page where you have to add the signature.
- Tap the Markup icon in the Mac preview.
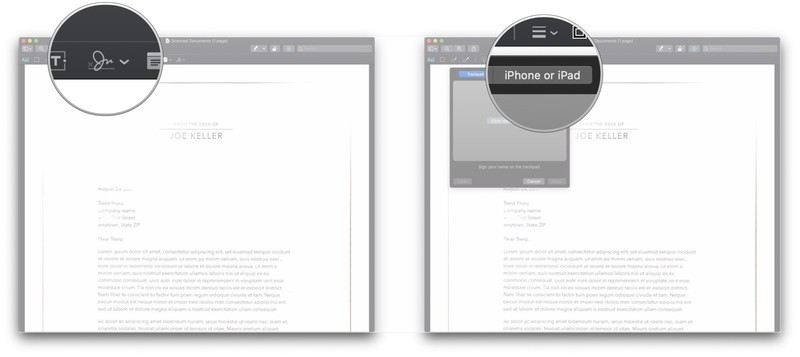
- Now, add the Signature icon.
- Here you can choose the signature from already added ones or create a new signature.
- If you choose to create a new signature, you will have three options as follows:

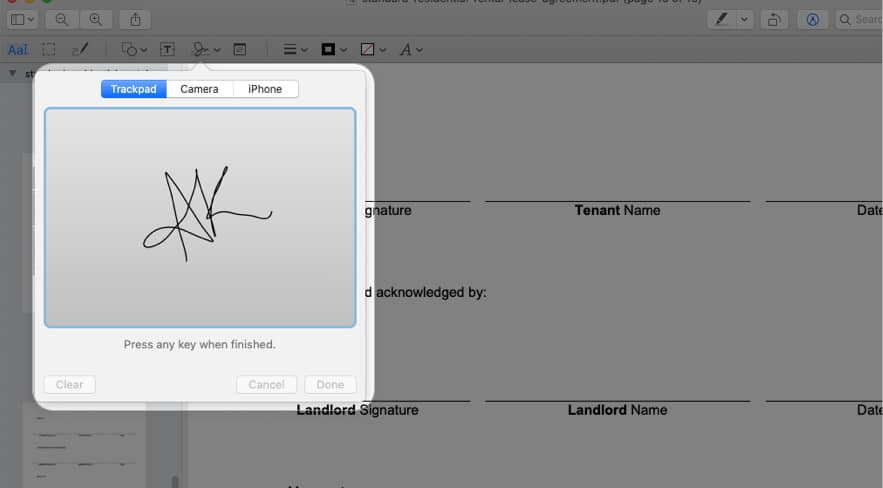
Create the signature using Trackpad
- Select the Trackpad option and select ‘Click Here.
- Now move your fingers on the Trackpad to draw your signature. To stop, press any key.
- If you want to try again, press the clear option.
- After you are satisfied with the signature, press the ‘Done’ option.
Use Mac’s Camera to create a Signature
- Choose the Camera option
- Create your signature on the white piece of paper and place it in front of the camera.
- Now Mac will scan your signature and create its mirror image.
- Tap Done to save the signature.

Use iPhone to create sign a document on Mac
- Pair your iPhone with Mac and choose the iPhone option.
- The iPhone screen will resemble the Mac screen.
- Now sign on the iPhone’s screen using your finger or stylus.
- The same signature will appear on Mac’s screen.
- Tap ‘Done to save the changes.
Conclusion
That’s how you can sign your documents using a digital signature on iPhone, iPad, or Mac. Hope this helps! This ability of iPhone devices will eliminate the requirement of any third-party apps or software to create signatures on iPhone, iPad, and as well as Mac.
Also Read: How To Fix Microphone Not Working On Mac?


