iCloud is a service that helps to store photos, videos, information, and files more securely and up to date. It syncs on your iPhone,iPad, or Mac. When you enable the iCloud service, you can utilize the storage and access the photos on one device from any of your other devices at any time.
iCloud is not a backup service, it is a Sync service. If any change is made in one device it changes in all the devices. So if you delete a photo or any file on one device it will be deleted in all other devices which are synced with it. You must be careful when you are deleting anything from your device, do not think that if you delete it on one device the original will be saved in the iCloud. iCloud keeps all the photos, videos and etc in an organized manner that is according to their date, month, year.
How to turn on iCloud?
First, set up and sign in to your iCloud account. Remember you should sign in with the same account with all the devices you are using.
If you are using iPhone or iPad follow the below steps to enable the iCloud:
- Select Settings and tap on your Apple Id.
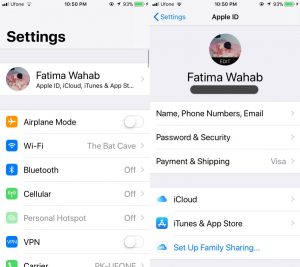
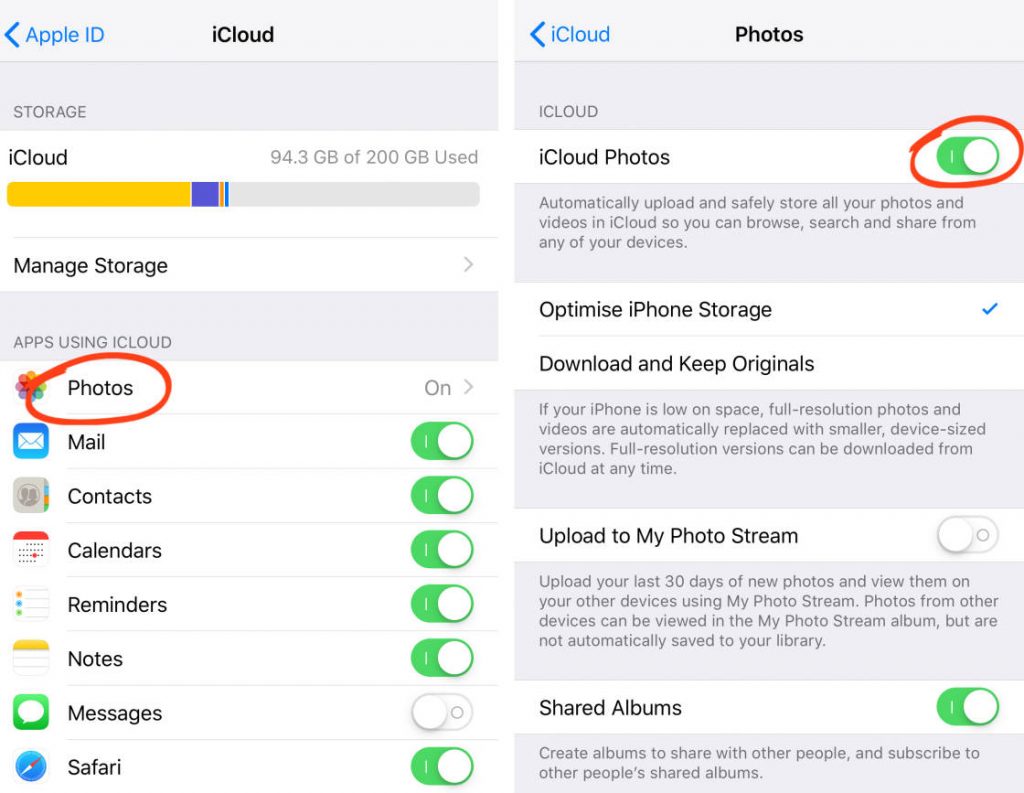
- You can see the iCloud option, select it. Tap and select Photos and turn on iCloud photos.
To enable the iCloud on Mac, follow the below steps:
- Open the Apple Menu and choose System Preferences.
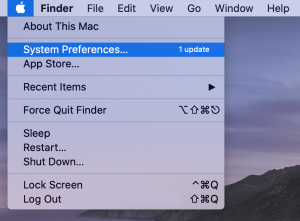
- Tap and select Apple Id, and select the iCloud.
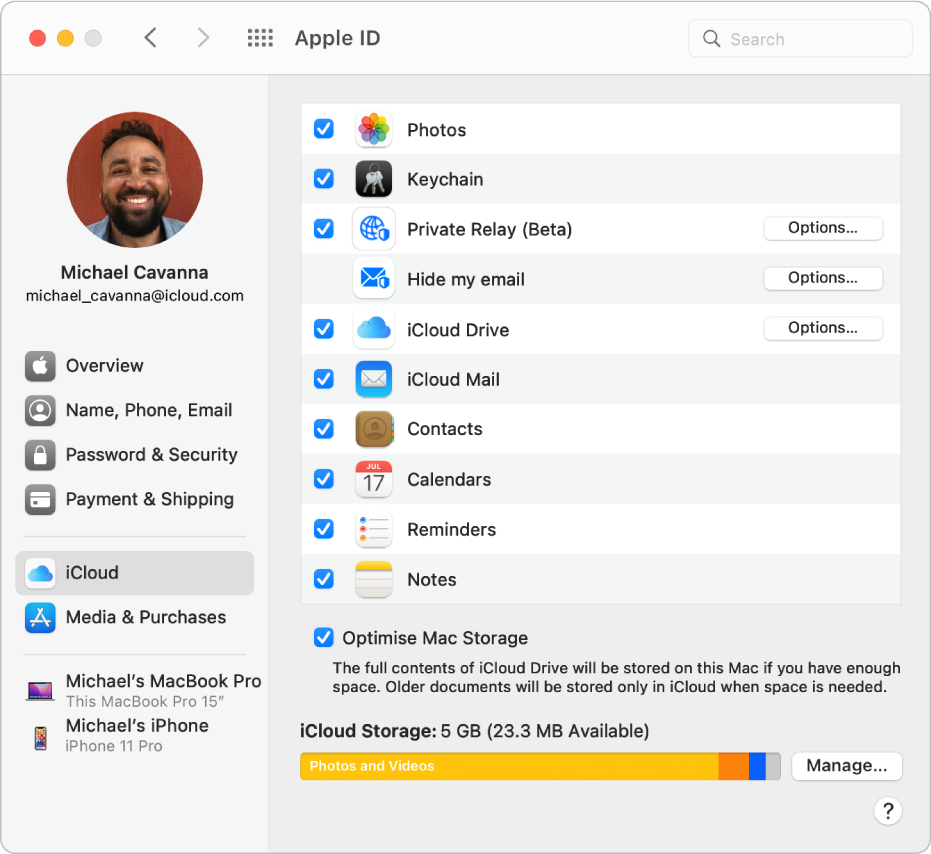
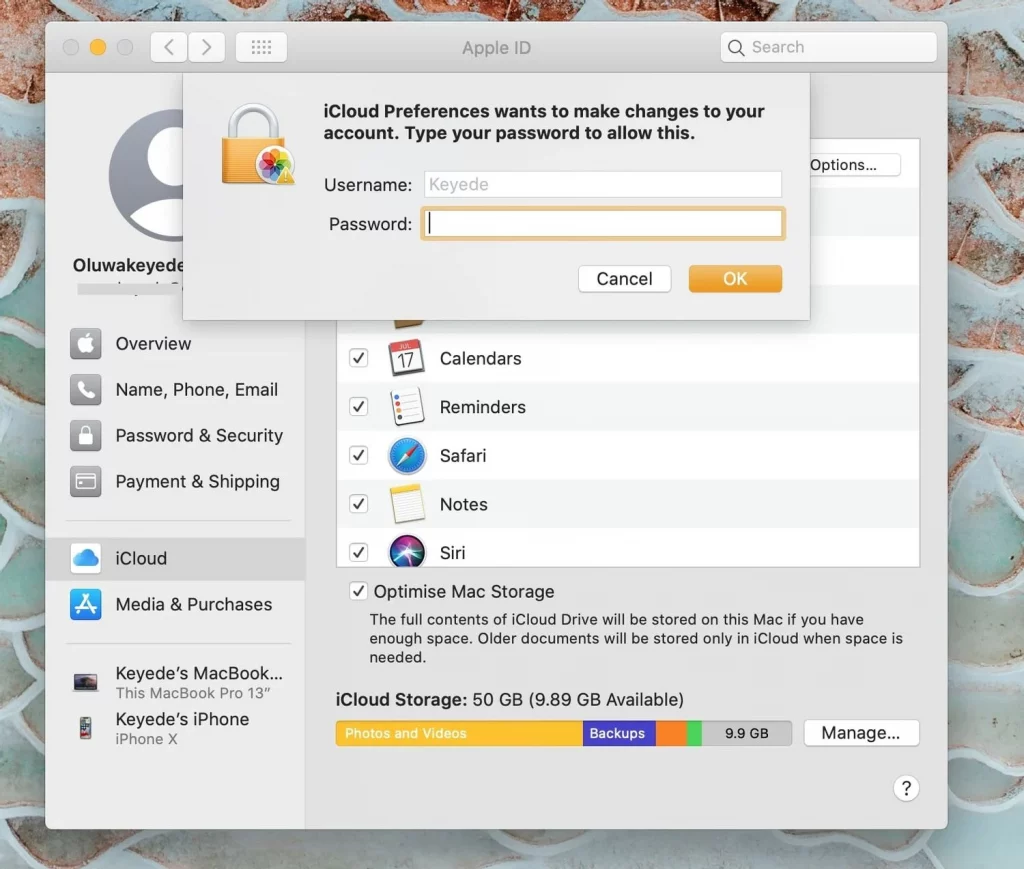
- In the right-side column, select Photos. You will get a pop-up box to enter the Apple ID and password. After you enter, click on the Ok.
If you want to enable iCloud on Apple TV, follow the below steps:
- Open the Settings, and select the Users and Accounts option.
- Tap and select iCloud. Now turn on the iCloud photos.

Now you are enabled with iCloud on all of your Apple devices. Next, all of your images, videos, and files will be synced automatically up to date as long as you are connected with the internet connection.
How to Upload the photos to iCloud?
We got to know how to sync and enable the iCloud on your Apple devices. Now let us see how to upload the photos to iCloud.
Upload on iPhone or iPad:
When you click a photo or video from iPhone or iPad. It automatically gets synced in 24 hours in the iCloud library of all the devices that are connected. It can be accessed through all the Apple devices that are enabled with your iCloud. But it must be connected to a proper internet connection and with a full battery. If it is not connected to an internet connection, nothing will be synced.
Upload on Mac:
It is very easy to upload photos to the Mac. You just need to drag it from the particular folder and then drop it in the Photos library. Then like normal, it will get synced by iCloud.
Optimizing the photo and the storage:
Sometimes due to high-quality videos or photos which consume more space than usual, you might run out of storage. Apple offers a special setting to optimize your storage that helps to keep all your new videos or photos the high-quality as it is and the old ones with the low-resolution, also can be viewed on your iPhone or iPad. Let us check out how to optimize the storage :
- Open the setting on your iPhone or iPad. Tap and select the Apple Id.
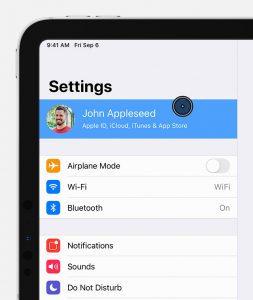
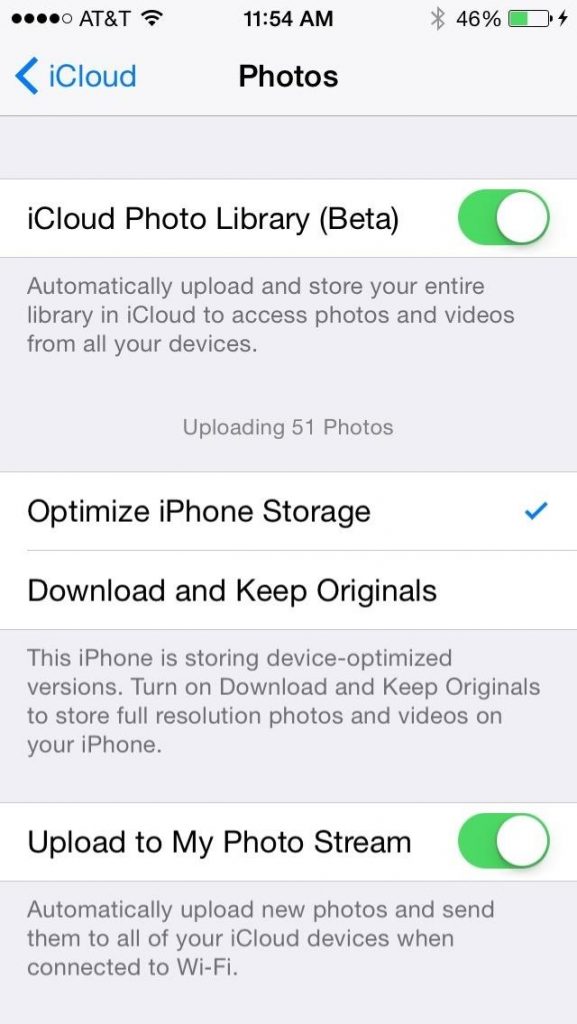
- Select the iCloud option and tap on the photos.

- Now select any one option among Optimize iPhone Storage or Download and Keep Originals option.
Deleting and Editing the photos:
iCloud automatically stores the photos and videos in the original format and resolution. The format can be JPEG, PNG, MP4, and many more, also slow-motion videos, time-lapse, and the live photo. When you edit or delete anything it will be done on all the devices that are connected.
Deleting the photos:
When it is deleted on one device it gets deleted in all the other devices which is synced with the iCloud. But you can restore it before 30 days of deleting it as it stays in the Recently Deleted folder for 30 days.
Editing the photos:
After you edit any photo or video from your iPhone, iPad, or Mac, it automatically gets updated on all the devices. You will be able to see the changes made including the Apple TV. For example, if you are adding some filter to a photo on your iPhone, you will be able to see the same thing changed on your Mac.
How to download the photos and videos from iCloud?
After you turn on the iCloud photos, they will be automatically uploaded to the iCloud. It will not be backed up, so you need to have a backup of the library. You can download the photos and videos from iCloud to Mac or PC.
To download the photos and videos from iPhone or iPad:
- Open the Photos app and select the photos or videos whichever you want.
- Then tap on the Share button and select the Airdrop option.
- After selecting the Airdrop option, select the device for which you want to share.
To download the photos and videos from your Mac:
- Open the Photos app and select the photos and videos of your wish.
- Now drag the selected photos or videos to the desktop or also control-click on it. Then select the share option. Tap on airdrop and choose the device you want to share with.
Pause the library uploads to the cloud:
When you have lots of images or videos to get synced in the iCloud, it takes more time depending on the internet speed and the size of the photo or video. You have an option that helps to pause and upload for one day by looking at the status of the uploading. Let us see how to pause the library:
- On your iPhone or iPad, open the Photos app and go to the Library tab. Click on the All photos option. Now scroll down to the bottom of your screen and tap on the Pause button.
- On your Mac, open the Photos app. Select Library which is present in the sidebar, then tap and select All Photos in the list of tabs in the toolbar. Now scroll down to the bottom of your photos and choose Pause.
Conclusion:
In this article, you will get to know all information regarding how to use and set up iCloud and sync all your data. It can be achieved in just a few steps. You will also get to know how to download the photos. Hope this article will be helpful.


