Privacy is a term most people take lightly, especially on their devices and the internet. In fact, given the times we live in, one should think long and hard. Our devices contain more vulnerable information than our house lockers do. Moreover, people in high official positions are also vulnerable to online hackers as their devices contain priceless data about their companies. If these devices fall into the wrong hands, it can cost people their livelihood and, in worst-case scenarios, all their employees.
But let’s come down to the first wall of security for our computers. At times, we have to reluctantly share our macs with our spouses, children, siblings, friends and colleagues. And we all have some personal files containing our journals, bank details, passwords, personal data that we do not want anyone to know about. So when we have to share our macs with someone or leave it open to pick up an urgent call, chances are people will try to investigate each folder because of “no boundaries!”.
Not only does it trigger us and hurts us, but it might also be extremely embarrassing. It is in these moments that we want to punch that person hard who is probably laughing their heads off by now. But then again, what’s the point, right? You cannot undo it but ensure it does not happen to you again. Setting a password is the best way to keep all your files and folders safe from prying eyes. Here’s how you can do it.
Read: How to Scan Your Phone For Malware And Viruses?
How To Add Password To A Folder In Mac?
Adding complicated and easy-to-remember passwords on your mac will save you from a lot of trouble in the future. To enable a password on a folder, this is what you have to do.
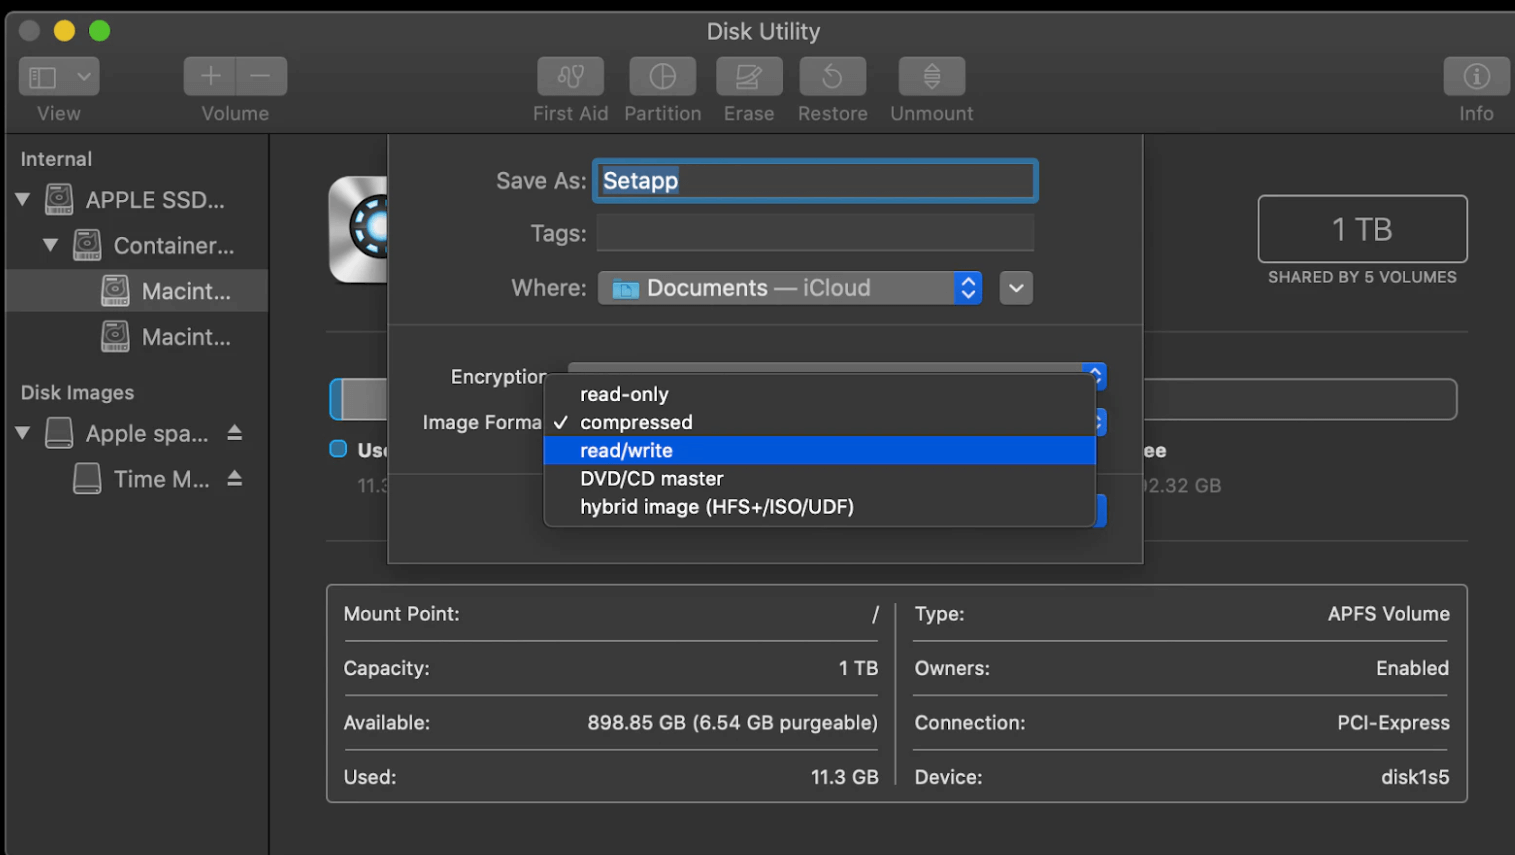
Step 1: Go to Disk Utility and select File from the Menu bar.
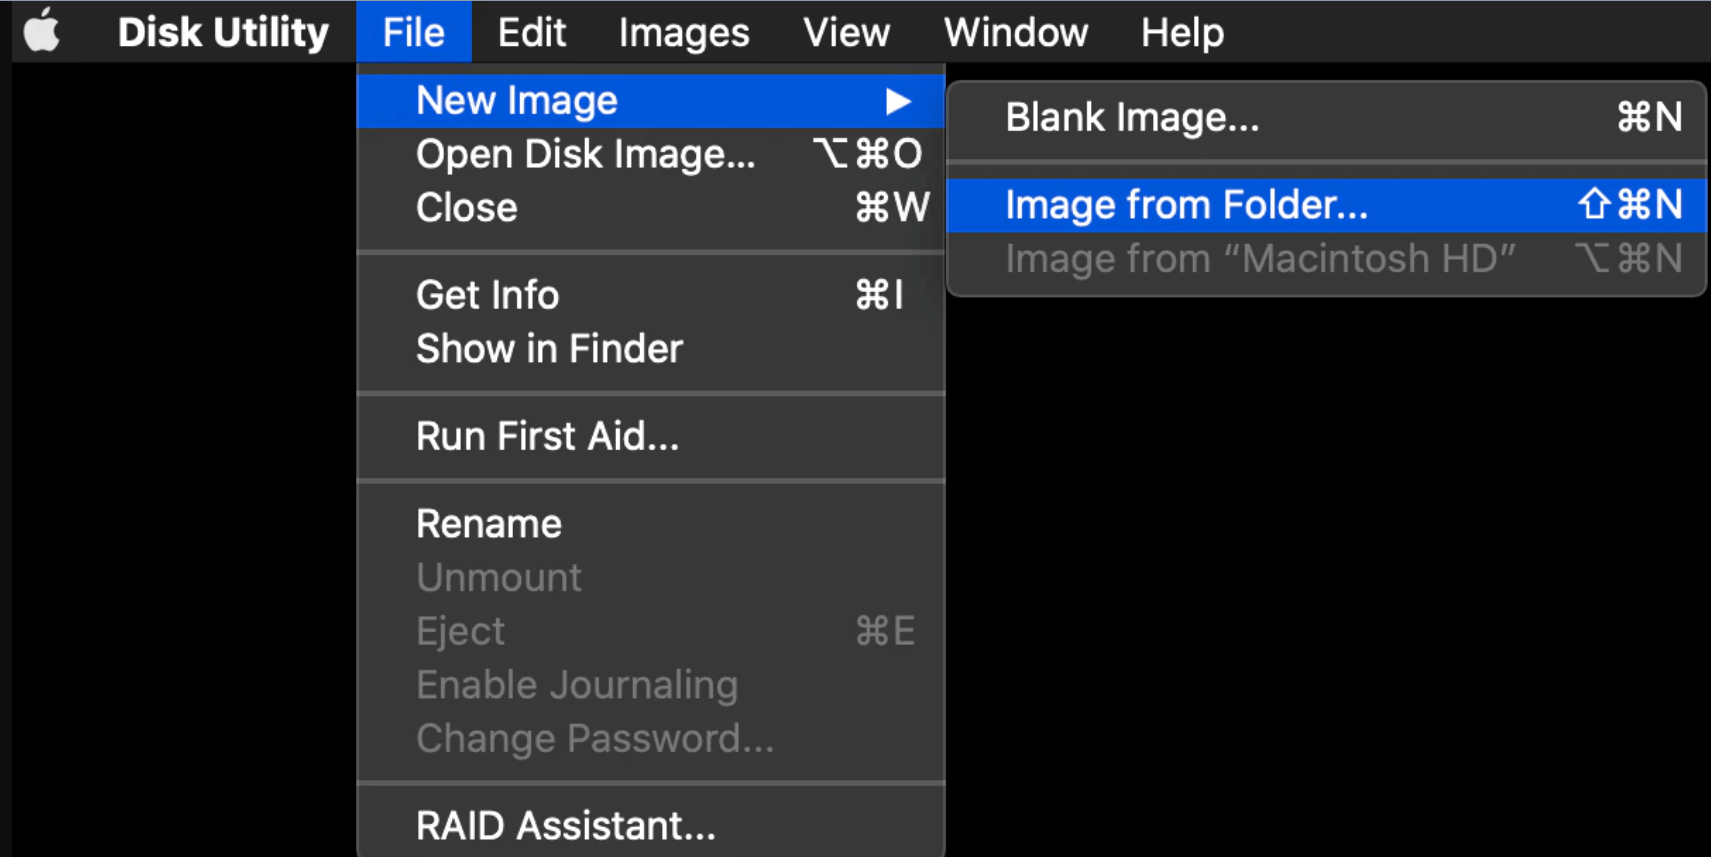
Step 2: Under the File section, select New Image and from there choose Image From Folder.
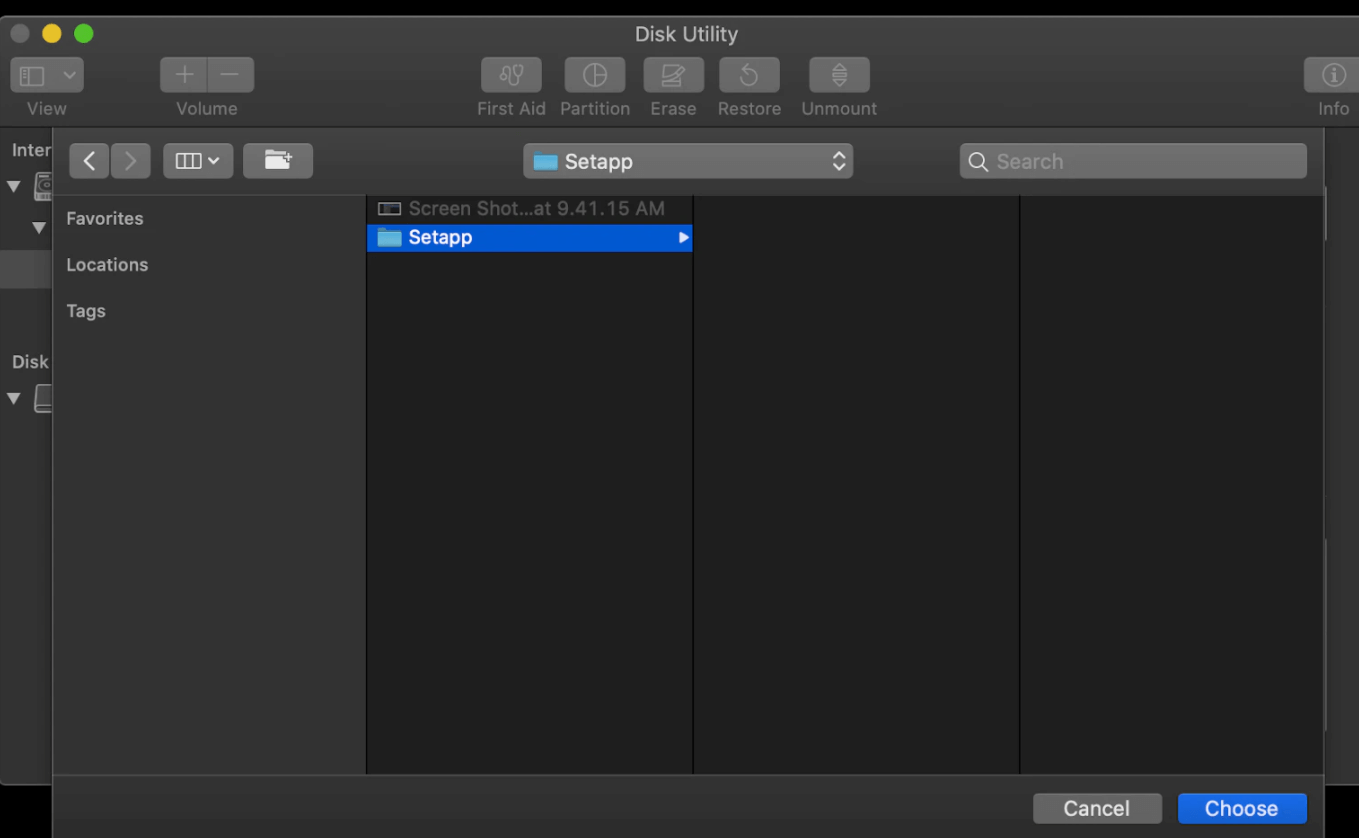
Step 3: Choose one folder you want to password-protect. Moreover, here you can also choose the level of encryption like 128-bit, 256-bit and so on.
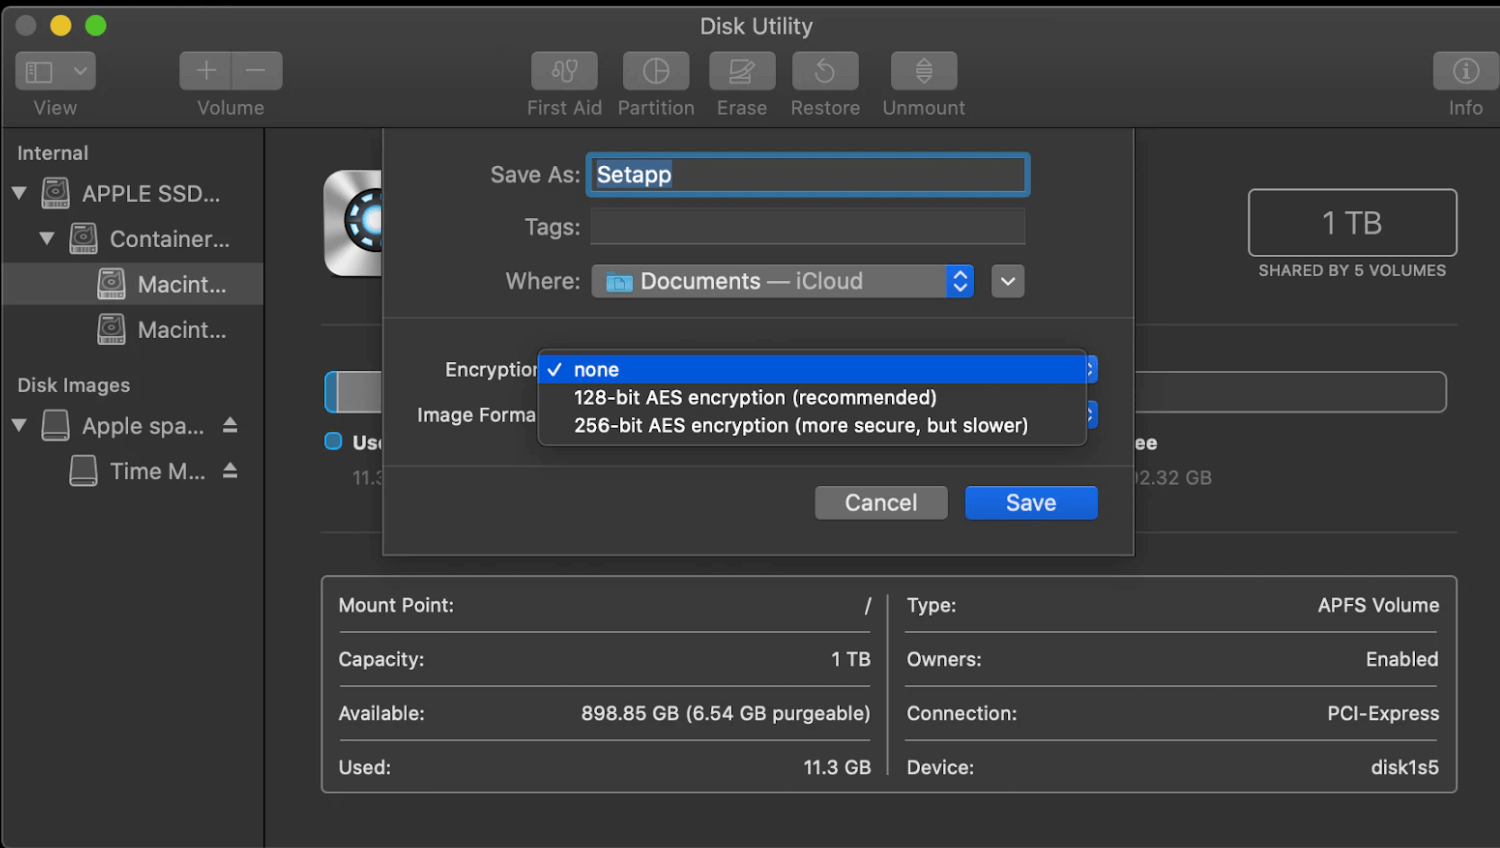
Step 4: Enter a password (make it complicated yet easy to remember, as we said before) and verify it. You can also name the folder for ease of use.
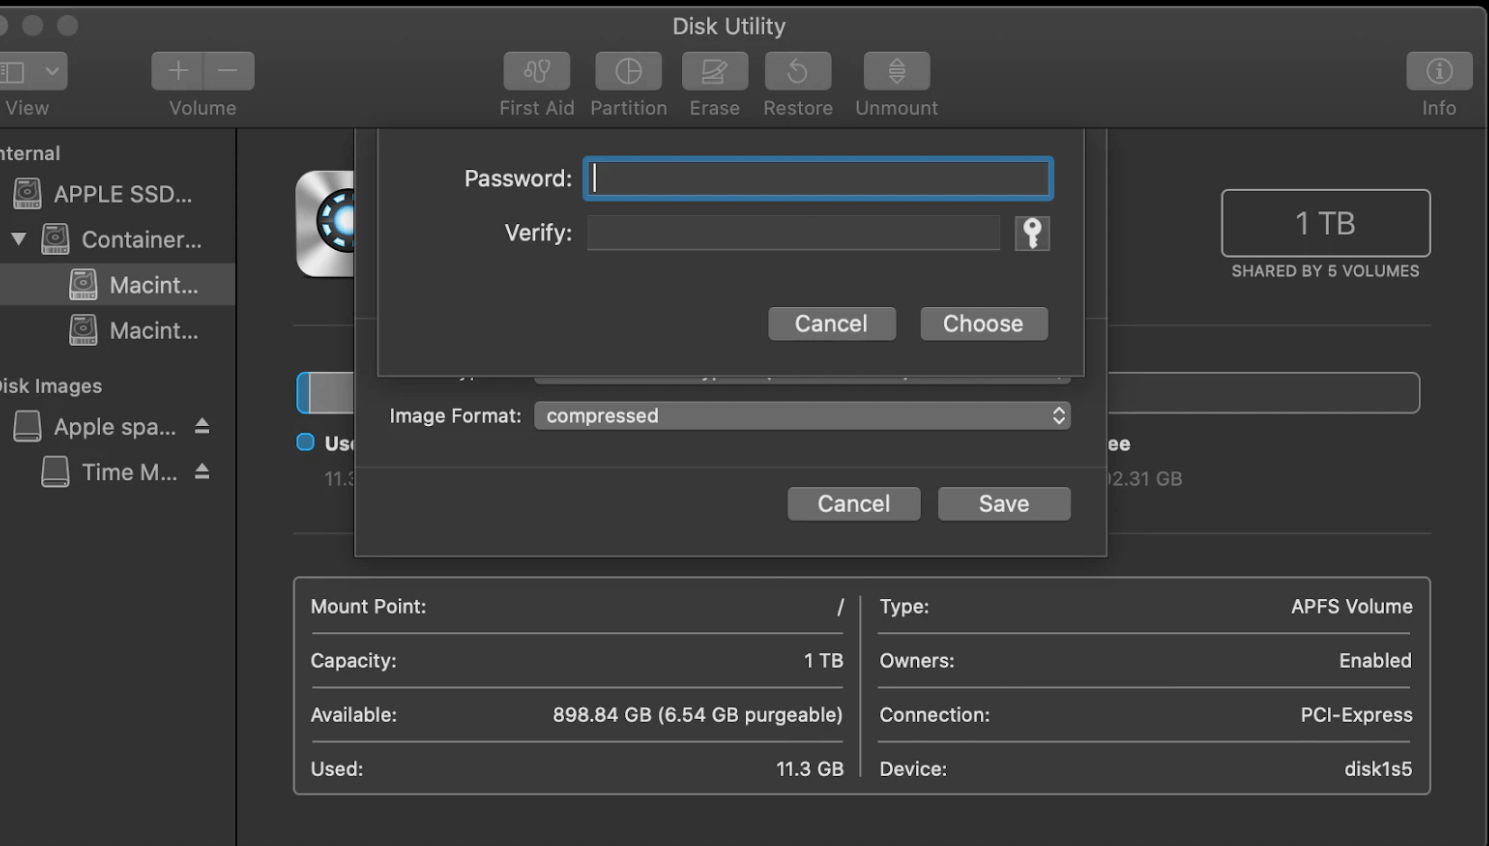
Step 5: Go to Image Format and choose Read/Write under Menu. Now click on Save.
How To Password Protect File/Files On Mac?
At times, its just one File or a few selective files from a folder that we want to secure. For that:
Step 1: Go to the Notes app and choose the File you want to add a password to.
Step 2: On the Menu bar under Notes, tap on the Lock icon and select Lock Note.
Step 3: Type a password for the File you want to protect, and you’re good to go.
Read: Antivirus vs VPN – Which Protects You Online Better in 2021?
Preview
Apart from Notes, you can also add a layer of password protection to your files through the Preview option.
Step 1: Go to Preview on Mac and select the PDF file. Moreover, if you right-click a particular PDF file and choose Open With, that will also lead to Preview.
Step 2: Choose File from the Menu bar and choose to Export. Enable the encrypt option in the dialog box.
Step 3: Enter your password and verify it. And click on Save.
Note: To use the Preview feature for a password, you must first convert all your files to PDF. Only then can you enable passwords for them.
Also Read: How To Free Space On Your Apple Watch?
Conclusion
Mac also allows you to add passwords through Pages, Keynote, and Numbers. Open a file in these, Select File, and add a password. In this way, if you proactively add passwords to all your important files and folder, rest assured that you never have to fall into trouble or face awkward situations with people you know.
Also Read: How To Scan Your PC For Malware
Warning- Your Amazon Kindle Can Be Hacked
How To Secure Website From Hackers And Viruses?
Top 5 Technology Smartphones Use Today


