We were overjoyed the first time we began transferring pictures from our cameras and mobile phones to our computers. The thought of having those pictures forever with us without needing ample storage space was such a relief. Soon we all got used to the idea, and now our computers have way more pictures from years than we can imagine.
In 2021, most of us are running out of patience and perseverance to locate these pictures should we want to see them. Especially with the last four months of the year coming around, the pressure to click more pictures and travel down memory lane rises. Maybe you want to find an old picture of your teen who was once a child and surprise them on their birthday. Maybe you want to make your old parents feel special by decorating their house with old pictures you took years back.
These are incidents where you have to hunt down each and every file and folder on your computer. And if that scares you as it scares me, and time is of the essence, you are in the right place. So here, we will discuss some of the tips and tools you can apply to organize and arrange your pictures on a Windows computer. And how a Photo Organizer can help us in this scenario.
Also Read: What’s New With The Apple Health App In iOS 15
What Does A Photo Organizer Do?
When we capture a photo, it encapsulates much more as its identity, and we simply overlook it. Details like location, day, and date are some of them. All this data collects as metadata and reveals a lot about you without your knowledge. However, there’s nothing to be afraid of as Photos EXIF editor helps remove this very data.
A photo organizer uses this metadata to sort your pictures according to the date, day, and year.
Also Read: How To Fix Bluetooth Mouse Not Working In Windows 10?
Guide To Sort Photos By Date Using Photo Organizer
To use Photo Organizer, follow these steps:
Step 1: On your Windows 11 operating system, download Systweak Photo Organizer.

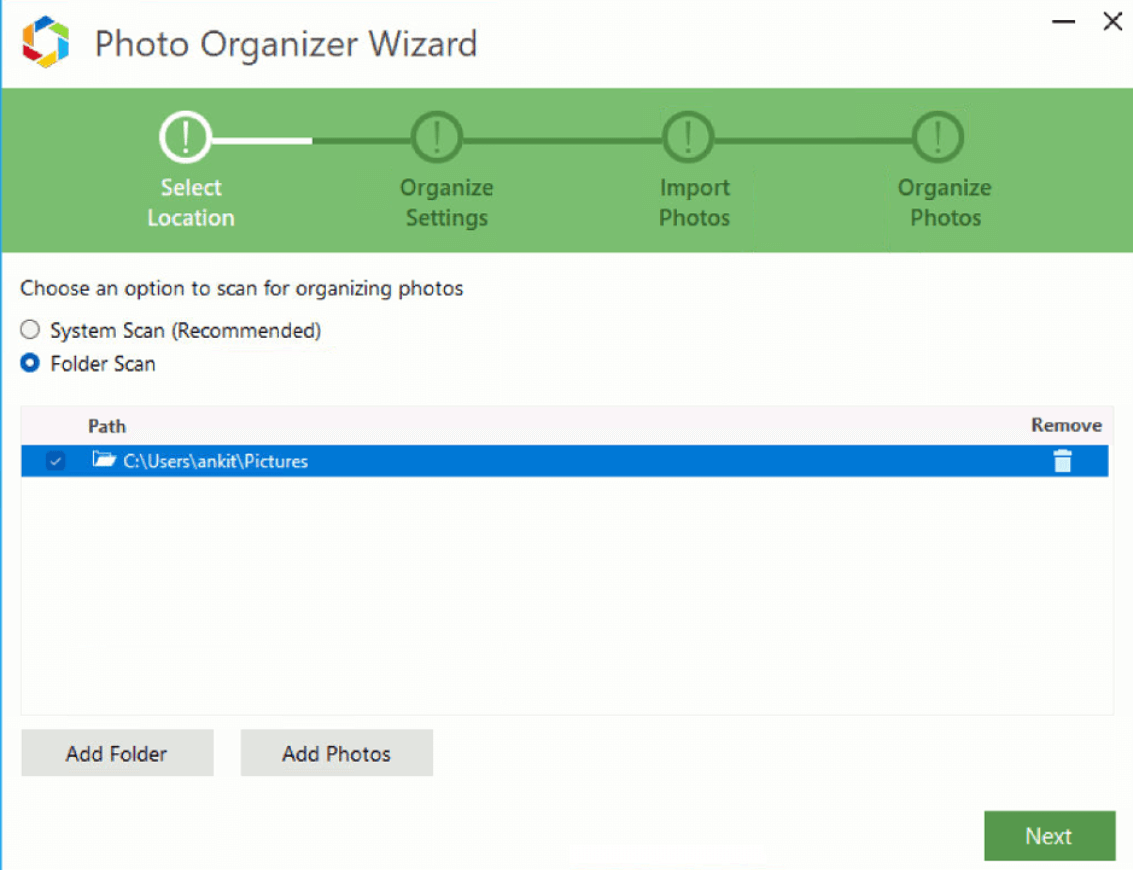
Step 2: Once you launch the tool, you get to choose between System Scan and Folder Scan.
Step 3: Choose your preference and tap on the Next button.
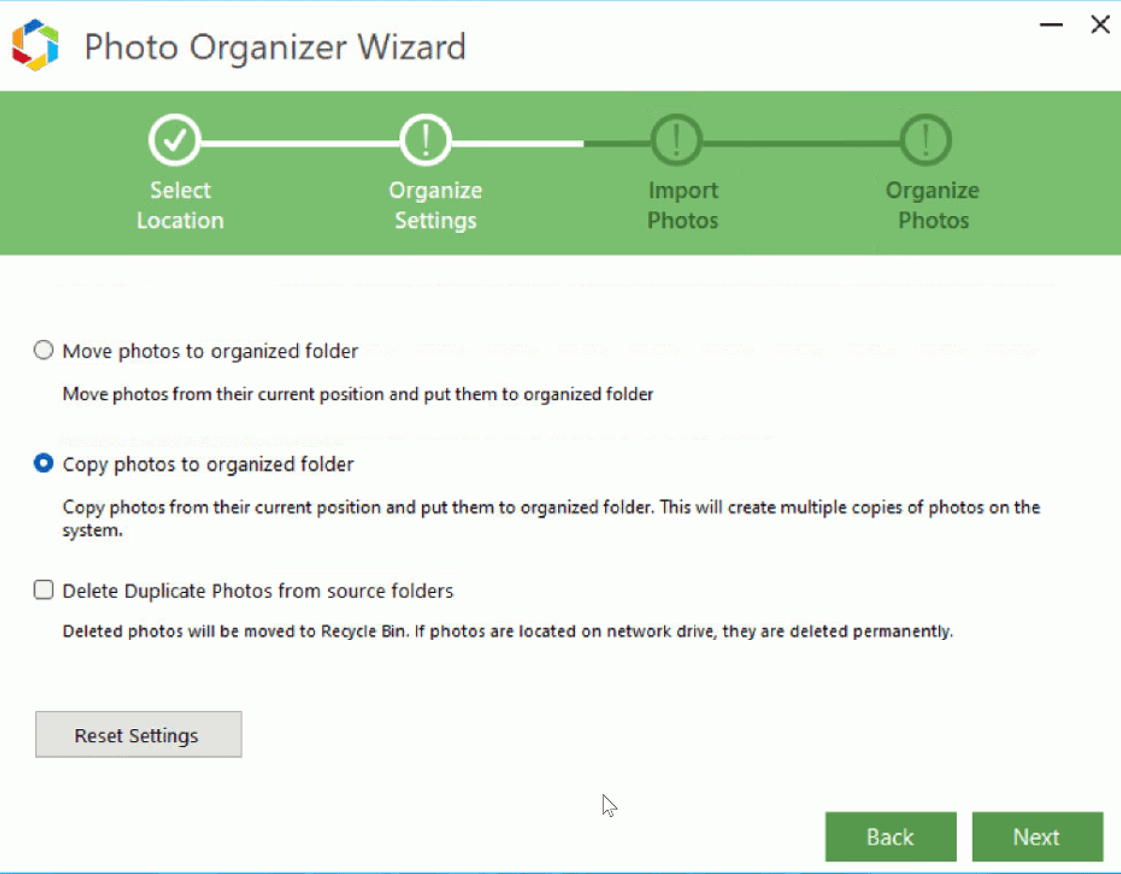
Step 4: Tap on the platform you want to choose from among these options.
- Move to organized folders: Photos will move to the new folder created by Photo Organizer.
- Copy to organized folders: This option will keep a copy of the photos you will scan. Moreover, the newly copied photos will go to the organized folder by Photo Organizer.
- Delete Duplicate photos from original folders: We are troubled with duplicate photos flooding our computer. Therefore, this option will be one of your favorites if you want to get rid of duplicate photos.

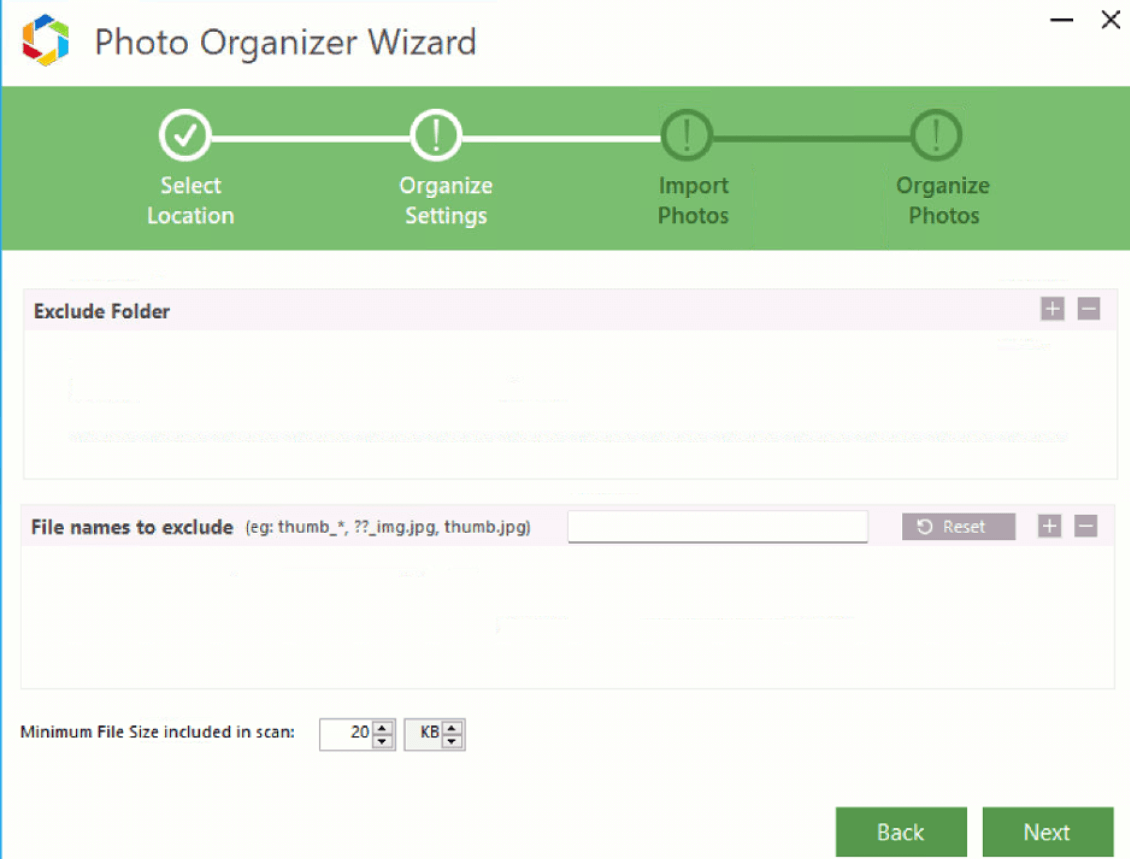
Step 5: Once you have selected, click on Next.
Step 6: All your pictures will import to the new folder created by Photos Organizer Wizard.
Step 7: Wizard will scan your photos and when the process is done, click on the Finish button.

Step 8: Thus, all your photos have shifted to the new folder on the left pane. Photo organizer sorts them in the order of the day, date, month, and year.
Step 9: To save the new folder, tap on a folder and click on the export button.
Step 10: To go to the new file or folder to your images, you have to right-click on images. Moreover, choose Open File Location.
This way, you will be able to see all your files and folders neatly organized.
Also Read: How To Get PDFs Signed By Others Using Adobe Sign
Conclusion
Photo organizer is an excellent tool for sorting out thousands of images, deleting duplicate ones, and sorting them accordingly. Moreover, once you have all the pictures organized and under your control, you will find whichever image you need from whichever day or month you like. So make space for more pictures and manage the old ones on your computer. And if you have any other photo organizing tool for Windows 11, we are all ears.
Also Read: How To Fix 502 Bad Gateway Error On Your Website?


