There is an urgent need to upgrade and install the RAM and SSD of your old laptop. In 2021 and going forward, Windows laptop that is older than two years probably needs an upgrade. This was not a problem till a few years ago. But with the launch of Windows 11 and the sudden shift to work from home, the demand for a powerful laptop is rising.
There are many apps and software that can only run on a faster computer. This means that if you use your laptop for editing and playing games or coding, a higher version of RAM and SSD is inevitable. Nowadays, almost everyone wants to try their hands at editing, playing and streaming games, and developing apps.
Moreover, if you want to install Windows 11 on your laptop but cannot, you must install a higher version of RAM and SSD. It is an easy process if you have the time and tools required. To upgrade, you don’t have to spend money on technicians and chase them around.
In this blog post, I have discussed a step-by-step method of installing RAM and SSD to your laptop all on your own.
Read: How To Install Microsoft SQL Server In Windows 11?
What To Look For Before You Install RAM And SSD In Windows Laptop?
To install RAM on your Windows laptop, you need to take care of three things first.
- Laptop’s maximum RAM capacity and number of slots available for the same
- Type of RAM: DDR4 or DDR3
- Clock Speed
These three are important factors that you should not ignore while buying a new RAM. Thus, to check your laptop’s maximum capacity and slots, you must open the backside and check. You can also go to your laptop’s official website and enter your model details.
If you have any trouble looking up the specifications from the website, you can contact the customer care executive. Moreover, you also have to check if your laptop supports a DDR4 or DDR3 RAM. Both are very different in terms of voltage and pins. For this, you can once again check your older RAM.
Clock speed is the speed or frequency at which it functions. To check this, you can read it from your old RAM or go to the CPU-Z system information website. There you have to download a file on your laptop and go to the SPD tab. You can buy RAM from here.
How To Install RAM On Your Laptop?
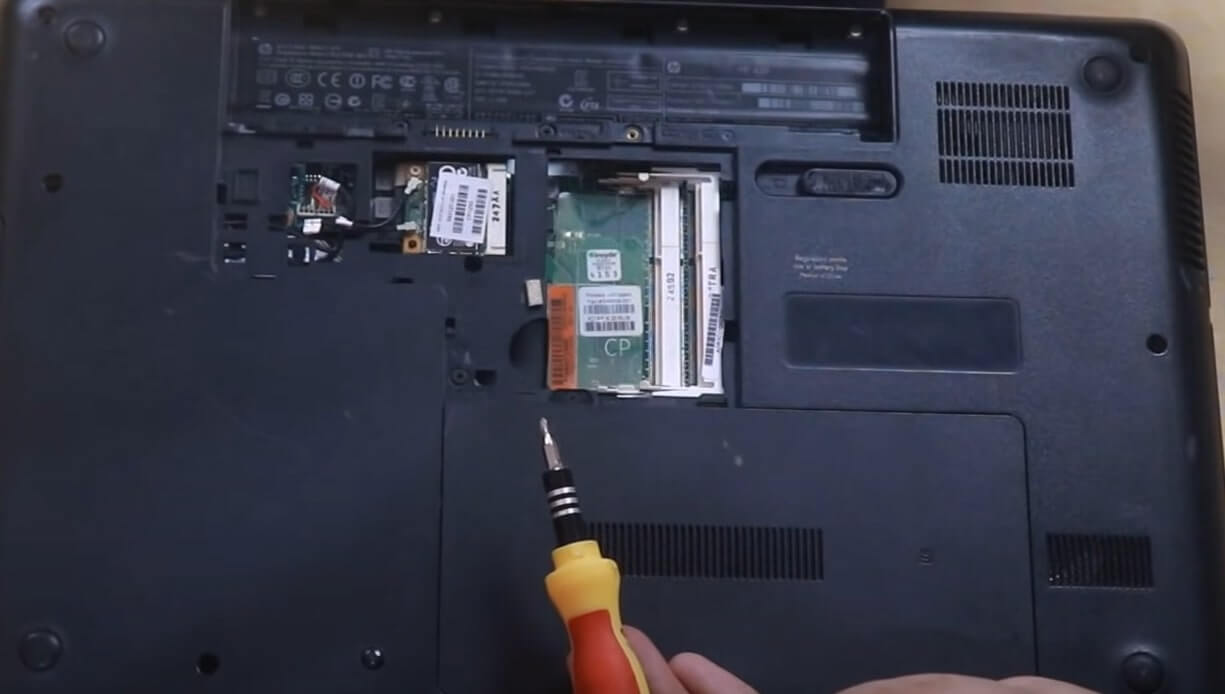
Step 1: Using a screwdriver, unscrew the back of your laptop.

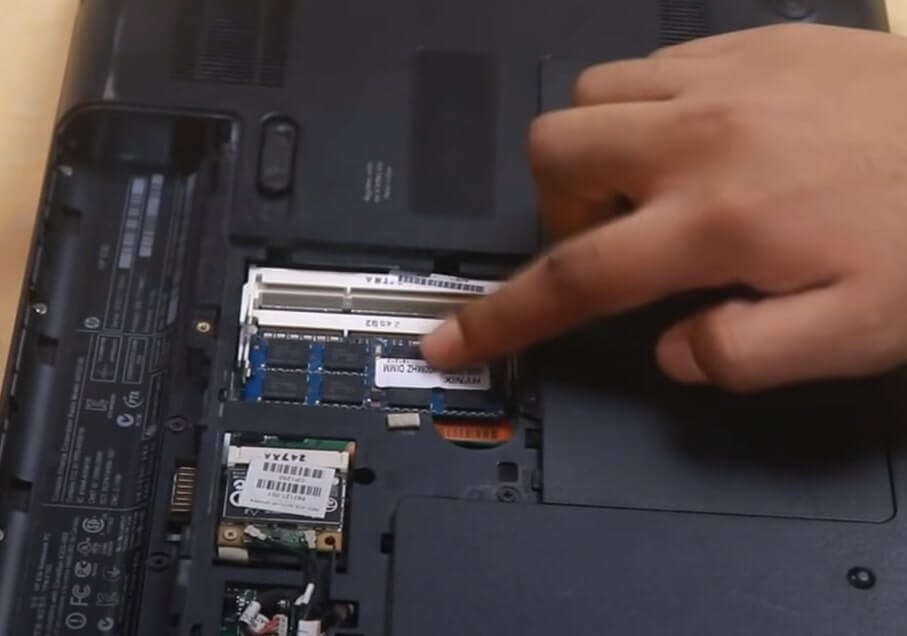
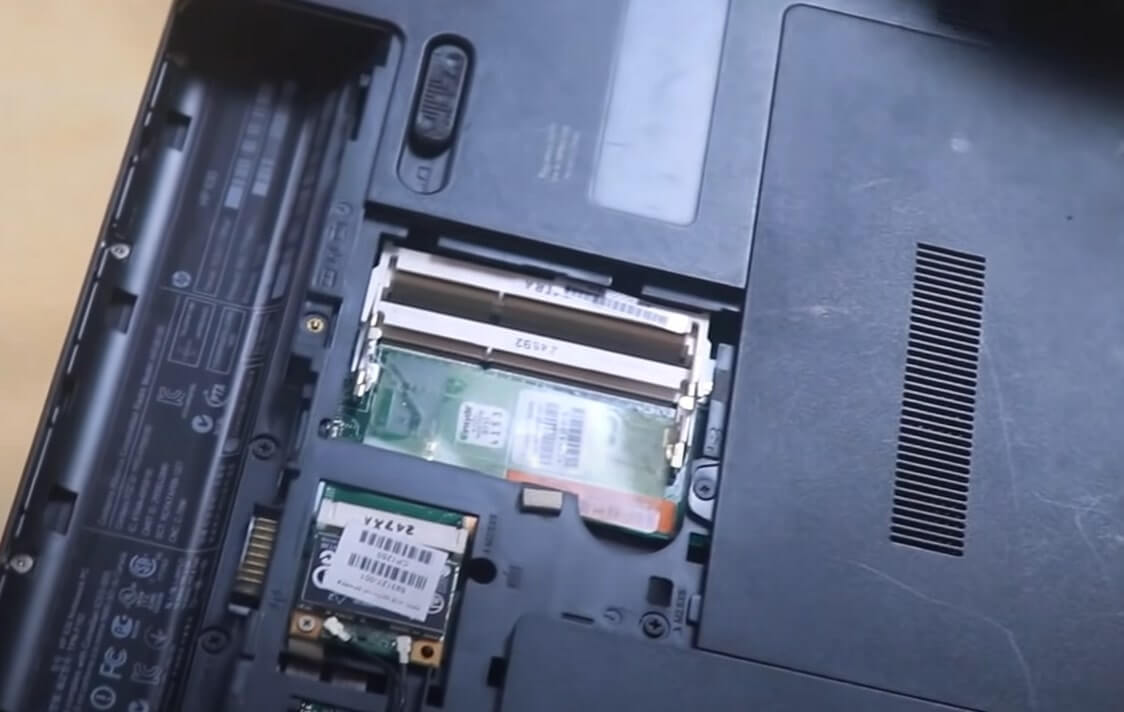
Step 2: Now, remove the old RAM if there is only one slot. Moreover, if there are 2-3 slots, place and align your new RAM into it.

Step 3: Gently apply pressure till you hear a click sound to ensure it is placed correctly.

Step 4: Then reattach the back panel and tighten it with screws.
Step 5: To check, go to the Task Manager and check the memory. It will reflect your new memory now.
Thus, in this way, you can replace or add new RAM on your laptop for better functioning.
How To Install SSD (And RAM) In Your Windows Laptop?
Step 1: You will need a SSD drive, a caddy adapter tray, and a screwdriver toolkit.
Caddy comes in different sizes, notably 12.7 mm and 9.5 mm. To check for the right measurement, go to Device Manager on your computer and DVD/CD drive. Here you will see a model number. Use that information to look up on Google, and you will find the exact measurement.

Step 2: Furthermore, mount the SSD drive into the caddy and tighten it with screws on the back.
Step 3: You have to take out the Blackstrap from the side of the caddy because your laptop already has one.
Step 4: Now, using the screwdriver, unscrew the back cover of your laptop. Moreover, if you have a DVD driver or a dummy DVD driver, you can unscrew only that part.
Step 5: Once again, remove the black strap from the DVD drive as you did for the caddy. Furthermore, attach it to the caddy.
Step 6: Now slide the back to the DVD drive and tighten the screw around the area. You can add it on the motherboard and screw the back panel for those without a DVD drive.
Also Read: How To Install Dolby Atmos In Windows 11?
Check For SSD In Your Computer
After following all the above steps, you have to check if the installation is successful. To do that:
Step 1: Start your laptop and go to My Computer.
Step 2: The DVD drive will no longer be there, and your computer now has three partitions only.
Step 3: Go to Manage under Settings and click on Disk Management.
Step 4: Tap on Okay after popup windows appear.
Step 5: To figure out your SSD, it will appear as an unallocated space with the amount of GB. However, it will not be available on your drive section on My Computer.
Step 6: In this case, go to the unallocated drive and right-click on it. Choose a new sample volume and click on Next.
Step 7: Furthermore, click on Next again and again and finally tap on Finish. This will format the SSD drive, and after some time, you will be able to see it as a readable volume.

Moreover, you can rename it as SSD for clarity and tap on Continue on the popup menu.
Conclusion
You need to keep one thing in mind regarding the warranty of your laptop. If your laptop is still under a warranty period and you need to upgrade your RAM and SSD. In this case, to make sure that the warranty does not become void, only unscrew those pins that do not have any sticker on them.
The warranty will no longer be valid when you remove a sticker from your laptop and open the back panel.
Thus, if, in your case, the screws at the back are not possible to unscrew without messing with the stickers, it is better to contact an authorized service center. You will have to spend money, but at least your warranty will be valid. However, if your laptop’s warranty period is already over, then you can go ahead with installing on your own without any worry.
Must Read: How To Manually Setup Proxy Server In Windows 11?


