Microsoft has introduced a feature that allows you to run Android apps on your Windows 11. It is possible to download Android apps using Amazon Appstore which does not include a lot of apps at this moment.
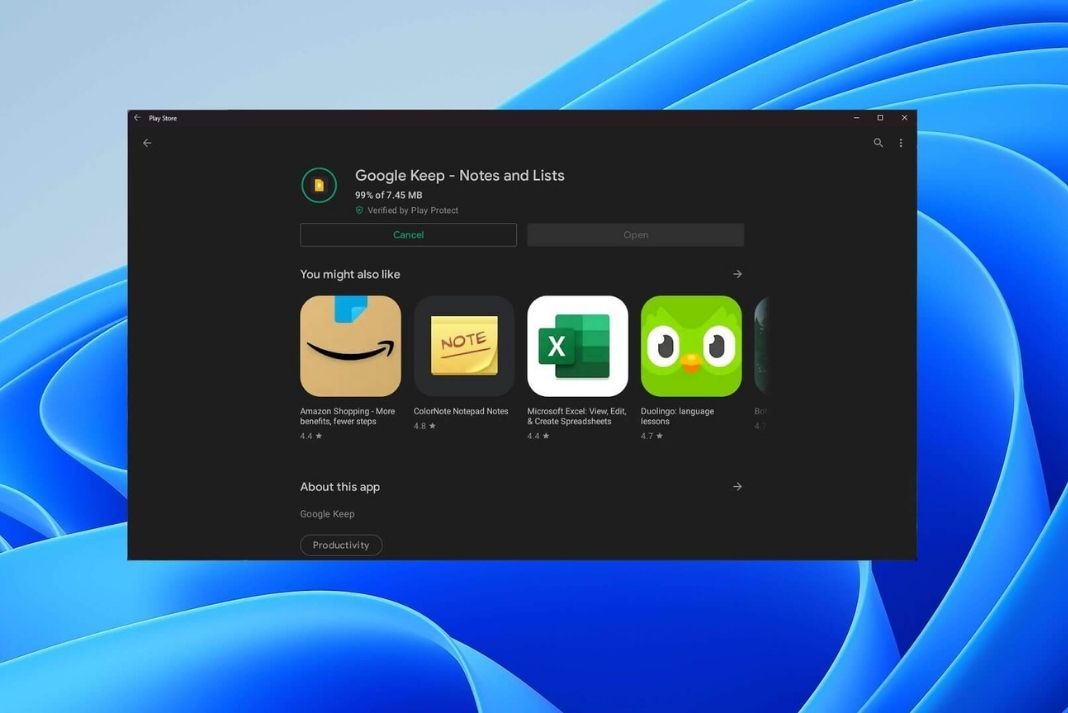
But worry not; it is also possible to install Google Playstore on your Windows 11 PC so that you can download any of the apps from it. If you are curious about how to download Google Playstore on your Windows 11 PC, you don’t have to go any further. In this guide, we are providing a detailed method of installing the Google Play Store on your PC. So let’s get started.
Also Read: How To Set Up And Manage VPN On Windows 11
Requirements to Install Google Play Store on Windows 11
Before installing the Google Play store, you need to download the following files and packages:
- Download the GApps package from the Open GAPPS website.

- Next up, you need to download Windows Subsystem for Linux (WSL 2).
- You also need an app to extract the Windows Subsystem for the Android MSIX package.
- Finally, you need to download the WSAGA script developed by ADeltaX from GitHub.
Also Read: How To Split Screen In Windows 11 For Multitasking?
Download Windows Subsystem for Android (WSA) Package from Microsoft
If you don’t have an MSIX package of Windows Subsystem for Android, follow the steps below to download one:
- Go to the RG-Adguard website and select “ProductID” in the drop-down menu.
- Now type WSA’s Microsoft Store product ID, 9P3395VX91NR in the text box and select ‘Slow’ in the text box and click the OK button.
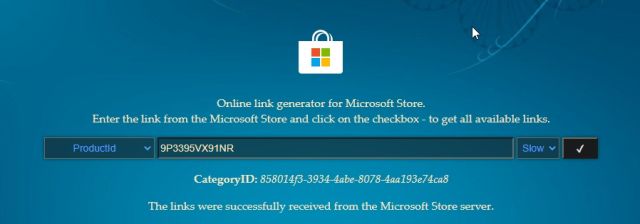
- Scroll and search for the ‘msixbundle’ file which is about 1.21 GB in size in the list.
- Once you find it, right-click it and choose ‘Save Link As’ to download it.
How to manage the WSA files on your Windows 11 PC
After the files get downloaded, you need to arrange the files before going further. Follow the steps below to do it:
- As mentioned above you need an app such as 7-Zip to extract the files. But you cannot open the MSIX package from the 7-Zip context menu; you need to extract the file from the software itself.
- After extracting the MSIX package, look for a file ending with the suffix ‘“Release-nightly.msix“.
- You will find two files one ARM64 and another ending with x64. Tap x64 and open the file.
- Next, create a folder ‘WindowsSubsystemAndroid’ in the C: drive. Keep in mind not to leave any spaces in the middle.
- Now copy the bundle’s content from the 7-Zip window except the following files: AppxMetadata, AppxBlockMap.xml, AppxSignature.p7x, and [Content_Types.xml].
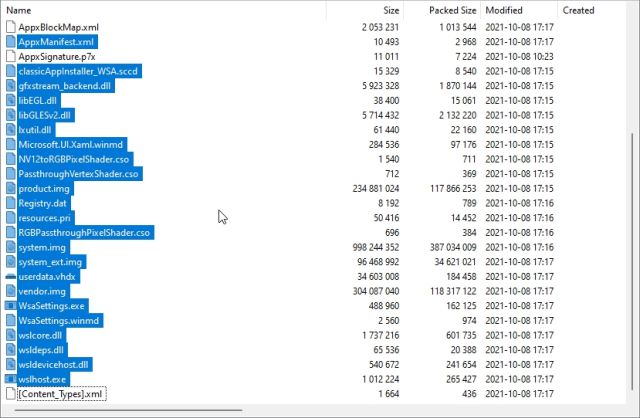
- Now paste all the copied files in the ‘WindowsSubsystemAndroid’ folder.
- Next in a similar way, create a GAppsWSA folder in the C: drive.
- Now it’s time to extract the WSAGA script we’ve downloaded before and paste the folder’s content in the GAppsWSA folder.
- Finally, copy the GApps (pico) ZIP file you’ve downloaded in the first step. Now search for the #GAPPS folder in GAppsWSA and paste the GApps ZIP in it.
Note: You don’t need to extract the ZIP file.
- Now copy the vendor.img, system.img, system_ext1.img, and product.img from WindowsSubsystemAndroid folder.
- Head to the GAppsWSA folder again and paste these files into the #IMAGES folder.
Read: How To Install Windows 11 On An Unsupported CPU
Patching WSA to install Google Apps on Windows 11
- After arranging all the files as explained, head to the Linux on Windows Terminal. Enter the ‘sudo su’ command and press enter key. Enter your Linux password to grant root permissions to Linux.
- Type the following commands to download some packages in Linux. Press Y to initiate the installation process.
apt install lzip unzip
apt install dos2unix
- Now move to the GAppsWSA folder in the C: drive by typing the commands mentioned below:
cd ..
cd ..
cd GAppsWSA/
- After accessing the GAppsWSA folder, type these commands one at a time and press enter key.
dos2unix apply.sh
dos2unix extend_and_mount_images.sh
dos2unix extract_gapps_pico.sh
dos2unix unmount_images.sh
dos2unix VARIABLES.sh
dos2unix
- After the above commands, you need to enter the below commands as well.
./extract_gapps_pico.sh
./extend_and_mount_images.sh
./apply.sh
./unmount_images.sh
- Next, head to the #IMAGES folder inside GAppsWSA and copy-paste all the four IMG files in it.
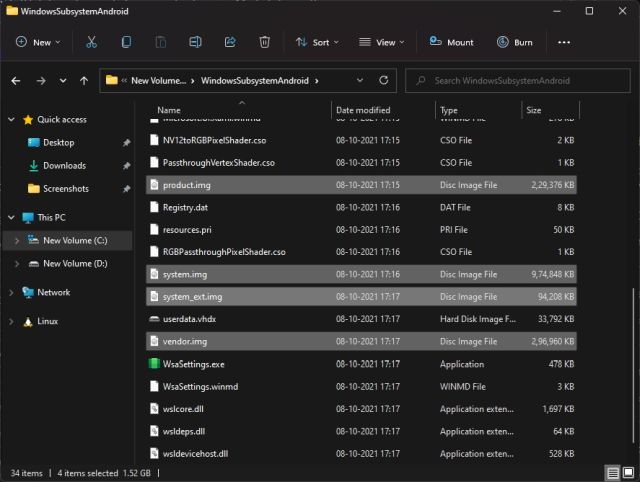
- Now move to the WindowsSubsystemAndroid folder and press the ‘Ctrl+V’ key followed by the ‘Replace’ button.
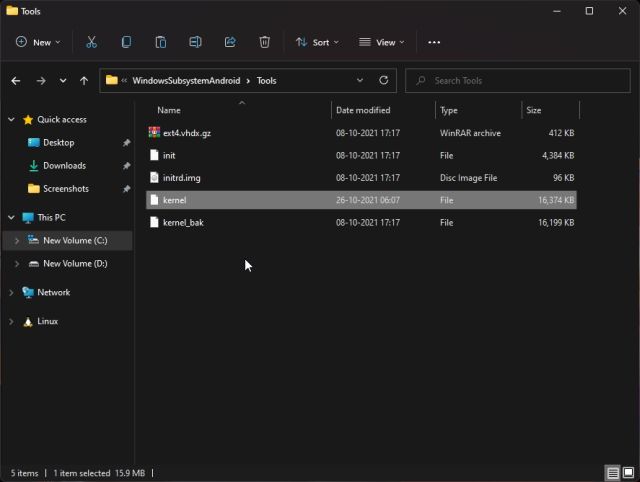
- Again, head to GAppsWSA and then the misc folder. Now copy the kernel file from here.
- Finally, access the WindowsSubsystemAndroid folder and then the Tools folder in it. Look for ‘kernel file here and change its name to kernel_bak. After that paste the ‘kernel’ file we copied in the previous step.
Install Google Play Store on Windows Subsystem for Android
Now it’s time to install Google Play Store on Windows 11. Follow the steps below to do it:
- Type ‘PowerShell’ in the search box and right-click the first suggestion and choose ‘Run as Administrator’.
- Now type the below command and press enter key.
- Add-AppxPackage -Register C:\WindowsSubsystemAndroid\AppxManifest.xml
- This will install the modified version of WSA on your PC.
- If you encounter any errors, go to Windows Settings > Privacy & security > for developers and turn on the toggle next to it to enable developers mode.
- Now try running the above commands once again. It will work fine this time.
- After this go to the Start menu and look for Windows Subsystem for Android. Open the app and follow the further steps.
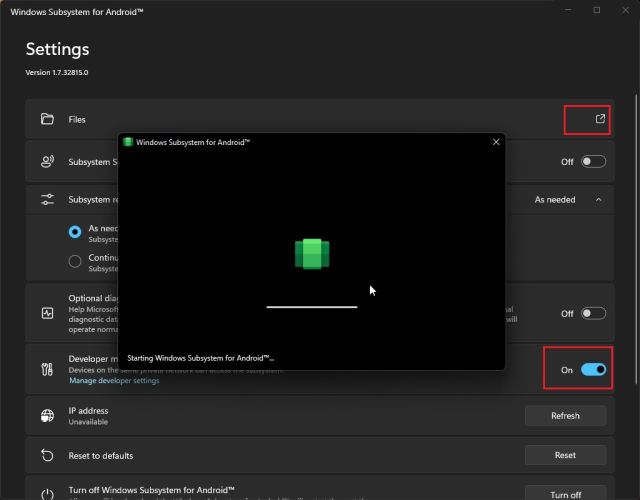
- Now enable the ‘Developer mode in the WSA mode and note down the IP address you will assign the container. Next, click the ‘Files’ option to start running the WSA on Windows 11. After this, you can close the window.
- Now head to the Developer options menu and choose the “Wireless debugging” option. Write down the IP address you see under wireless debugging settings.
- Now set up the ADB to connect the WSA on Windows 11.
- After doing it, type CMD in the File Explorer and type the following command.
adb connect [ipaddress]
Replace the ipaddress with the one you’ve noted.
If it fails, run it again. It will surely work this time.
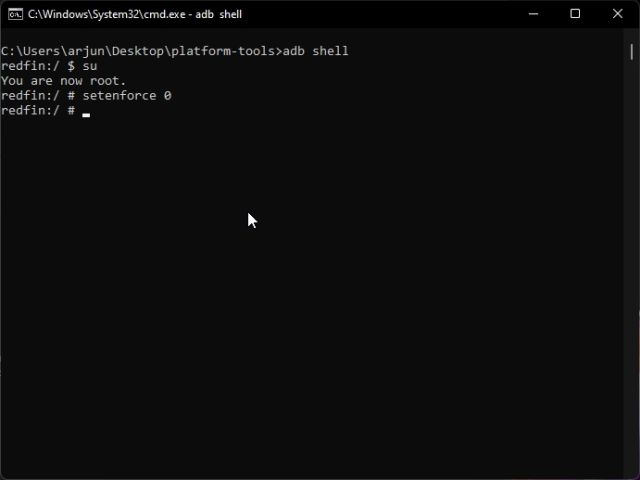
- Now enter the Shell Mode of WSA and use the superuser rights by entering the following commands one by one:
adb shell
su
- You’re almost done. Type the below command which will modify the SELinux mode to permissive.
setenforce 0
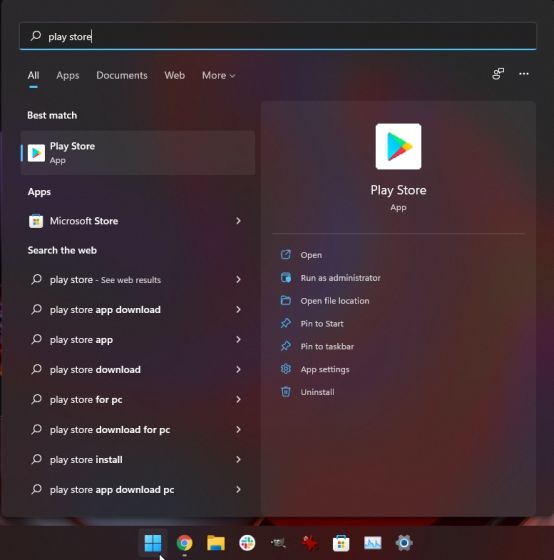
And done! Now you can search for Google Play Store in the Start menu.
Conclusion
That is how you can download and install the official Google Play Store on your mobile. Now open it and log in the Google Play like you would on your mobile phone. You can directly download and install any apps from here on your Windows PC. If you have any questions, let us know in the comments below.
Must Read: How To Use Snap Layouts In Windows 11?


