Windows Defender is Microsoft’s built-in anti-virus to protect your operating system. Think of it as a boundary wall to your house. It stops viruses and malware affecting your computer till this message shows up “Windows defender is turned off by group policy.” Uh-Oh! There could be multiple reasons that can lead to this issue.
Also Read: How To Fix Bluetooth Mouse Not Working In Windows 10?
Methods To Unblock Windows Defender Blocked By Group Policy
Hackers and cybercriminals are aware of Windows defender, which makes it vulnerable to the online world. One of the reasons you see the above message on your screen is hackers trying to enter your system. When cybercriminals want to hack into your computer to access other computers in your network, blocking Windows Defender is their first step of action. To undo this, we have curated a list of methods below for you to try out.
First things first, if Windows Defender is blocked by group policy, you should try unblocking it from there. To do that:
For Windows Pro users
Step 1: Simultaneously press the Windows button + R. It will open the run dialog box.
Step 2: Type gpedit. msc and tap on Run.
Step 3: On Windows 10, you can also simultaneously click on the Windows button + Q, which will open Cortana.
Step 4: Once again, enter gpedit. msc and press the enter key.
For Windows Home users
If you are using the home version of Windows 10, you will not be able to access the group policy editor. And therefore, you will have to try out these methods.
1. Add Gpedit.masc Installer
To install this software tool, your computer needs some changes and a NET framework version higher than 3.5.
Step 1: Go to C:\Windows\SysWOW64 and copy GroupPolicy folder, Group Policy User folder, and gpedit. msc files.
Step 2: Open C:\Windows\System32 and paste the above files.
Step 3: Download Add Gpedit.msc ZIP. You can do it from Deviantart user drudger by opening an account in the DevianArt account.

Step 4: From the installation tool, find C:\Windows\Temp\gpedit.
Step 5: You will need to adjust your installation if your username is more than just one word.
Step 6: On x64.bat or x86.bat, right-click on whichever is compatible with your computer and tap on Open.
Step 7: Go to Notepad on Windows 10 and add respective quotes to six places. For instance, change %username% to the username of your system and so on.
Step 8: Click on Save and right-click on BAT file. Moreover, tap on Run as administrator.
Tip: If you see the message “MMC could not create snap-in,” you can replace %username% with %userdomain% \%username%.
2. GPEDIT Enabler BAT
If the previous option didn’t work for you, then try through the enabler.bat.
Step 1: Go to Notepad and type the code as shown below. After writing the code, you can save the file as Enabler.bat.
Step 2: Right-click on the BAT file you saved right now and chose to Run As Administrator.
Step 3: The file will go over various installations. The text Press any key to continue appears at the bottom.
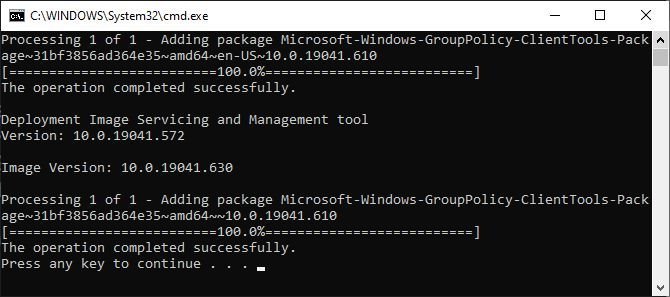
Now open the gpedit. msc by following the instructions given on the screen or by using the Run window.
Also Read: How To Set Up 3 Monitors In Windows 10?
Method 1# Use Group Policy
Step 1: Go to Group Policy Editor and choose Local Computer Policy.

Step 2: Under this section, go to administrative templates and then to Windows Components.
Step 3: Choose Windows Defender. Furthermore, from the right panel, double-click on the option Turn Off Windows Defender Antivirus.
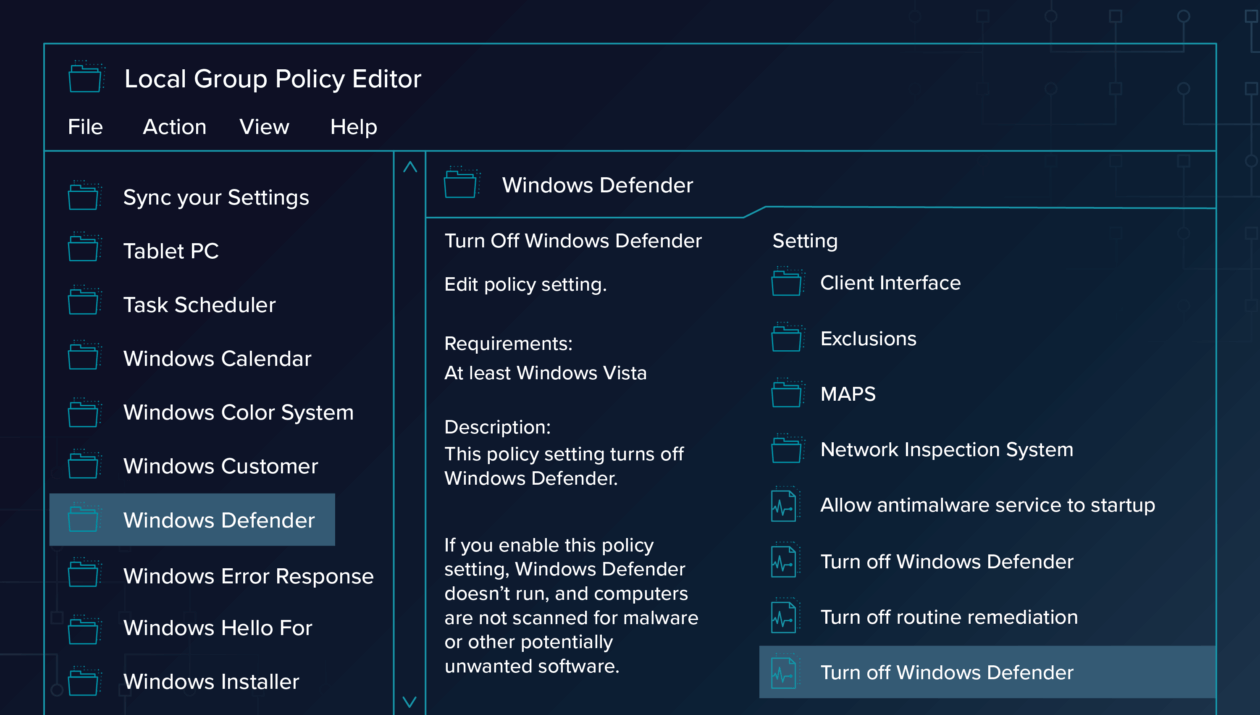
Step 4: Most probably, this option is disabled. Thus, you need to access it as a local administrator to make changes and enable it.
Once you can make the changes, your system will be able to run the Windows Defender.
Also Read: How To Fix Amazon Prime Video When It’s Not Working
Method 2# Make Changes In User Settings
Step 1: From the start button, write Windows Defender and double-click the icon to launch it. Windows Defender security system will look different on different versions of Windows.
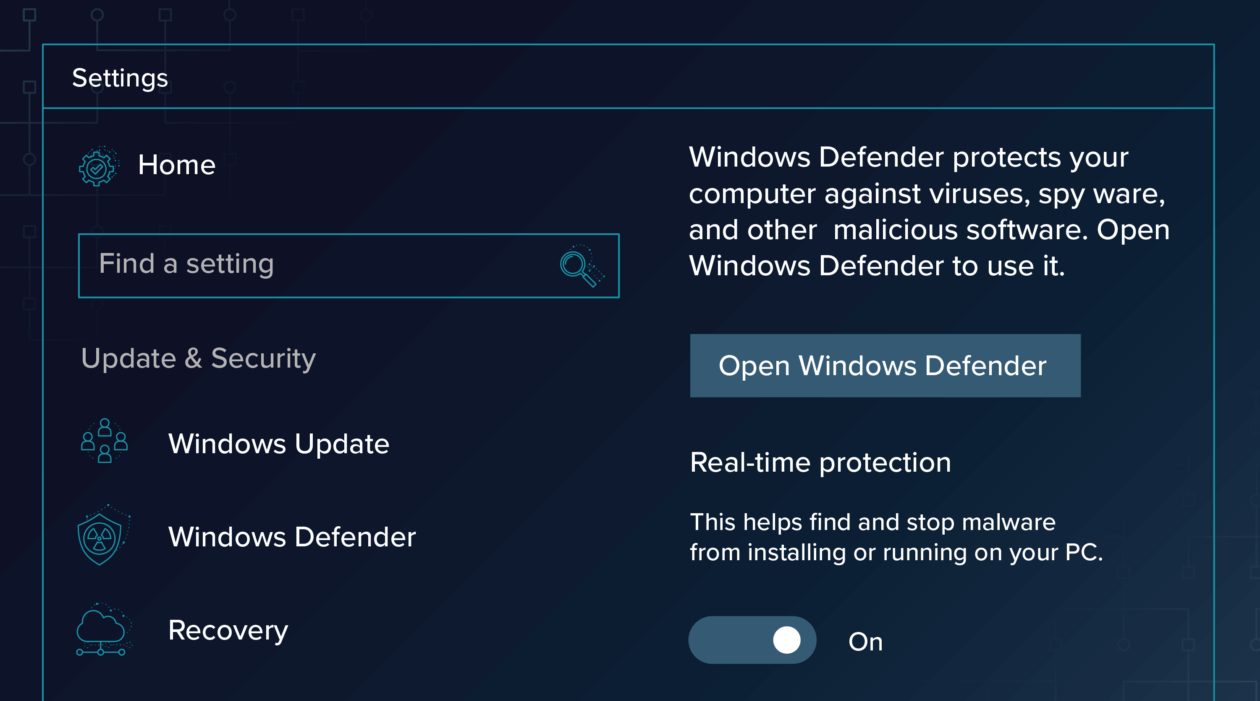
Step 2: Tap on settings and choose Real-Time Protection. Moreover, ensure that the option is switched on.
Method 3# Command Line
Step 1: On the Start button, choose Power Shell by right-clicking on it.
Step 2: Enter the command Set-MpPreference – DisableRealTimeMonitoring 0 and tap on the Enter key.
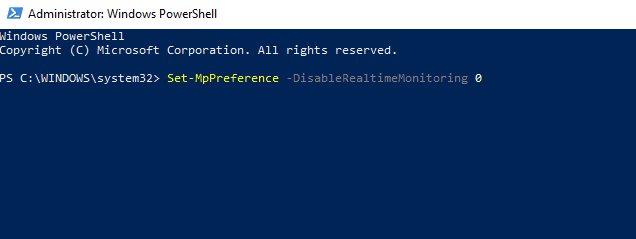
All you need to do is enter a few command lines shown as above and press enter for an advanced user. That is all one needs to do to activate and deactivate Windows Defender.
Method 4# Using Command Prompt
Step 1: Press Windows key + S. Furthermore, type cmd and tap on Run as administrator from the keyboard. This will open the command prompt dialog box.

Step 2: On command prompt, type “HKLMSOFWAREPoliciesMicrosoftDefender”/ vDisableAntiSpyware. Tap on entering.
Method 5# Using Registry Editor
If the previous solutions did not work, then you can try editing the registry editor.
Step 1: From the keyboard, simultaneously press Windows key + R and enter regedit. Moreover, tap on Okay.
Step 2: Follow to the path HKEY_LOCAL_MACHINESOFTWAREPoliciesMicrosoftWindows Defender.
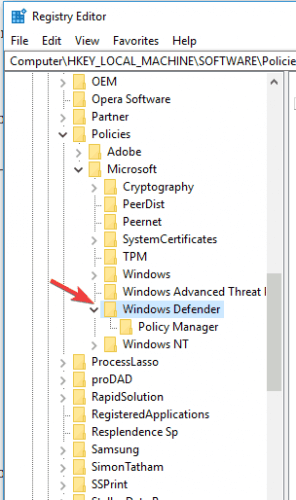
Step 3: In the DisableAntiSpyware option, delete the value. If you see two options, i.e., REG-DWORD under type and DWORD 32-value under data, double click on the first option and delete the value or set it to zero.
Method 6# Check For Conflicting Programs
Sometimes malware can keep Windows Defender switched off. And prevent you from trying to switch on no matter how much you try. Therefore, the ideal solution would be to run another anti-virus to remove the infection. Moreover, some third-party anti-virus can stop the Windows Defender while working. In this case, you have to find an anti-virus that works well with Windows Defender.
Conclusion
Windows Defender is the first line of defense for your computer. Therefore it must be activated. It helps in detecting threats and providing additional security to your computer.
Also Read: How to Secure Your WordPress Website in 5 Simple Steps


