Struggling with the no login screen issue in Windows 11? Let’s see how to fix it easily.
Windows 11 is the latest version of the Microsoft operating system and the most advanced Windows operating system has ever been. However, similar to its predecessors, it is not immune to bugs and issues. Thus, users are continuously facing several sorts of problems after they’ve upgraded to Windows 11.
We are constantly troubleshooting the common issues which are bugging the Windows 11 users. In the same context, several Windows 11 users have reported that they are facing problems in accessing the login screen after their Windows 11 PC reboots. There can be many reasons for this issue, the most common one being buggy software, the loading of error-prone apps on startup, and even a faulty user account on your PC.

To help you out in troubleshooting no login screen issue on Windows 11, we have brought several methods at your disposal. Keep scrolling downwards to know about them.
Also Read: 7 ways to fix Microsoft Store Not Opening on Windows 11 issue
Reboot the login screen
First of all, try rebooting the login screen of your Windows 11 PC. Many times, there is a great chance that a random glitch is preventing you from accessing the login screen of your Windows 11 PC. So go ahead and use the Ctrl + Alt + Del password to access the sign-in interface.
Now choose the local account you want to log in to and enter your password.
Please remember that it is just a workaround and not a permanent solution to fix the login issue.
Getting Started
To execute any of the fixes that are written below, it is essential to boot your Windows 11 in Safe Mode. If you are not aware of how to reboot your Windows 11 in safe mode, do not worry! To help you out with this, we have already crafted a how-guide to explain how you can reboot your Windows 11 in safe mode. So go ahead and check it out before going further with the steps.
How To Boot Windows 11 In Safe Mode
After you successfully reboot your Windows 11, go ahead and try the following methods one by one.
Update your Windows 11 PC
First of all, try to update your current version of Window. If by any chance your current version is obsolete or bug-ridden, this step will sort out both the problems. Here’s how to update your Windows 11 PC:
- Use the ‘Windows + I’ shortcut to open the Settings App on your Windows 11 PC.
- Now move towards the left pane and click on the Windows Update tile.
- Next, click on Check for Updates on the right pane and Windows will begin looking for any pending updates.
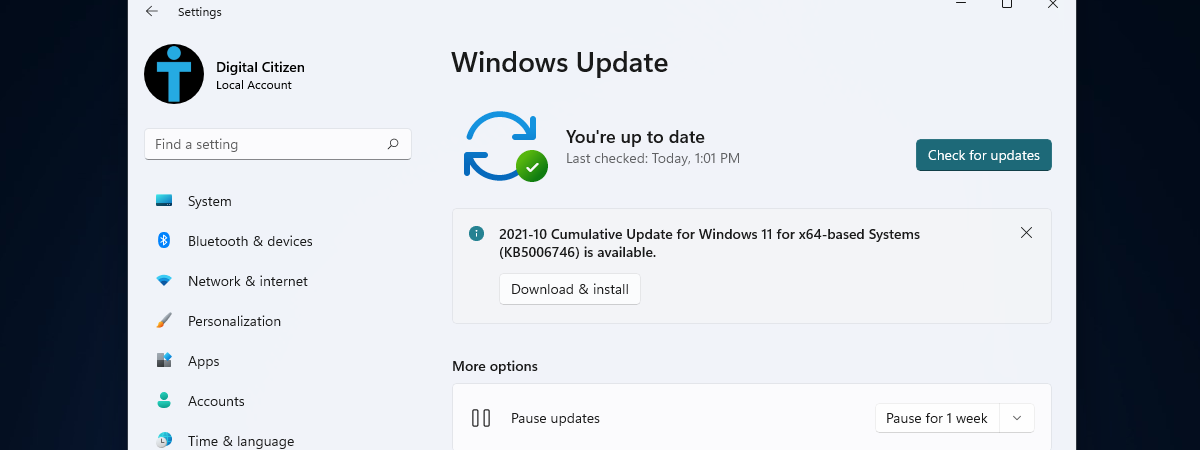
- If any update is found, Windows will download and install it automatically. Now restart your PC and see if the issue is solved.
Disable Login Password Screen
- Access the Run dialog box using the Windows+R shortcut.
- When the dialog box pops up, enter ‘regedit’ in the command line and press the enter key.
- A User Action Control will open up on your PC, press the Yes button to continue.
- When the Registry Editor will open, copy-paste the following address bar followed by the Enter key.
Computer\HKEY_LOCAL_MACHINE\SOFTWARE\Microsoft\Windows NT\CurrentVersion\Winlogon - Now see if a DefaultUserName string exists. If you don’t find it, right-click anywhere in the space to open the context menu
- Now hover New > String Value. Now rename this as DefaultUserName.
- Double click this string and put your account name under the Value Data followed by the OK button.
- Similarly, create a new string value with the name DefaultPassword
- Double click this string and put your account password under the Value Data followed by the OK button.
- Finally, create an ‘AutoAdminLogon’ string if not already present here using the same way.
- Now double click it and enter 1 in the Value data field.
- Finally, close the Registry Editor window.
In case you want the login screen back, just delete these strings.
Disable Fast Startup feature
The fast Startup feature helps cut down the time to reboot Windows. To achieve this, it does not fully shut down your PC and the apps keep running in the background.
However, the Fast Startup feature has a bad reputation of doing more harm than good. So it’s recommended to turn this off since you are facing login issues.
- Use the Windows + S shortcut to bring up the Search menu.
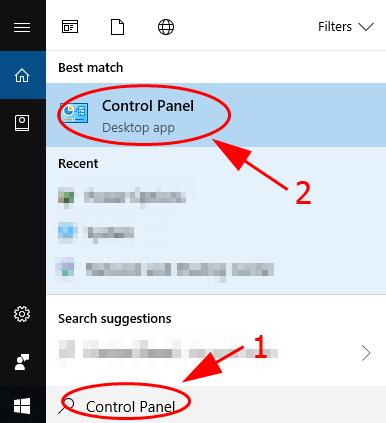
- Now type Control Panel in the search bar and double-click on the first search result.
- In the Control Panel window, click to open the ‘System and Security’ category
Next, click on the Power Options and then you can choose what you want to power buttons to do for you.

- Now choose on the Change settings that are Currently Unavailable option.
- Next, uncheck the checkbox for ‘Turn on Fast Startup (recommended) and then press the Save Changes button.
Go for a Startup Repair
This method will only work if you were successful in rebooting the login screen using the Ctrl + Alt + Del shortcut. Besides, if you accidentally shut down your machine thrice to reboot your PC in safe mode, Windows has already done the Startup Repair of your machine. However, if you still want to perform the Startup Repair, here’s how to go about it:
- Hit the Windows key to bring up the Start menu on your PC.
- Now press the Power button along with the Shift key and then click the Restart button.
- This way your system will load the Windows Recovery Environment.
- In the Windows Recovery Environment, click on the Troubleshoot option
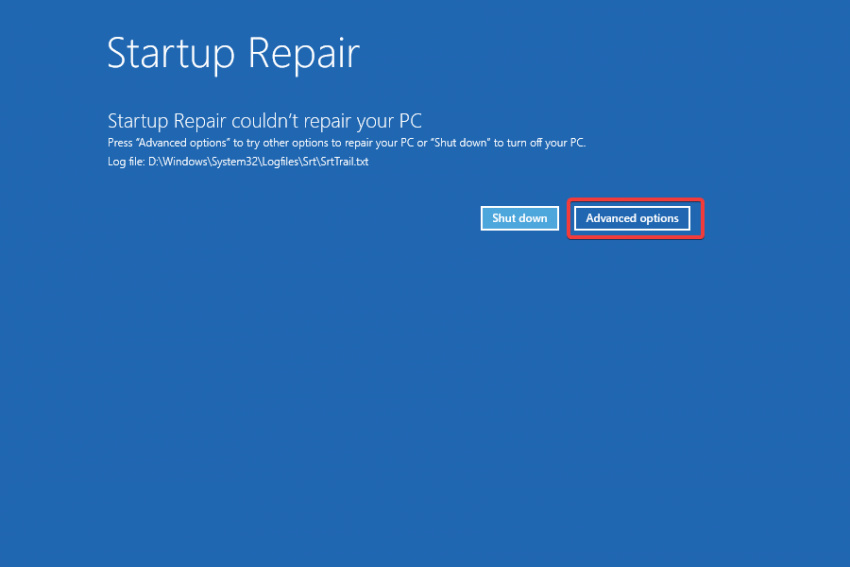
- Now choose Advanced options followed by Startup Repair.
- Next, choose a user account to go further.
- Now put in your password and press the Continue button to begin the Startup Repair of your Windows 11 PC.
Wait patiently until the start repair is completed.
Disable the Startup Apps
There are several apps on your PC that automatically load when you reboot your PC. There is a good probability that an error-prone app is creating issues in the login screen on your Windows 11 PC. To remove this possibility, you should disable these apps so that they don’t launch at startup. Here’s how to disable the Startup apps on your Windows 11 PC:
- Bring up the task manager using the ‘Ctrl + Shift + Esc’ shortcut.
- Switch to the Startup tab in the Task Manager window.
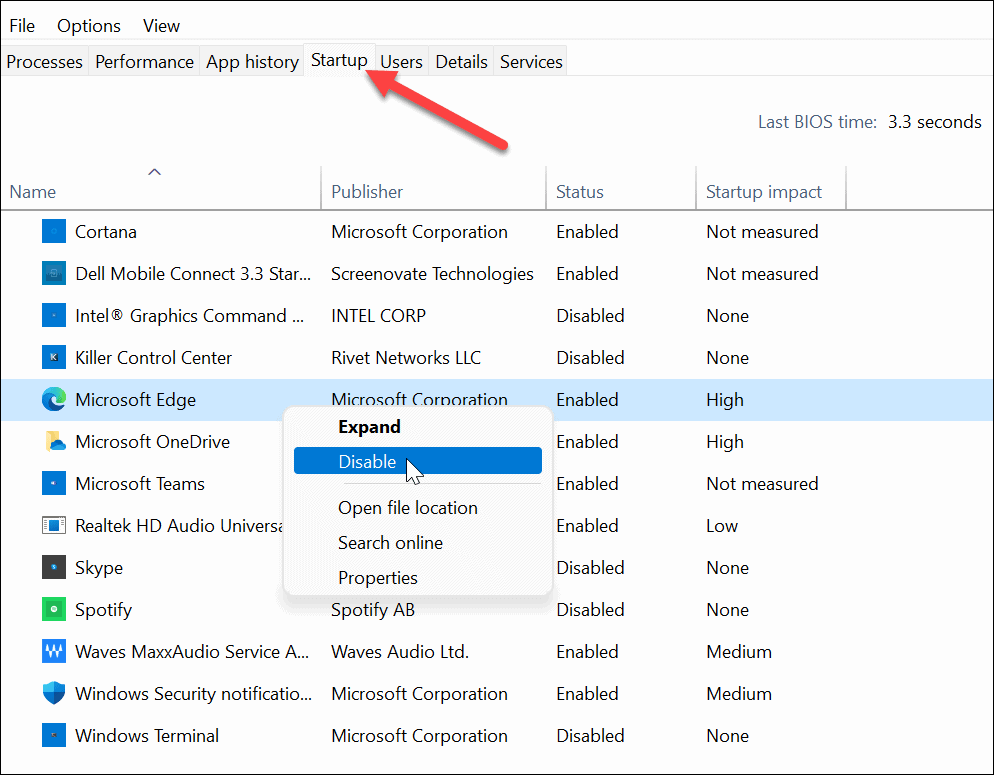
- Now right-click each program present here and click on Disable option present in the context menu.
That’s it, now these apps will no longer load automatically when you will reboot your Windows 11 PC.
Perform a system restore
If the above method did not work for you, the simplest method that is gonna fix the issue is performing a system restore. System Restore takes your Windows 11 PC to the point where your PC was in a stable state.
Note: Performing a system restore can wipe off some of the recent tweaks in the settings and even uninstall the newly installed apps, but don’t worry it will not affect your data saved on your system.
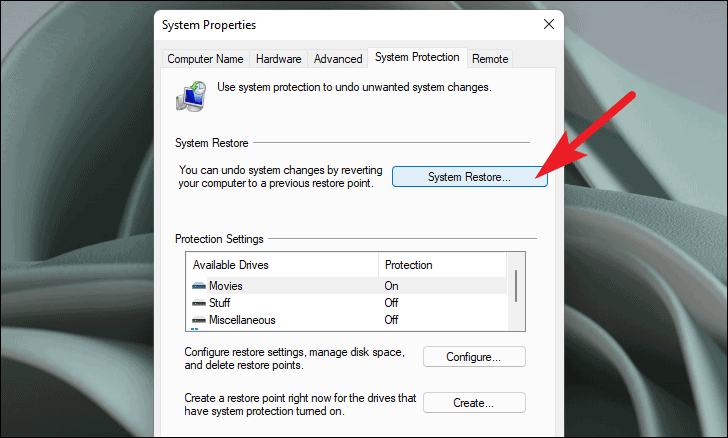
Here’s how to perform a system restore on your Windows 11 PC:
- Use the Windows Key + R shortcut to bring up the Run dialog box on your Windows 11 PC.
- Type ‘stud’ in the command line and press the Enter key or click the OK button.
- This will bring up the System Restore window. Press the ‘Next’ button to proceed forward.
- Now choose the latest restore point listed here press the Next button.
- Finally, press the Finish button.
- Now your PC will begin rebooting your Windows 11 PC and will automatically restore to the restore point you’ve chosen before.
Conclusion
This was a quick guide on fixing the no login screen issue on Windows 11. If you’ve followed every method we’ve listed here, your problem will be solved by now. If you found the article to be helpful, don’t forget to share it with others.
Also Read: How To Improve Sound Quality On Windows 11 PC


