A professional profile picture leaves a very good impression on others. Whether you trying to create your online brand or going to create a social media profile, profile pictures can help you represent yourself better. They are a great way to show your individuality and personality to others online. So, in this article, we will be discussing how to change profile picture in Zoom.
It is always advisable to put your picture as a profile picture. It helps you to create an effective online profile. When it comes to attending online meetings, there is rarely anyone who has not heard about Zoom. Zoom is an app that helps users meet and conduct conferences online.
In this article, we will be discussing how to change profile picture in Zoom.
Table of Contents
- Change profile picture in Zoom
- Update/Edit your Zoom profile
- Add participants in a Zoom meeting
How to change profile picture in Zoom
- Go to the Zoom web portal.
- Sign in to your Zoom account.
- Click on the Profile option on the left side.
- Click on your profile picture.
- Then click on the Change option on the bottom.
- Select a new profile picture.
- Click open.
- Then, click Save.
That’s it. This is how you can easily change your profile picture in Zoom.
Also Read: 7 Tips For Using Microsoft Teams, Zoom And Google Meet
Now, let us discuss the steps to change the profile picture in Zoom in detail.
As already mentioned, the profile picture is a good way to leave a great impression on others. If you are not happy with your present profile picture on Zoom, you can luckily change that. So, let us learn how to change profile pictures on Zoom (with screenshot).
1. First of all, you need to go to the Zoom web portal.
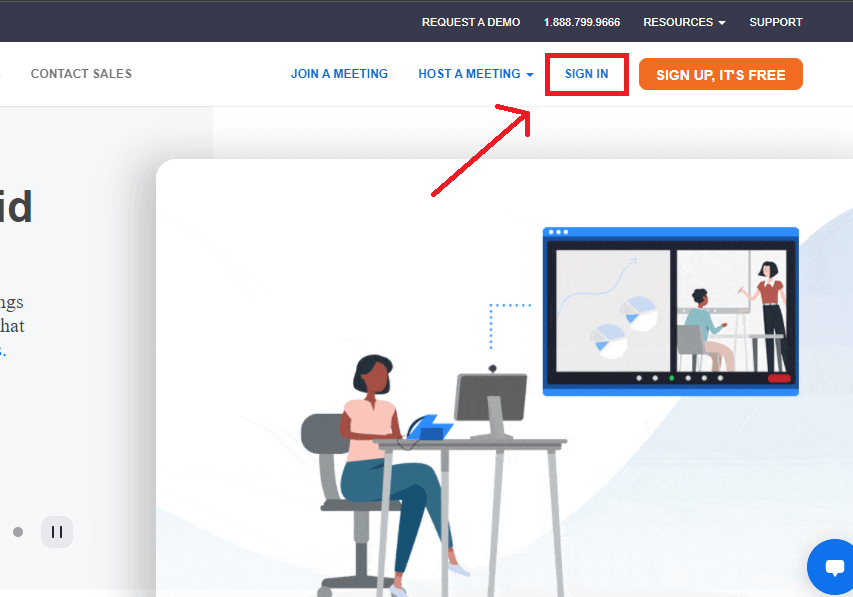
2. Sign in to your Zoom account by clicking on the Sign In on the top-right corner.
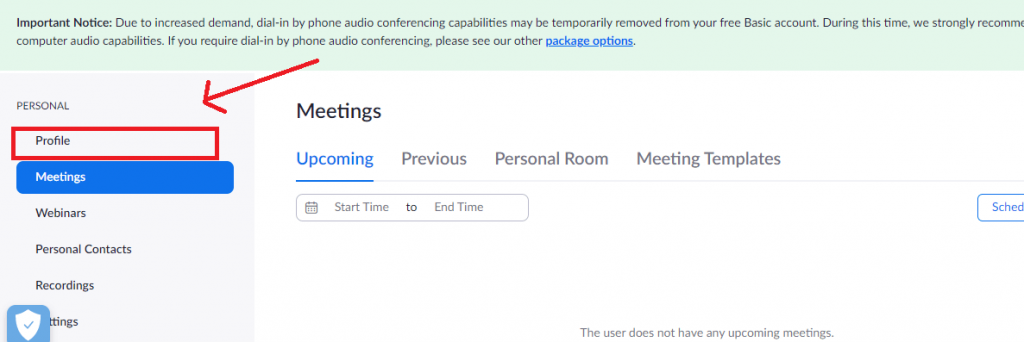
3. Upon successful login, click on the Profile option from the number of options appearing on the left side as given below in the screenshot.
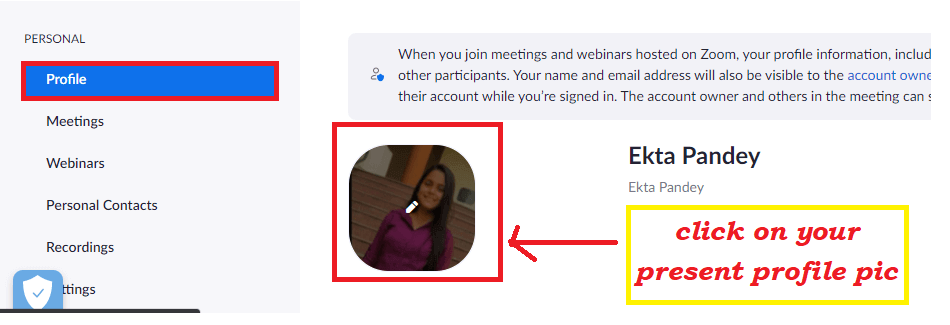
4. Then, hover over your current profile picture and click o it. Then, the Change Profile picture window will open up.
6. All you need to do is to click on the Change option at the bottom as shown below in the screenshot.
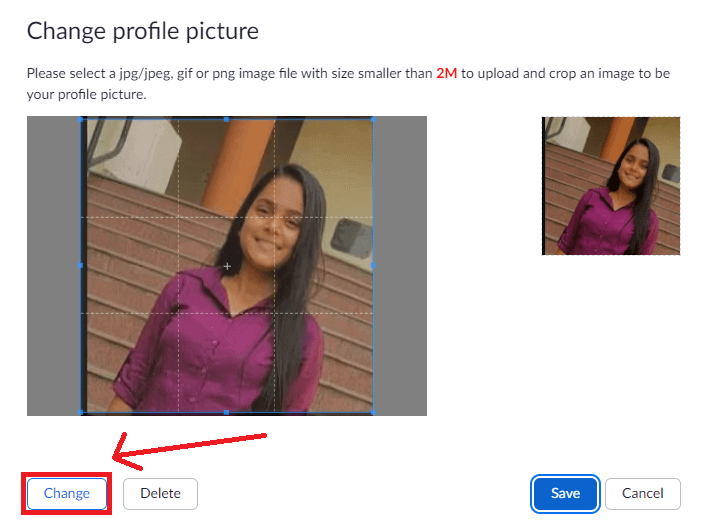
7. Then, you need to select your new profile picture from your PC and then click on the Open option.
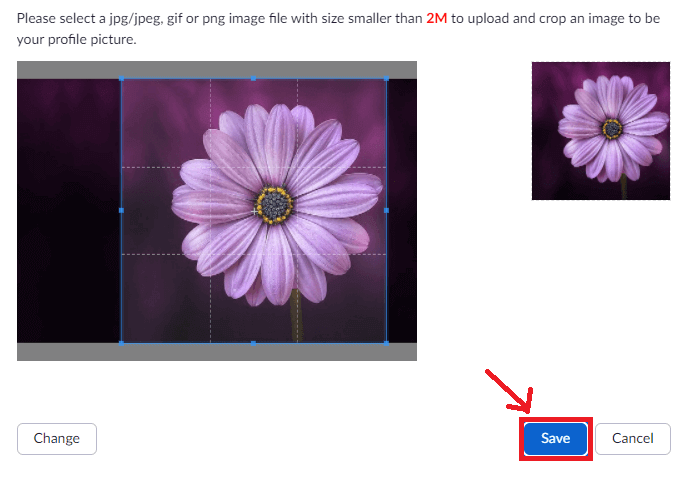
8. Then, your selected profile picture will load on the Change Profile Picture windows.
9. Lastly, after adjusting the picture in the grid, click on Save.
Congratulations! You have successfully changed your profile picture on Zoom. So, follow these steps to keep updating your latest pictures as profile pictures on Zoom.
Also Read: How To Fix Zoom Not Working On Mac
How to update/edit your Zoom profile
Now, let us discuss how to update or edit your Zoom profile. By accessing your Zoom profile, you can change or edit various details related to your Zoom profile such as name, email address, job title, phone number, Personal meeting ID, etc. So, below is how to do this.
- Open the Zoom web portal on your PC.
- Now, sign in to your Zoom account by tapping the Sign-in icon on the top-right corner.
- Enter your credentials and click Sign in.
- Then, click on the Profile option on the left side.
- Next, various details related to your profile will display on the screen.

6. You can make the required changes by just clicking on the Edit option next to every field.
For example, if you want to change your name, just click on the Edit option next to your name on the right-side as given below in the screenshot. Likewise, if you want to bring any other changes, you can do them effortlessly.
Also Read: How To Use Immersive View In Zoom
How to schedule a Zoom Meeting
If you want to schedule a Zoom Meeting but don’t know how to do that, we have got you covered. Zoom is an incredible tool to organize and participate in virtual meetings and conferences. So, the steps to do this are given below:
- Download and install the Zoom application on your PC.
- Open the Zoom app and Sign In to your Zoom account.
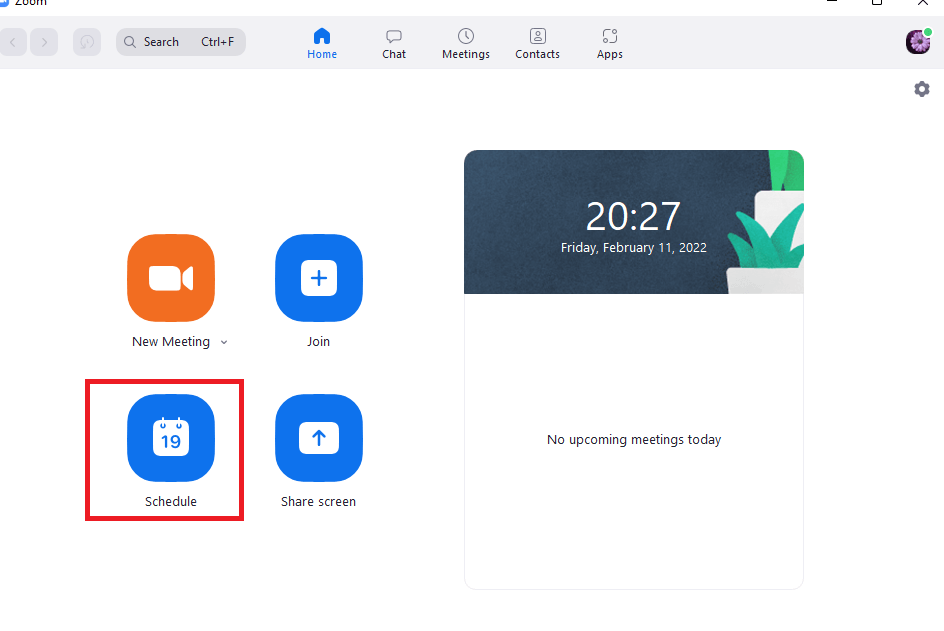
- Next, click on the Schedule option on the Zoom client window as shown below in the screenshot.
- Now schedule a meeting option that will open up.
- Enter the details related to the meeting in their respective fields.
- After successfully and correctly filling in all the details, click on the Schedule option on the bottom.
- Hurray! You have successfully scheduled a Zoom meeting.
How to add participants in a Zoom meeting
So now, we will be discussing a few simple steps to add participants to a Zoom meeting. Below is how to do it:
- Download the Zoom application and Sign In to your Zoom account.
- Next, start or join a Zoom meeting from the Zoom client window.
- Now, hover over the Participants icon and click on the caret(^) icon and then tap Invite.
- Further, there are two options to invite someone on Zoom: Through Contacts and via Email.
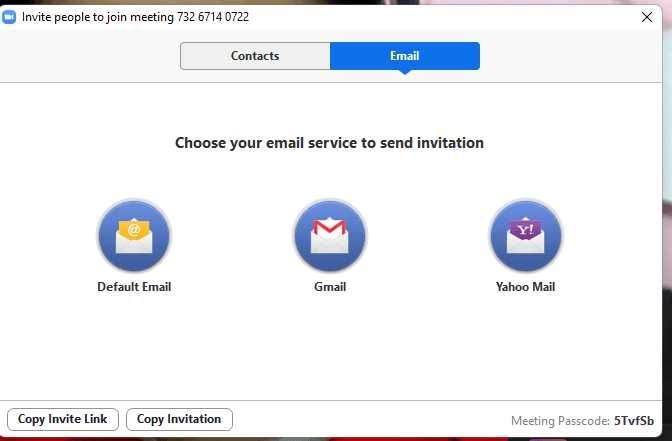
- When you choose to invite through email, you will get three options.

Also Read: How To Enable ‘Stop Incoming Video’ Feature In Zoom
Inviting through Email:
- Tap the Email tab at the top.
- Choose the email provider as per your preference:
- Default Email: It allows you to invite others through your default email on the Zoom app.
- Yahoo/ Gmail: Invite others via your Gmail or Yahoo mail. You will need to sign in to your account.
Inviting through contacts:
- Click on the Contacts tab on the top.
- Then, search or ether the contact in the contact bar.
- Select the individuals you want to invite.
- Click on the Invite button at the bottom.
You can also invite through the meeting link
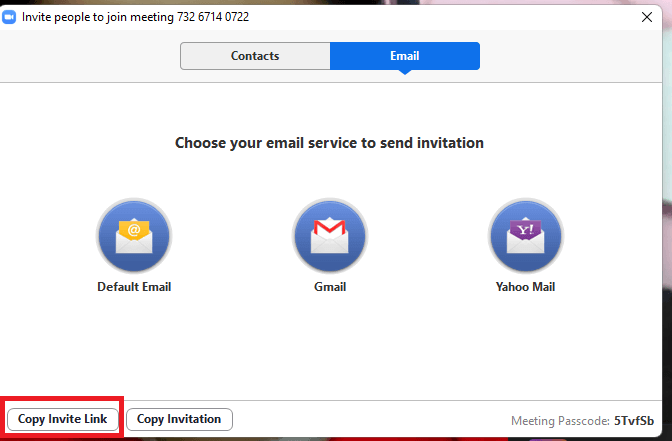
You can also invite people by sharing the meeting link. All you need to do is just copy the meeting link and share it with people. To copy a link while in the meeting, just hover over the Participants icon and click on the caret(^) icon. Then, at the bottom, you will find the option to copy the link.
CONCLUSION
That’s all for now. This is how you can change your profile picture on the Zoom app. By, following these steps, you can effortlessly change Zoom profile picture on a laptop/PC/Desktop. Moreover, you can also bring any other desired changes to your Zoom profile. Steps to edit or update your Zoom profile are also mentioned in this article. So, go ahead and perform these steps. If you face any problems while doing so, do let us know in the comment section. We would love to help you.


