This article will walk you through the steps to Change the Name of the User Profile Folder in Windows 11.
Indeed, Changing the Username or User Profile Folder is not that easy. But, here we will provide you step-by-step guidance to accomplish this task hassle-free. User Profile Folder includes various Settings which are associated with a user account.
The user profile folder is located in the C:\Users\ directory. This folder contains and stores various Settings and Preferences of the user.
Also Read: How To Remove Shortcut Arrow Icon In Windows 11
Change Name of User Profile Folder (Windows 11)
Now, without digressing much, Let’s get started.
- Right-Click the Start icon on the taskbar and select Run from the context menu.
- Then, enter netplwiz and tap OK.
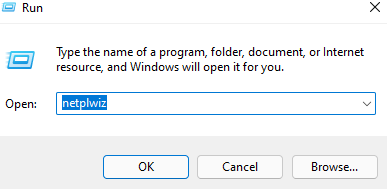
- Under Users for this Computer list, you’ll find a list of all the users on your computer,
- In the Next Step, Choose your Username and Click on the Properties.
- In case of the Properties button is disabled, the box next to Users must enter a user name and password to use this computer option must be unchecked. So, firstly Check it and then tap Properties Button.

- Now, a properties window will open up. User name which is the User Profile folder name will appear on the screen. So, change the Username and click on OK.
- Here, We also need to alter the User Folder Name which saves data related to various settings. So, these actions will take place in the Windows Registry, often known as Regedit. To accomplish so, we’ll require Windows 11’s built-in administrator account.
- The built-in administrator account in Windows 11 is disabled by default. So, you need to enable it first to proceed further.
Also Read: Dolby Atmos Not Working In Windows 11? Fix It Now
Enable Built-in Administrator Account
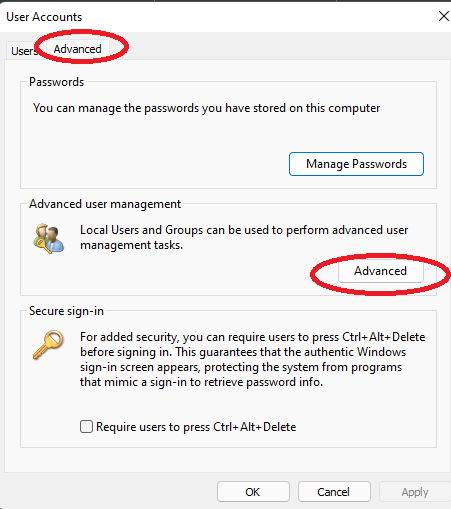
- To enable the Administrator account in Windows 11, Right-click on the Start icon and choose Run from the context menu. Now, again enter netplwiz and Click Ok

- On the User Accounts Windows, Select Advanced on the top and then tap Advanced under Advanced User Management.
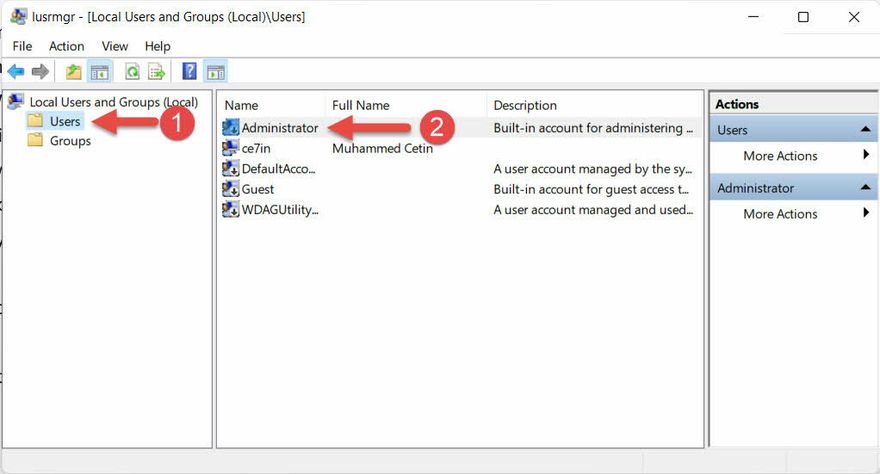
- Now, under the Local Users and Groups (Local) window, you need to double-click the Users folder on the left.
- Double-click Administrator as given below.
- Now, deselect the box next to Account is a disabled option and then tap OK.
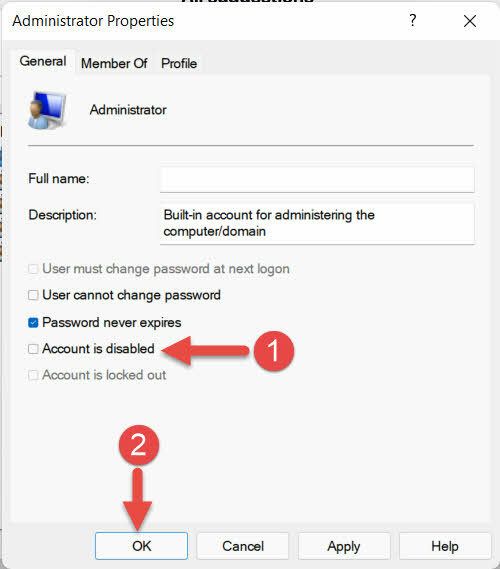
- You can close the Local Users and Groups (Local) window now as you have successfully enabled the built-in administrator account.
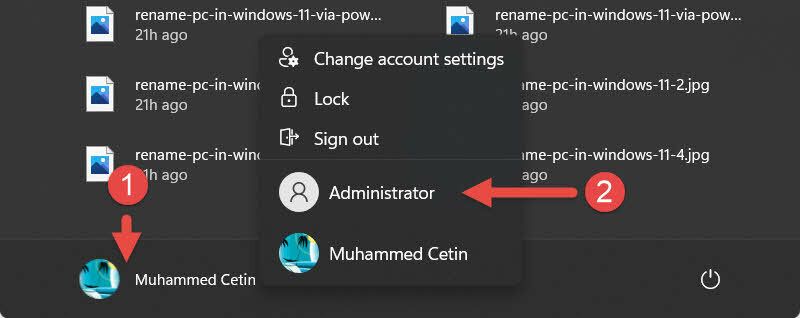
- Next, open the Start Menu and Right-click on your Account Name at the bottom of the Start Menu.
- Then, to switch the signed-in account, select Administrator. (If you haven’t already logged in to the administrator account, Windows 11 will create one for you. This preparation has no bearing on your primary account)
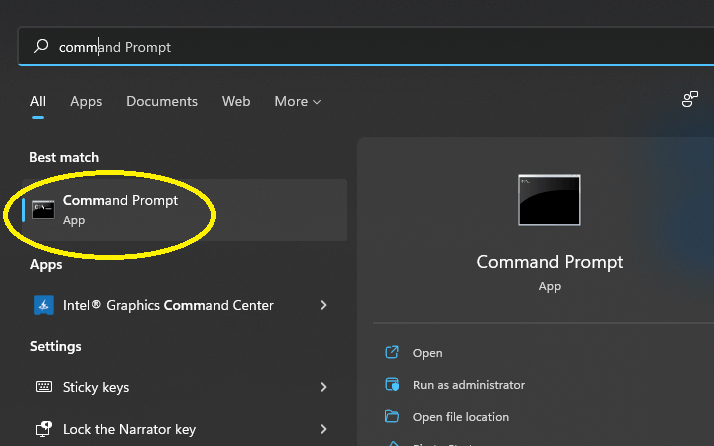
- Now, before proceeding further, sign out from the primary account. Search Command Prompt in the Search box. This will lead to the opening of the Windows Command-Line.
- To see the main account’s ID, type query session and hit Enter.
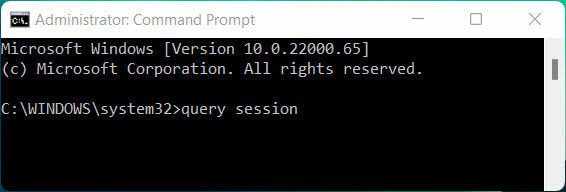
- Now, enter the command logoff followed by your ID number. In the example given below, the Id number of the user is 2 so the command will be logoff 2. As a result, you will be able to completely log off from your main account.

- Go to
This PC>Local Disk (C:)>Usersdirectory in the Files explorer. - Now, Select your primary account’s folder and change its name to your new username by clicking the F2 key on the keyboard.
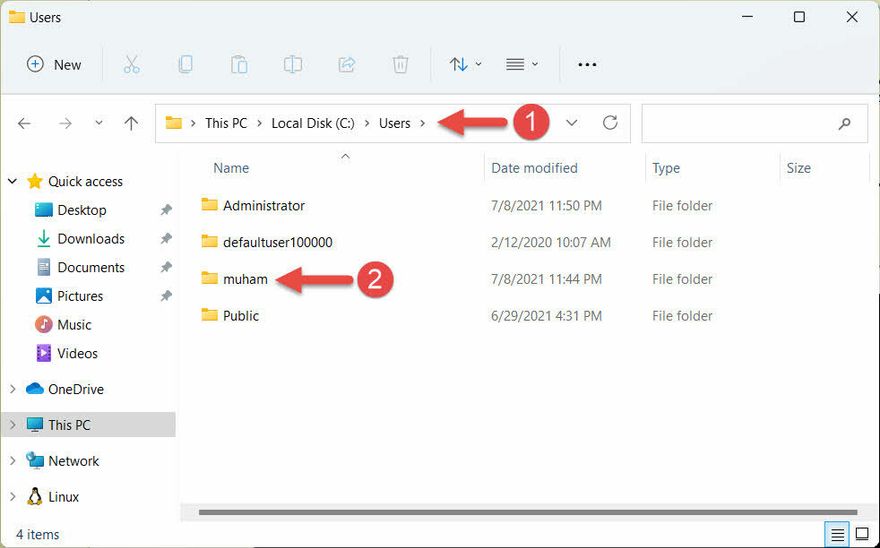
- Here, the user has changed its username from muham to Ce7in.
- Go to the Search box and type Registry Editor. Then, tap-open the Registry Editor app.
- Copy and Paste this path on the Registry Editor’s address bar on the top as given below in the picture Computer\HKEY_LOCAL_MACHINE\SOFTWARE\Microsoft\Windows NT\CurrentVersion\ProfileList.Press the Enter key and Go to the Profilelist folder on the Left pane as given below.

- Select the Profilelist folder and Press the Shift+ F10 key combination. Then, choose Find from the context menu. Now, enter your old username in the Find What box. In this example, the user’s old Username is muham.

Like this :

- The ProfileImagePath key in the Registry Editor containing the path to your User Folder will be highlighted on the screen. Furthermore, Modify it by right-clicking on it and then selecting Modify.

- Now under Value Data, replace your old username with the new one as given below and click Ok.

- Now, You need to reboot/ restart your PC. Also, don’t forget to close all the opened windows before Restarting.
- In case you are Signed-in through a built-in Administrator account, you can easily sign in to your primary/main account by going to the Start Menu and Right-clicking on the Administrator Account.
Congratulations! You have successfully changed the name of the User Profile Folder on your Windows 11 PC.
Conclusion
Indeed, Changing the name of the User Profile folder in Windows 11 is a difficult task. But, You can do it easily by following the steps mentioned above.


