If the mouse wheel is not working properly, Windows 11 will allow you to set your scrolling preference.
On Windows 11, the mouse scrolling behavior is most suited for most users. However, if you feel it needs tuning you can set several lines to roll at a time or specific to roll one screen with a single roll.
In addition to this, you can even control the mouse whether you can scroll inactive Windows as you have already done it while working on another application.
In this Windows 11 guide, you will get to know about the steps to customize the scrolling settings on your laptop or computer desktop.

How to change the mouse scrolling preference on Windows 11
In Windows 11, you can decide how the mouse wheel should scroll and see whether you should be able to scroll inactive windows when hovering over.
Also Read: 5 Ways To Find MAC Address In Windows 11
To change scroll behavior
To change the scroll wheel behavior on Windows 11, the following steps should be used:
- Firstly, Open Settings
- Tap on Bluetooth and Devices
- Thirdly, click on the Mouse page which is present on the right side of the page.

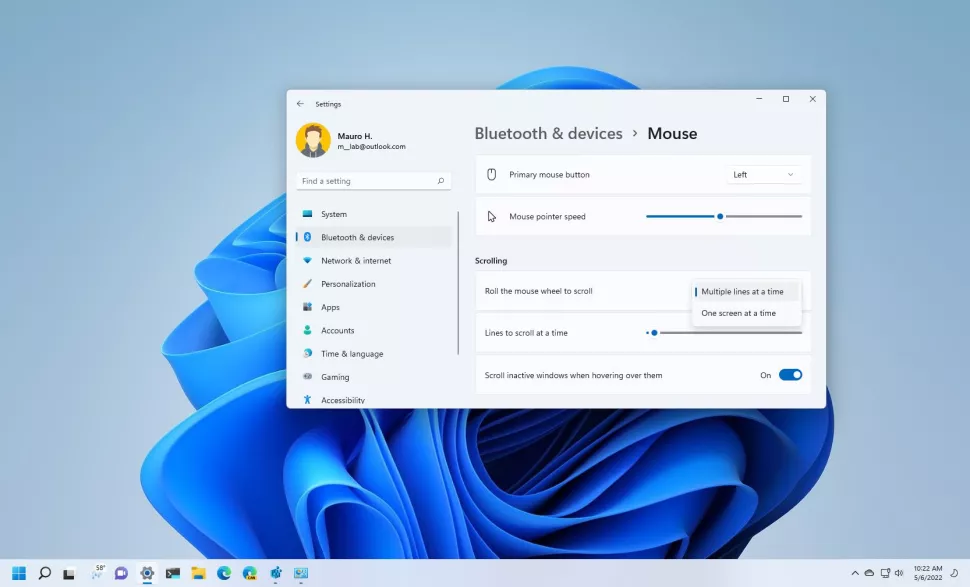
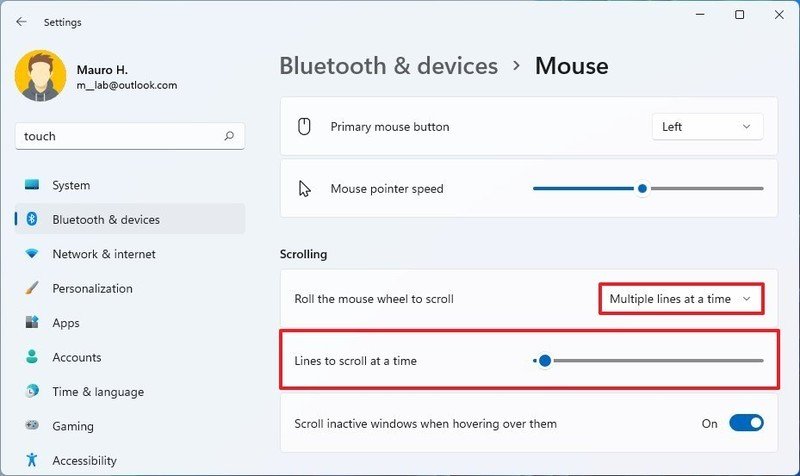
- Head towards the “Scrolling” section, under click on the “Roll the mouse wheel to scroll” option.

- Later, select one of the options from below:
- Multiple lines at a time
- One screen at a time
- Sliders are used to select the number of lines to scroll at a time.
Once all the steps are completed, the next time when you scroll or roll your mouse wheel, the scrolling should be based on the configuration you have set.
Also Read: How To Group Pinned Apps Into Folders On Start Menu In Windows 11
To find out inactive Windows scrolling
To configure scrolling on windows that are not active, use the following steps:
- Initially, open the Settings.
- Later click on Bluetooth and Devices.

Image source: Windows Central Tap on the Mouse page present on the right side of the page.
- Under the scrolling section click on the Scroll inactive windows when hovering over them toggle switch settings.
- After you complete these steps, you will now be able to scroll even when they are not focused and hovering.
Also Read: 15 Best Registry Hacks For Windows 11
How to change mouse setting in Windows 11
What are the best ways to customize your mouse setting in Windows 11? There are lots of ways to customize and make your device interact with your laptop or desktop computer.
If you want to increase your level of productivity, even more, you can always invest in a great design for multitasking. They are very easy to use, so don’t worry about being prepared.
Mouse settings :
- Adjusting the mouse sensitivity thorough the Settings Menu
- By Customizing the scrolling options
- By adjusting the pointer option through Control Panel
- With Control Panel Personalizing Mouse buttons
- By using the Third-party software
Some Windows 11 settings
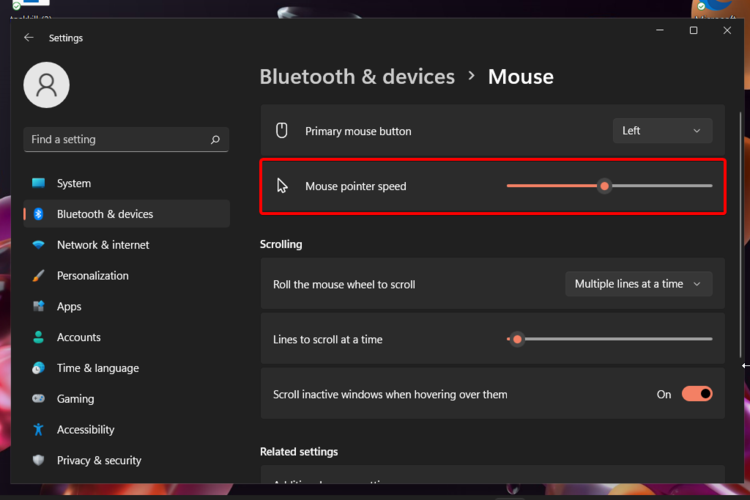
1. Pointer speed
This pointer speed refers to the Windows option that scales individual counts from the mouse to on-screen cursor movement. This is also known as Mouse Sensitivity. The speed of the pointer can be changed whenever you need it.
Each Windows OS has its Mouse sensitivity levels, so we can also adjust the levels of the mouse sensitivity according to your needs.
2. Scrolling design
The scrolling design is controlled by the mouse scrolling wheel and this is one of the most used features. It also allows you to scroll side to side for horizontal scrolling.
Along with the regular left and right buttons at down, it should also have an extra button to adjust its settings as required.
3. Visibility
With Windows 11 improvements, you will have some interesting and easily adjustable options.
You can choose how to display pointer trails in a short way or in a long way. Whether you want to hide your pointer or not while typing, or whether or not you would like to show the location of your pointer when pressing the Ctrl key.
Also Read: How To Change Windows 11 Start Menu
What are the most common mouse problems?
- The mouse is too slow or too fast in the movement of the cursor- This problem can occur due to improper settings or random bugs. It can be easily solved by updating the related divers or by using the Control Panel support option. If you don’t know how to use these and yet want to keep them up to date, we suggest you use a dedicated tool such as DriveFix.
- What if the mouse cursor gets frozen- One of the common problems faced by many of them that is the freezing of the cursor. your mouse cursor could completely stop working. This is mainly because of the heavy load on the laptop or the desktop computer you use. Try to decrease the load on your system for easy movement of your cursor on the screen.
- Double click issue- This issue is nothing but difficulty in double-clicking your mouse cursor. While double-clicking the mouse cursor can get stopped working. and usually, this happens due to load. This can be quickly and easily adjusted by using the Double-click speed option from the Control Panel listed above.
- Uncommon behavior of mouse pointer- Another most common issue in mouse behavior is a malfunction of the cursor. The main reason for this uncommon behavior can be explained. This issue is due to an unsuitable mousepad used or a sensor area filled with dirt.
So, in short, we have come to an end of this article in which you can get information about changing the mouse scrolling preferences, the changes you should do to change the settings of the mouse scrolling, and mainly the most common issues related to mouse problems. I hope this article and its contents were informative and helpful.
Also Read: Microsoft Reveals- How Windows 7 Users Can Upgrade to Windows 11


