Nvidia graphics card is the most popular graphics card thanks for the surreal performance it offers for your Windows 11 PC. Despite being the best one in the market, users keep facing several issues with the graphics card now and then. The most common issue that users have reported is that the Nvidia driver keeps crashing on their Windows 11 PC.
As you know, drivers are essential for the proper function of the Nvidia graphics card, malfunctioning driver badly affects the functioning of your graphics card.
So it’s extremely essential to find out the reason why the Nvidia driver keeps crashing on Windows 11 and what can be done to fix the problem.
Also Read: 8 Best Fixes: Discord Not Opening On Windows 11
Reasons why Nvidia driver keeps crashing in Windows 11?
- Corrupt or outdated Nvidia driver.
- Bug-ridden driver.
- Low GPU memory on your PC.
- Misconfigured settings and corrupt system
Regardless of the reason why you are facing the issue with the Nvidia driver, we will help you solve it. In this troubleshooting guide, we have put down several methods that can help you fix the Nvidia driver to keep crashing in Windows 11 issue.
Reinstall the Nvidia driver
- Press the Windows key to open up the Start Menu.
- Type Device Manager in the search bar and click the first search result to open Manager.
- In the Device Manager window, expand the Display adapters category to see the graphics card installed on your Windows 11 PC.
- Now open the context menu of the display adapter and choose Uninstall device option.
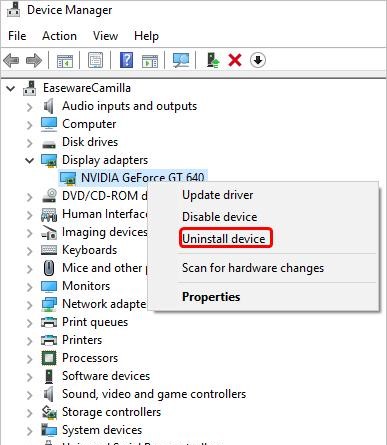
- In the new window, check the box for Attempt to remove the driver for this device option and press the Uninstall button present at the bottom of the window.
Now go ahead and reboot your PC. During this time, your Windows 11 PC will automatically look for the missing driver and install it.
Also Read: How To Change Size For Recycle Bin Storage In Windows 11
Update the Nvidia driver
If the above method, did not fix the issue, you should update your driver.
- For this, use the Windows + X shortcut key to open the Quick Access menu.
- Now choose Device Manager from the list of options.
- Expand the Display Adapters section and look for the Nvidia adapter in the list of graphic drivers.
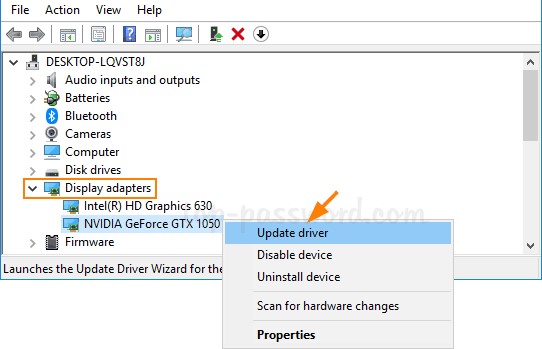
- Right-click it and then choose the Update driver option from the context menu.
- In the new window that pops up, choose the Search automatically for drivers option.
Now Windows will automatically scan your Windows 11 PC and then install the latest driver available for the Nvidia graphics card.
You can also check the Windows Update section to find the latest driver update.
Also Read: 10 Best Tips And Tricks For Windows 11
Download and install the driver from the official website
- Open the Run dialog box using the Windows+R shortcut key.
- Now type dxdiag in the text field and press the OK button.
- Now you will be taken the DirectX Diagnostic Tool.
- Switch to the Display tab, and note down all the information about the Nvidia graphics card.
- Now open the web browser and visit Nvidia’s official website.
- Choose the correct option in the drop-downs with reference to the graphics card installed on your PC.
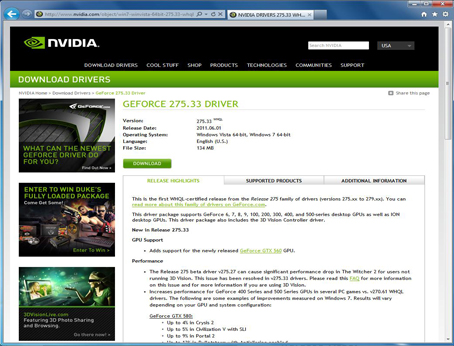
- Next, press the Download to get the driver setup button.
- Next, press the Download button to initiate the download.
- When the driver is downloaded, launch the installer by double-clicking it.
- See the on-screen instructions to install the driver.
- Once done, reboot your PC to complete the installation.
Reconfigure settings from Nvidia Control Panel
- Use the Windows+S key to open the Search menu.
- Type Nvidia Control Panel and click on the relevant search result.
- Choose the ‘3D settings’ option from the left navigation pane and then click on Manage 3D Settings option.
- In the next window, expand the drop-down menu for Vertical sync and choose Off here.
- Next, open the Power Management mode and set it to Prefer maximum performance.
- Now save the changes you’ve made and reboot your PC.
Also Read: Windows 11 File Explorer Tabs Configuration Guide
Run DISM tool & SFC scan
If none of the methods stated here helped you solve the Nividia driver that keeps crashing on Windows 11 issue, it’s time to run the DISM and SFC scan tool. Here’s what to do:
- Once again, open the Windows 11 search menu using the Windows + S shortcut key.
- Now search for Windows Terminal and select the top search result.
- Next, choose the Run as administrator option from the right side.
- When the User Access Control opens up on your screen, choose Yes.
- In the Windows Terminal, click on the down arrow and choose Command Prompt.
- In the command prompt window, paste the following commands and hit the Enter key for each of them.
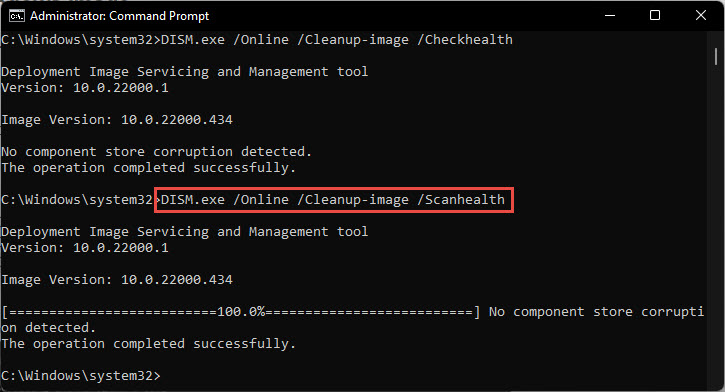
1 Dism /Online /Cleanup-Image /ScanHealth
2 Dism /Online /Cleanup-Image /CheckHealth
3 Dism /Online /Cleanup-image /RestoreHealth
- After the DISM tool finishes executing, copy-paste the following command to run the SFC scan.
sfc /scannow
Once both the scans are completed, see if the issue with the Nvidia driver is resolved. If not, try the next method.
Also Read: How To Change Microsoft Edge Kiosk Settings In Windows 11
Run the Windows Memory Diagnostic tool
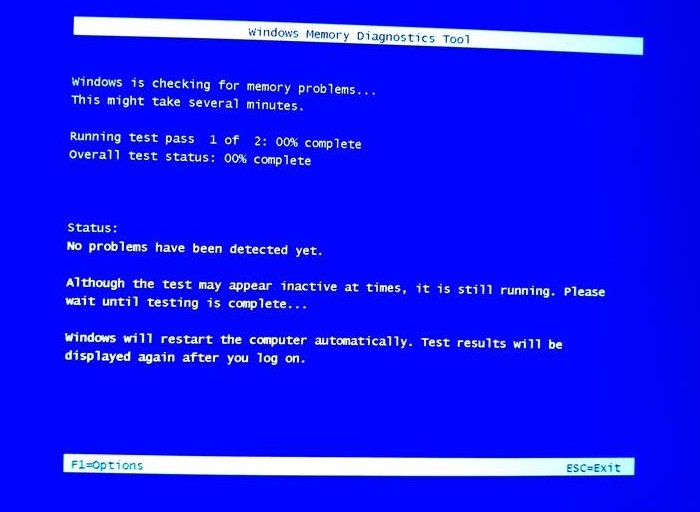
- Open the Search menu on your Windows 11 PC using the Windows + S shortcut key.
- Now search for Windows Memory Diagnostic tool and click on the relevant search result.
- In the next window, choose ‘Restart now and check for problems.
Note: Make sure to save your work before trying this method otherwise, you will have to face data loss.
Also Read: How To Fix Nvidia Geforce Error Code 0X0003
Wrapping Up
That’s all in this troubleshooting guide. Hope the Nvidia driver keeps crashing in Windows 11 problem is solved now. Which of the above methods worked for you? Don’t forget to mention them in the comments below. With this, signing off!


