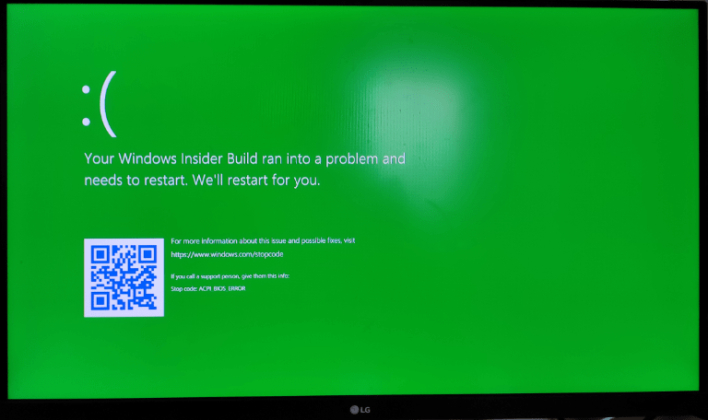
In this article, we will explain how to get rid of the green screen error in Windows 11 that occurs on the Insider Builds.
Blue Screen death is a common scenario on Windows PC that we all have encountered while working on our laptops. However, not many Windows users are familiar with the green screen error that can occur in Windows 11.
When users come across this issue, they are most likely to get startled by the error as they would have never met this error before. However, the green screen in Windows 11 error is similar to the blue screen of death error that you normally experience on your laptop. But there is a big difference between the errors and you encounter them in different situations. Let’s know more about it.
Also Read: How To Check For Updates On Windows 11/10?
Blue screen vs green screen of death in Windows 11
The difference between the blue and green screen of death is that the latter is a phenomenon that occurs on Windows Insider Builds. So, if you have signed up for them, you are going to come across the green screen error. No blue screen of death though!
The green screen of death usually occurs due to a bug present inside the insider build of Windows 11. This is because being in the initial stages, insider builds are more bug-ridden than the stable versions of Windows 11.
So if you are getting the green screen of death, let’s check out the fixes that can resolve the green screen error on Windows 11 effectively.
Also Read: How To Install Windows 11 On Virtualbox VM
Disconnect the malfunctioning device
Most of the time an incompatible or malfunctioning device connected is the reason why Windows 11 throws this error at you. So the first thing you should do is to find out the problematic device and then disconnect it.
So, shut down your PC and remove all the peripherals from your PC except the mouse or keyboard. Now begin connecting the devices one by one and see if you get the green screen error.
When you catch the culprit, you will have to contact the manufacturer and ask them to resolve the issue.
Update Windows 11
Another reason can be a pesky bug present in the current version of the insider build. To get rid of the error, you need to update Windows 11. So let’s begin:
- Bring up the Settings app using the Windows + I shortcut.
- Now choose the Windows Update option from the left navigation bar.
- Next, press the Check for Update button located on the right side to look for any available updates.
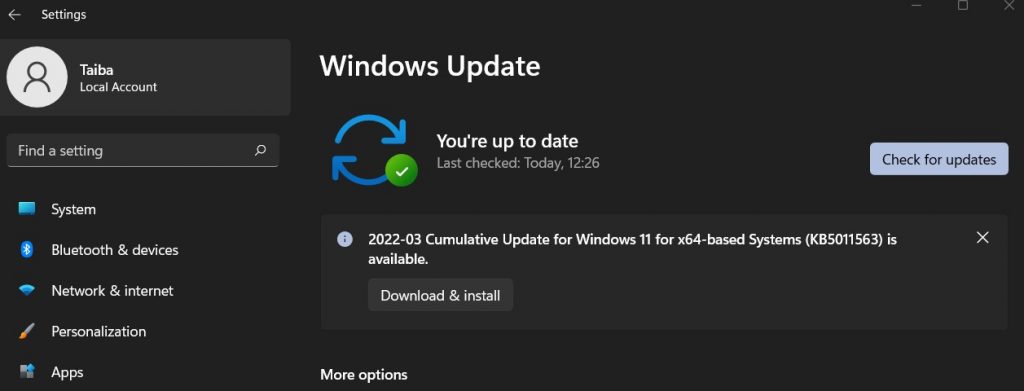
- If found, hit the download button to download the update and reboot your PC to install it.
Also Read: Backup And Restore Wi-Fi Network Profiles In Windows 11
Update the drivers
Corrupt drivers can also cause the green screen error in Windows 11. Here’s how to fix the outdated and corrupt drivers:
- Bring up the Start Menu by pressing the Windows key.
- Now type Device Manager in the search bar and choose the relevant option from the search results.
- In the device manager window, expand the Display Adapters option to view all the graphics adapters installed on your PC.
- Now, access the context menu by right-clicking the graphic card entry and choosing the Update Driver option.
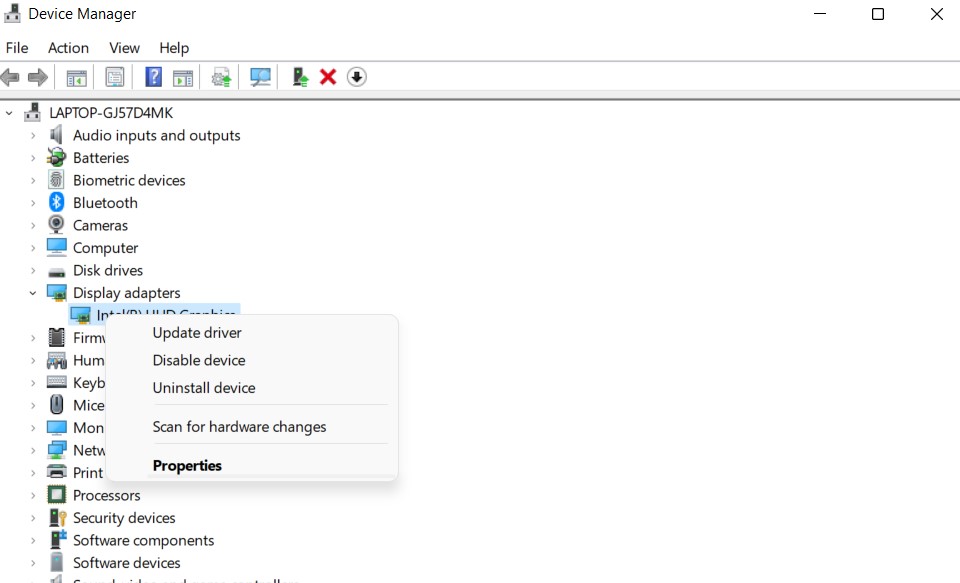
- In the new window that opens, choose the Search automatically for Drivers option.
- Now Windows will find and install the update for that graphic driver.
Also Read: How To Set Up Microsoft Family App On Windows 11
Remove conflicting applications
If you are still getting the green screen error in Windows 11, it can be because of one or more conflicting apps installed on your PC. So let’s get rid of those problematic apps:
- Use the Windows+I combination keys to bring up the Settings app.
- Now click on the Apps option present on the left navigation panel.
- On the right pane, click on the Apps & Features option.
- Look for the conflicting apps. Most likely, they are the apps you’ve installed recently.
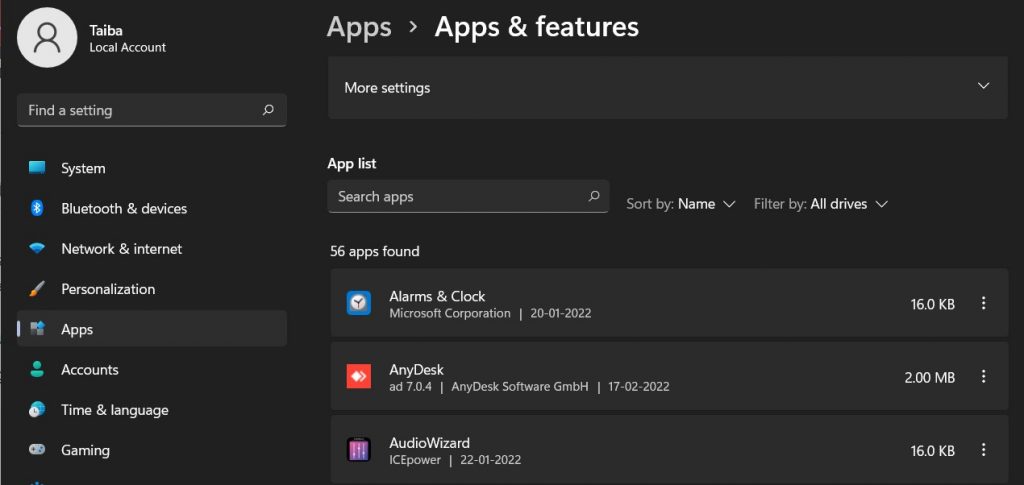
- Click on the ellipsis icon next to that app and choose Uninstall option from the context menu.
- Now, reboot your PC to apply the changes.
Note: if any third-party anti-virus is installed on your PC, then you should uninstall those too to get rid of the error screen.
Run SFC and DISM scan
- Type Windows terminal in the search bar of the Start Menu and highlight the relevant search result.
- Now right click it and choose the Run as Administrator option from the context menu.
- Choose the Yes option from the User Account Control (UAC) prompt that opens up on the screen.
- In the terminal window, press the down arrow icon and choose the Command Prompt option.
- Now execute the following commands by hitting the Enter key.
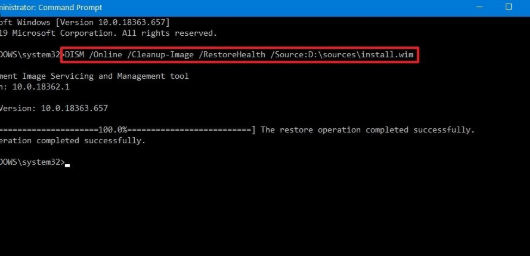
Dism /Online /Cleanup-Image /ScanHealth
Dism /Online /Cleanup-Image /CheckHealth
Dism /Online /Cleanup-Image /RestoreHealth
- After this, it’s time to run the SFC (System File Checker) scan. For this type the following command:
SFC /scannow
Also Read: How To Enable Active Directory In Windows 11
Wrapping Up
So that’s all! Hope you were able to get rid of the green screen error in Windows 11. Which of the methods mentioned here worked for you? Let us know in the comments below.


