In this guide, we will show to enable Screen Saver in MacOS 13. This month, Apple shows off macOS Ventura, which is also known as macOS 13. Ventura will also take full advantage of Apple’s M2 chip when it comes out later this year. It will add new features like Stage Manager and powerful new features to FaceTime with Continuity Camera and Handoff. MacOS Ventura also has big changes to Safari, Mail, Messages, Spotlight, and other apps.
Mac Models
But you should make sure you’re getting the most out of macOS 12 before you move on to macOS 13. The operating system will be called macOS Monterey. Anyone with a Mac that can run it will be able to use it. This is for anyone with a MacBook from early 2016 or later. MacBook Air from early 2015 or later, a MacBook Pro from early 2015 or later, a Mac Mini from late 2014 or later, an iMac from late 2015 or later, an iMac Pro from late 2017 or later, or a Mac Pro from late 2013 or later.
The new macOS 13 Ventura for Apple Macs has a feature called “Screen Saver,”. It shows other content on the screen if the device hasn’t been used for a long time or for the amount of time that the user sets.
Also Read: Download And Install macOS 13 Ventura Developer Beta On Mac
WHAT IS A SCREEN SAVER?
The screen saver is a fun and useful way to keep the information on your MacBook’s screen. Safe when the device isn’t being used. The screen saver is a special programme on the MacBook that replaces the screen with a picture or live wallpaper after a certain amount of time if the device hasn’t been used.
The screensaver on macOS serves the same purpose and does the same things as the screensaver on Microsoft’s Windows operating system. It’s basically an extra layer on the screen that shows up after a certain amount of time when the device hasn’t been used. You can also make it safer by making the system ask for a password after the screensaver has been turned on.
Also Read: How To Clean Install macOS Ventura On Mac
Step to Turn on Screen Saver on macOS 13 Ventura and Later
You just bought a new MacBook, but you don’t know how to set up or change the screen saver. Or do you have an old MacBook or don’t know how to change your device’s screen saver? Then don’t worry, because you’ve come to the right place. In this article, we’ll show you how to change and set the screen saver on your MacBook. This post also explains how to set and change the screen saver on your MacBooks running macOS Monterey and earlier versions, as well as the soon-to-be-released macOS Ventura, so keep reading to learn more.
When the device isn’t being used for a while, the screen saver will automatically change the screen to an image or a live image with other information, like the current system time.
Where are the settings for the screen saver on a macOS 13 venture 2022? Let’s say you updated your MacBook’s operating system to macOS Ventura Beta 1 or plan to buy a new MacBook that runs macOS Ventura. If that’s the case, you should stay in this section. Follow these steps to set up or change the screen saver on a MacBook running macOS Ventura or later.
Also Read: How To Install macOS Ventura On Unsupported Mac
How to Turn on the Screen Saver on an Apple Mac Running macOS Ventura
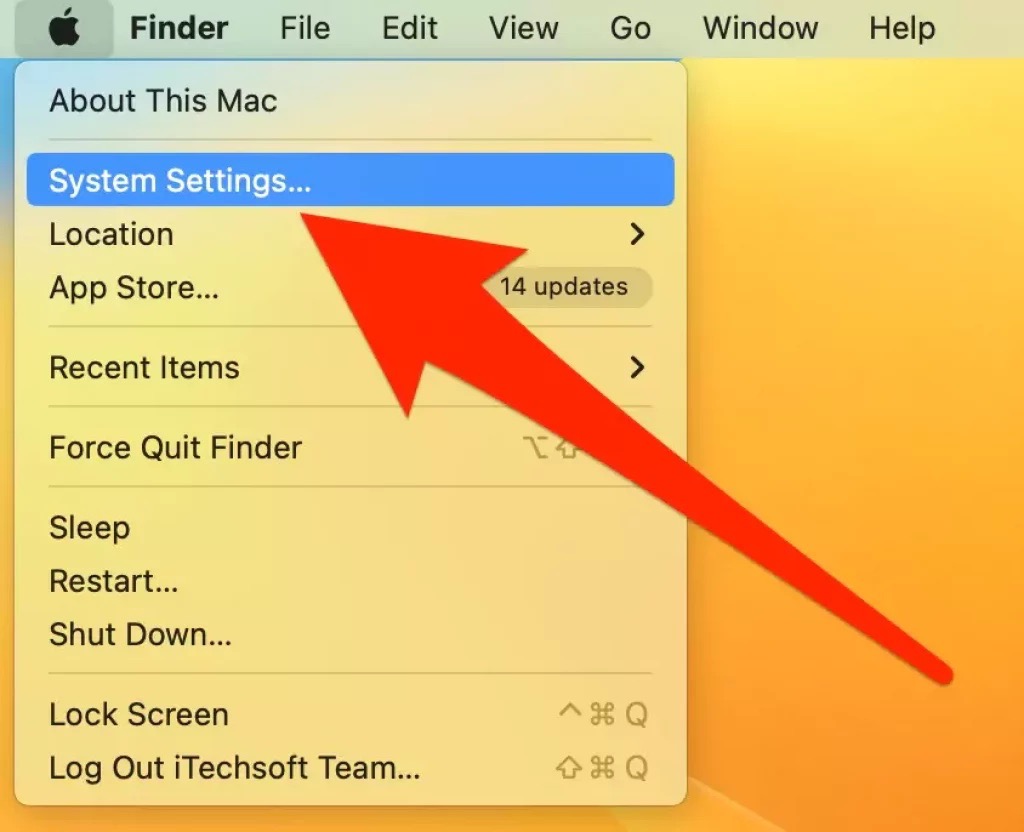
#1: On your Apple Mac, open the System Settings app. To do this, click on the Apple icon in the top left corner and choose the app from the drop-down menu.

You can also search for the app in Spotlight and choose it by pressing Command + Spacebar.
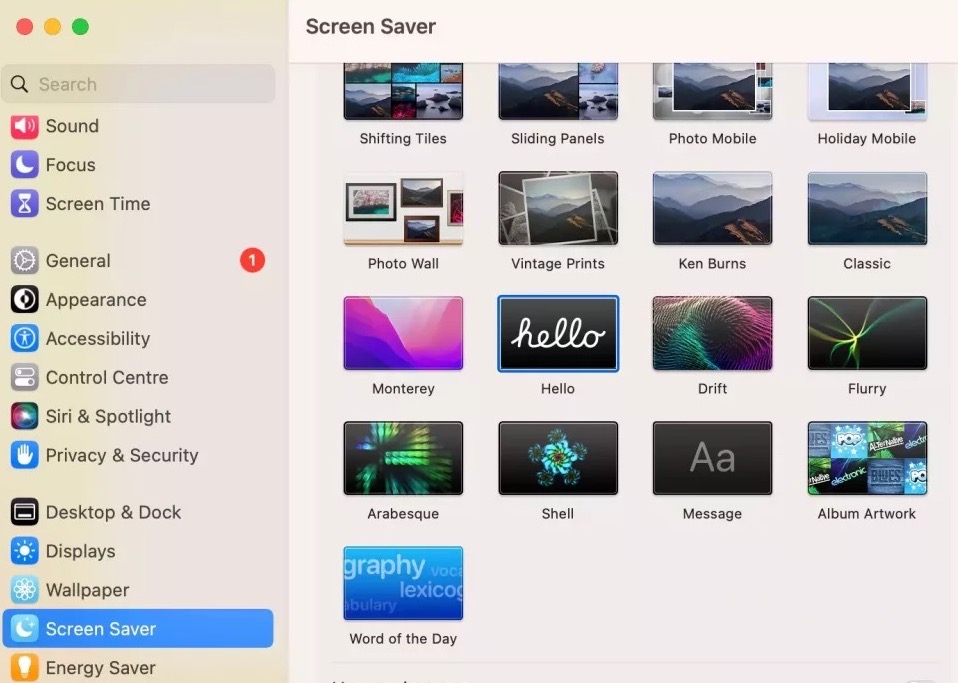
#2: When the System Preferences app opens, go to the left sidebar and click on “Screen Saver.”

#3: After that, you can change the settings for your screen saver in the right pane.
Also Read: Stage Manager In macOS Ventura :How To Use
So that’s it. You can choose the type of screensaver you want to use on your Apple Mac running the new macOS 13 Ventura operating system. Or you can choose to have screensavers show up randomly. Along with this, you will also be able to make other changes. Such as setting the time the screen saver starts or how the clock shows.
Final Thoughts
Anyone can set, change, or edit their MacBook’s screen saver by using the simple steps described earlier in this post. Use these steps to change the screen saver in just a few minutes on macOS Monterey. Earlier versions, and macOS Ventura.


