Windows 11 includes a variety of useful touchpad gestures that you may configure to do your bidding. In this article, we are going to discuss how to Enable Or Disable Screen Edge Swipe In Windows 11.
Laptop users frequently utilize an external mouse instead of their device’s touchpad. Aside from familiarity, many individuals argue that the mouse is more precise and easier to operate. Most laptops, on the other hand, now come with precision trackpads that can enable complex touchpad motions.
Despite the fact that Windows provides a number of sophisticated touchpad motions, it is one of the most underutilized features. Some users are aware of the motions but do not personalize them, while others are utterly unaware of their existence.
In this post, we’ll teach you how to personalize the various touchpad gestures available in Windows 11 to meet your specific needs.
Also Read: How To Turn On Hibernate Mode On Windows 11

Types of Touchpad Gestures in Windows 11
In Windows 11, touchpad gestures are supported in three different ways. The following are some of them:
Tap gestures: The most frequent gesture for detecting one or more fingers briefly pressing the touchpad is this. Tap gestures are simple; they allow you to select certain items on your computer with your finger.
Zoom & scroll gestures: These actions are self-evident. You can scroll through a webpage or document without using the Windows scroll bar by using the scrolling gesture. The Zoom gesture, on the other hand, allows you to zoom in and out of a specific item. Pinching or extending two fingers on your touchpad will do the trick.
Three-finger gestures: These are the configurable touchpad gestures in Windows 11, which allow you to generate unique movements on your computer, such as swipes or taps.
In Windows 11, how can I enable or disable touchpad gestures?
Here’s how to get started with Windows 11’s touchpad gestures, including how to enable and customize them.
Also Read: How To Fix Blank Icons In Windows 11
How to Enable or Disable Windows 11 Tap Gestures
On a Windows computer, tap gestures are usually enabled by default, especially if a precision touchpad is installed. If these motions aren’t working properly or you wish to disable them, follow the steps below:
Open the Settings of your Windows 11 PC, press and hold the Win + I keys.
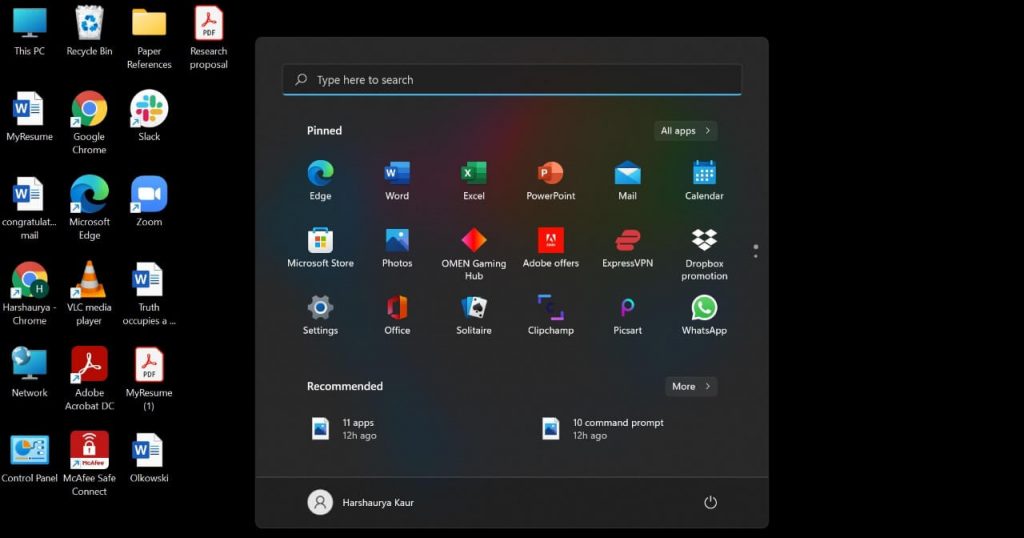
You can also access it from the Start menu.
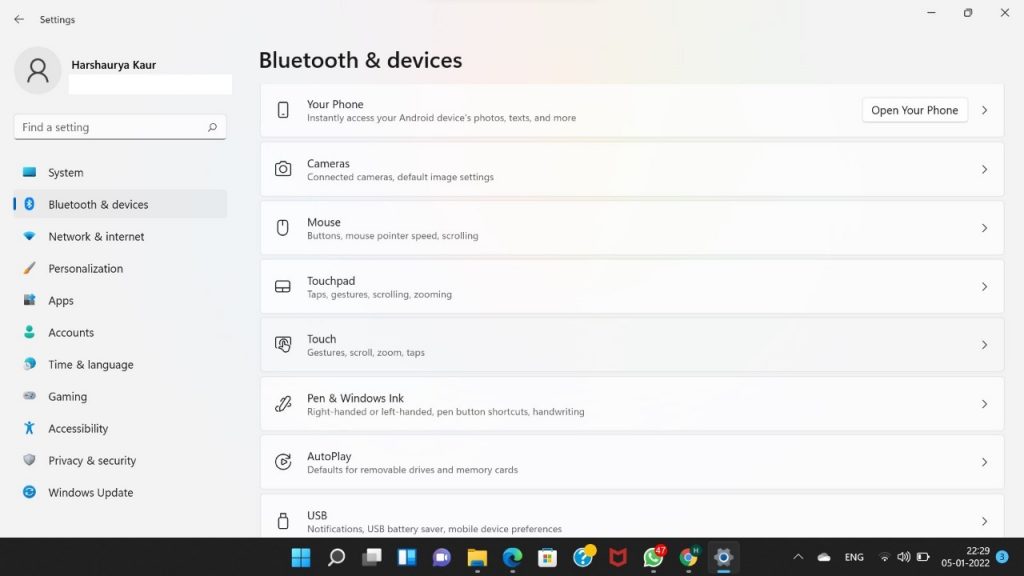
1. On the left panel of the Settings window, click the Bluetooth & devices option.

2. Then, from the menu, select Touchpad.

3. To see all gestures, go to the Touchpad page and click Taps. Various tap motions can be found here.

4. Then, to enable or disable the motion, click on the individual checkboxes.
5. This feature also allows you to change the sensitivity of your touchpad. To do so, go to the Touchpad sensitivity tab and select your chosen sensitivity from the dropdown menu.
Also Read: 8 Ways To Delete Temp Files In Windows 11
Scroll and Zoom Gestures in Windows 11: How to Enable or Disable Them
These gestures enable by default, but they cannot be programmed. However, in Windows 11, you may disable these motions and change the scrolling orientation to your liking. Here’s how to do it:
1. Settings can be accessed by pressing and holding the Windows + I keys or by clicking its icon on the Start menu.
2. On the sidebar of the Settings window, click the Bluetooth & devices option.
3. Then select Touchpad from the drop-down menu.
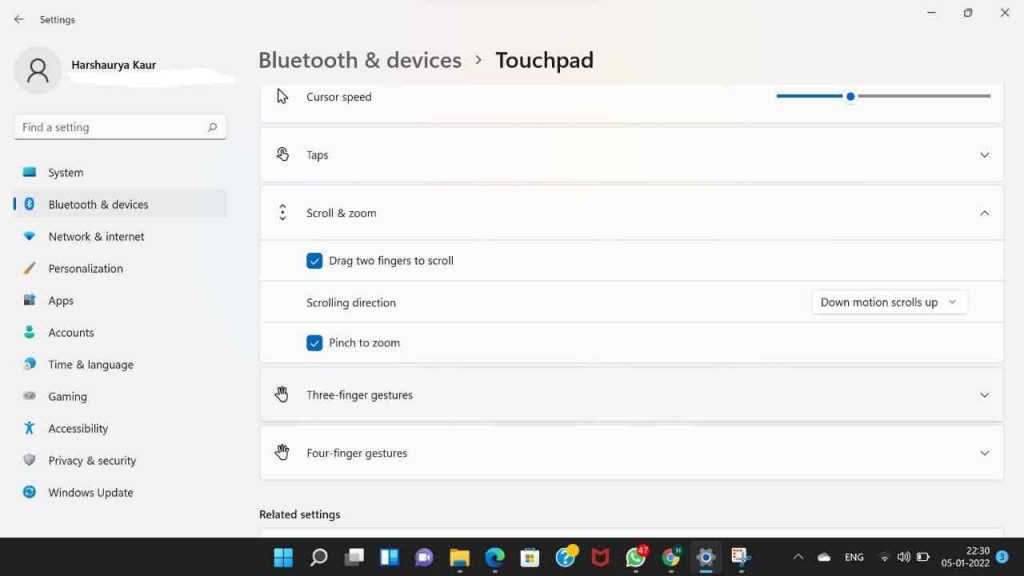
4. To reveal choices, go to Touchpad settings and click Scroll & zoom.
5. By checking the checkbox next to the settings, you can turn off or on the pinch to zoom and drag two fingers to scroll options.
6. You may also select your preferred scrolling direction by using the drop-down menu on the Scrolling direction tile.
Also Read: Unable to open JPG Files on Windows 11- Solved
How to Enable or Disable Three-Finger Gestures in Windows 11
Three-finger gestures are more configurable than the other two gestures, allowing you to construct swipes and taps to perform particular operations on your computer. To activate this type of gesture, follow the instructions below:
1. To launch the Settings menu on your Windows 11 PC, press Win + I. You can access it from the Start menu.
2. Then, on the left panel of the Settings window, click the Bluetooth & devices option.
3. Then, from the drop-down menu, select Touchpad.
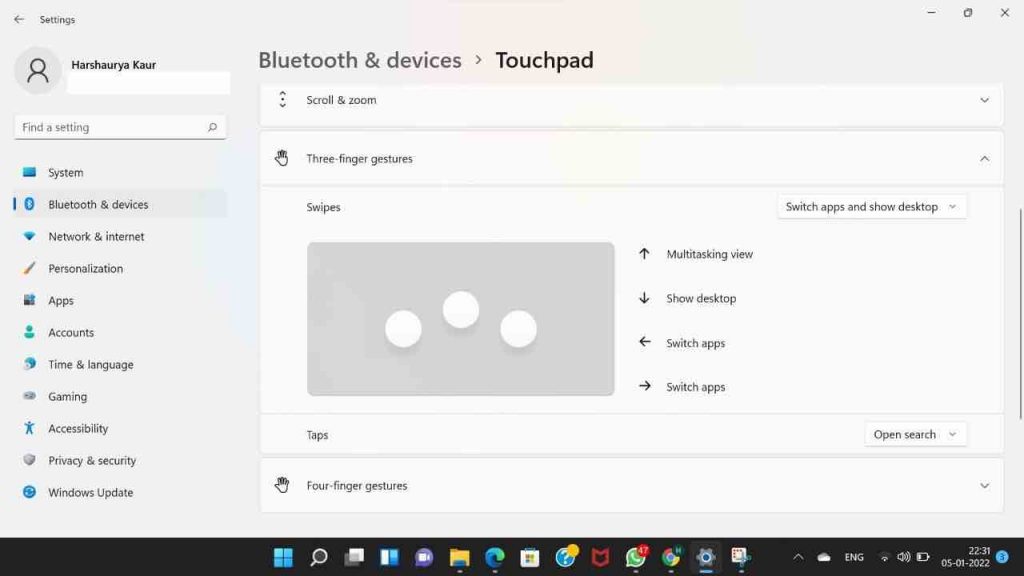
4. Scroll down to the settings and select Three-finger motions. Swipe and Tap are the two types of gestures available.
5. For the Swipe category, you may use the following Windows templates:
- Move apps and show the desktop (Default): The three-finger sideways swipe gesture is used to switch between apps in this templated gesture. Swiping your three fingers up will launch the Multitasking view, and swiping down will show your desktop.
- Switch desktops and show desktop: This setting allows you to switch desktops with a three-finger sideways swipe gesture instead of switching apps. The function of the two three-finger motions is the same as the preceding design.
- Change audio and volume: This gesture template is perfect for folks who use their Windows device to listen to music, podcasts, or edit videos on a regular basis. The three-finger up and down swipe motion can be used to increase or decrease the volume. You may also jump to the previous and next song in your queue with a sideways three-finger swipe.
6. To choose among the available Swipe gestures, go to the Swipe section and select your favorite option from the drop-down menu. If you select Nothing, this motion will be disabled on your Windows 11 PC.
7. The three-finger touch gesture in Windows also offers preset options. To pick this option, go to the Taps section and click your favorite action from the drop-down menu. You may alternatively choose Nothing from the drop-down menu to allow this motion.
Conclusion
A standard mouse may be easier to handle, but you may utilize your touchpad to create gestures that are personalized to your needs. You can get more out of the Windows system by using touchpad gestures, especially when combined with other powerful features in Windows 11.


