If you have a USB flash drive or an external hard drive pre-formatted in NTFS and you connect it to a Mac, it will be mounted as a read-only drive under Mac OS X system because Apple does not fully support NTFS file system by default. Mac OS X by default can only read the NTFS file system but can not write anything onto it because Apple has turned the writing feature to NTFS formatted drive off which you can turn on with the help of a third party software ( like Tuxera NTFS, Paragon NTFS, NTFS 3G etc. ) or with the help of some terminal commands if you know. Don’t worry you will not need to learn terminal commands or buy any software to enable writing to an NTFS formatted drive, I will explain to you some simple terminal commands and free software that will help you enable write access to NTFS partitions under Mac OS X. This article will help you fixing following problems.
- The NTFS formatted external hdd does not appear on desktop or may not be mounted.
- Unable to make a new folder or save a new file on Boot Camp partition.
- Unable to write or create folder on any NTFS formatted partitions.
- Attempting to drag a file into an NTFS drive in Mac OS X, turn your mouse cursor into an error sign.
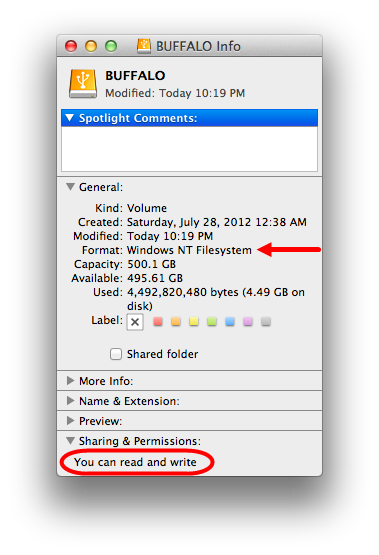 |
| Enable write access to NTFS partitions under Mac OS X |
NTFS – An Overview
NTFS (New Technology File System) is a Microsoft’s proprietary journaling file system that uses the NTFS Log ($LogFile) to record metadata changes to the volume just like ext3/4 ( third/fourth extended filesystem) used by Linux, HFS used in Apple, JFS used with IBM’s enterprise servers, Linux and IBM’s OS/2. NTFS has been released in 5 different versions starting from v1.0: Released with Windows NT 3.1 in 1993, v1.1: Released with Windows NT 3.51 in 1995, v1.2: Released with Windows NT 4.0 in 1996, v3.0: Released with Windows 2000. and v3.1: Released with Windows XP in Autumn, 2001 (and subsequently used also for Windows Vista,Windows 7,Windows 8 and Windows 10). Apple has long been supported the universal and simplistic FAT file system with both read and write access, and added read-only support for NTFS back in 2003 in OS X 10.3 “Panther” because of stability and its compatibility with NTFS file system technology. FAT 32 is still fully supported by Mac OS X with read and write access but it is not used preferably because of its limitation of having maximum file size of 4 GB and maximum partition size limit of 8 TB.
Why should you enable write access to NTFS partitions under Mac OS X?
You can still use exFAT instead of FAT32 as it is fully supported by both Windows and Mac and can work with files as large as 16 EB (exabytes) and has no realistic file-size or partition-size limits. exFAT also performs better than FAT32. While Appls’s HFS+ also has a limitation of maximum 8 EB file size and a maximum of 8 EB Volume size. This article will be very helpful for those who frequently transfer bigger files across two operating systems or have a NTFS formatted hard drive with big file size that he wants to format without loosing the data or if he is planning to migrate from Windows PC to Mac, or Boot Camp de-installation.
How would you enable writing to NTFS partitions under Mac OS X?
The easiest way of enabling write access to NTFS partitions under Mac OS X might be to reformat it in an OS X supported file system. But this won’t be a preferred workaround if you have large amount of data stored on you external drive. If it’s formatted in Apple’s HFS file system, the drive won’t be detected on Windows anymore; and you won’t be able to copy items from other computers running Windows, to that external drive. Using a third party NTFS read/write driver or some terminal commands, you can overwrite the default (read-only) NTFS driver provided by Apple. Once the NTFS driver is installed, you will be able to write to NTFS formatted disks on your Mac just like any other Mac-compatible disk drives. There is another way of writing data to NTFS formatted hard drive under Mac OS X environment without the help of any driver. This method is used mostly by the enterprise and small-medium environments where they use a file servers with shared drives for data distribution, storage, and so on. Regardless of the underlying NTFS format of the server hard drives, Macs use the SMB protocol to read/write data to these shares. For an individual user, there are several other options for enabling write access to NTFS partitions under Mac OS X that I will we explaining below.
However, it goes without saying that you should try this on a non-production system first to see if it suits your needs or take backup of your files and data before proceeding.
Different Methods of enabling write access to NTFS partitions under Mac OS X
If you are ready to spare a few bucks,there are multiple software out there in the market which will make your work easier, you can get decent stable NTFS read/write support for your Mac. These drivers are usually more stable and offer greater read/write speeds on NTFS volumes compared to the free alternatives. Another important feature about the paid drivers is the integration with Mac System Preferences, allowing you to create NTFS formatted volumes directly using the Disk Utility application. But it is not possible for everyone to buy these software and for them there are still other options like using these software as a trial for 10-15 days, using the free one or using the terminal commands.
1. Enable NTFS write support using Paid Third Party Software
(A). NTFS for Mac® 15 – for $20 but cost you $15 after applying Hawkdive’s 25% discount code (XXX-XXX-XXX)
This is one of the best and convenient software for writing to NTFS formatted drive among all. It is manufactured and marketed by Paragon Software Group and costs $19.95 but it is also available as 10 days trial. As per Paragon-Software, “Paragon NTFS for Mac® 15” is fully compatible with Apple’s new security policy ensuring fast, hassle-free and safe access to NTFS partitions from macOS 10.12 Sierra. Once the program is installed, the user can get started right away: conveniently navigate contents and read, edit, copy or create files and folders. It even provides you with verify, repair and format option to NTFS formatted hard drive.
| NTFS for Mac to enable write access to NTFS partition under Mac OS X |
How to use
The drivers are easily installed through user-friendly wizard. No additional configuration is required after installation. Just restart your computer and let it go to work for you!
| NTFS for Mac to enable write access to NTFS partition under Mac OS X |
After installation every Windows partition works like a native Mac® partition! Mount any NTFS partition like a native one – no need to perform special commands to get access – just attach a disk drive or removable media formatted as an NTFS partition and use it as you wish.
Also be aware that Seagate offers this NTFS driver software named “Paragon NTFS for Mac”, free of cost with the limitation that it only works with Seagate drives, or with drives that are manufactured by Seagate.
Download Paragon NTFS for Seagate Drive – OS X Version 10.9 and above
Download Paragon NTFS for Seagate Drive – OS X Version 10.6 -10.8
Buy Paragon NTFS for Mac 15 for other hard drive (25% Discount Coupon Code included in Link)
(B). Tuxera NTFS for Mac
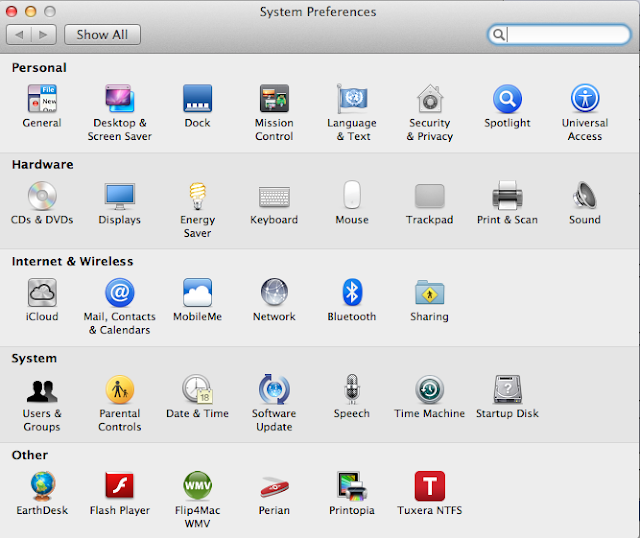 |
| Enable write access to NTFS formatted drive using Tuxera NTFS |
The software fully supports all OS X versions starting from 10.4 (Tiger) including OS X El Capitan. Tuxera-only advanced features include support for NTFS extended attributes. Tuxera NTFS for Mac is compatible with popular virtualization and encryption solutions including Parallels Desktop® and VMware Fusion®. Using Tuxera you can also format any hard drive in NTFS from OS X disk utility.
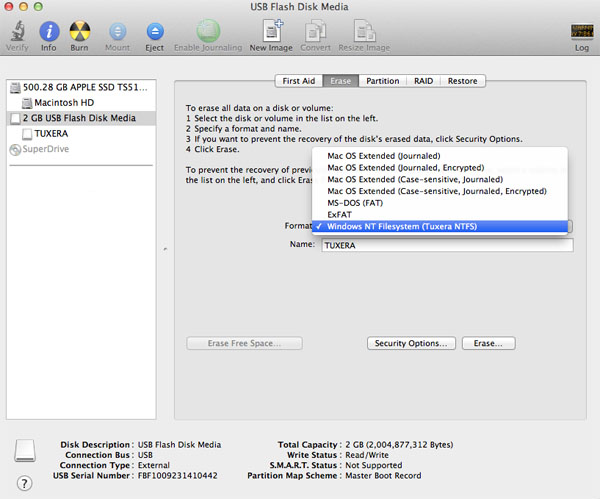 |
| Enable write access to NTFS formatted drive using Tuxera NTFS |
How to use
- Download Tuxera NTFS package from the official website.
- Run the downloaded file and click on “Install Tuxera NTFS” to launch the installer.
- Complete the installation process by following the wizard. You may need to provide Administrator Password during the process.
- Now restart the system; Tuxera NTFS driver will be installed.
 |
| Enable write access to NTFS formatted drive using Tuxera NTFS |
2. Enable NTFS write support using Free Third-Party Drivers:
Though, there are multiple free NTFS driver software available but I am only describing about some major stable drivers.These are free and open-source NTFS drivers that you can install on a Mac to enable write support to NTFS. But unfortunately, these take a bit of extra work to install, especially on OS X 10.11 El Capitan with the new System Integrity Protection (SIP) feature which may not allow them to change or alter system files.With the realease of OS X 10.11 El Capitan, it is now so locked down that even root users can’t modify the operating system. In order to make the following process work on El Capitan, You need to disable the System Integrity Protection prior to installation.
To do that, restart your system and hold down cmd+r while it reboots – it will start the device in Recovery Mode.
Next, click on Utilities, open the Terminal, type csrutil disable, press Enter, and reboot the system.
 |
| Disable System Integrity Protection to enable NTFS write support |
(A). NTFS-Free for Mac
One of the most basic NTFS drivers for Mac OS X that is available for free is NTFS-Free. It installs a third party NTFS driver that overwrites the native NTFS driver. After installing it, NTFS volumes will be automatically detected by OS X once connected, and mounted in read/write mode. Being a basic driver, it does not offer a better read and write speed on NTFS volume or any customization options under system preferences.
To install and use NTFS-Free:
- Download and install the latest NTFS-Free package (.pkg file). During installation, you may be asked to provide your system password.
- Restart your system to complete the installation.
However, NTFS-Free does not offer a lot of support in terms of application stability, bug fixes and updates. The NTFS-Free driver has also been reported to have stability issues with multiple NTFS drives.
(B). Open Source: NTFS-3G
The development of NTFS-3G for Mac OS X is funded by Tuxera Ltd. The NTFS-3G is an open source safe and stable, full-featured, read-write NTFS driver for Linux, Android, Mac OS X, FreeBSD, OpenSolaris and other operating systems. NTFS-3G often uses the FUSE file system interface, so it can run unmodified on many different operating systems. So download and install FUSE for macOS on your computer first before installing NTFS-3G. Though, it won’t enable NTFS write in Mac OS X by itself, but FUSE is a necessary tool for any Mac driver that deals with third-party file systems (including the NTFS file system).
To set up and use NTFS-3G:
1. Download and install FUSE for macOS on your computer before installing NTFS-3G. While installing FUSE for OS X, be sure to check the “MacFUSE Compatibility Layer” option in the installer.
 |
| Enable write support to NTFS format under Mac OS X |
2. Next, download and install NTFS-3G. This is the driver that will actually enable NTFS write capabilities on your computer.
During the installation process, When given the choice, make sure you select No caching rather than UBLIO caching.Then, once the installation is finished, reboot your computer.
 | |
|
3. After reboot, you may see a lot of on-screen warnings when your desktop loads, but you can safely ignore them – they are caused by the fact the NTFS-3G software has not been updated by its developers in a long time.
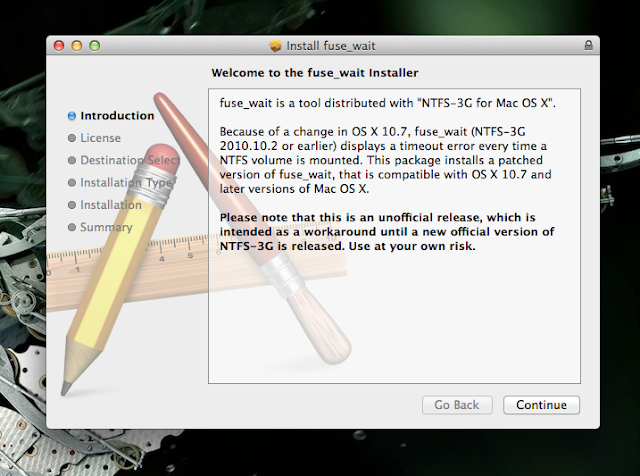
Technically, this means that NTFS-3G is working correctly and you can now write files onto your NTFS drives in Mac OS X. However, you’ll probably want to get rid of these annoying error messages. To do that, download and install the fuse_wait patch for NTFS-3G.
Once this is all done, you’ll need to re-enable the System Integrity Protection. Boot your Mac into recovery mode, click on Utilities, open the Terminal, type csrutil enable, press Enter, and reboot the system.
Warning: Be aware that above methods are unsupported by Apple, and might have adverse effects on your system.It may damage your volume or result in data loss otherwise. Do it at your own risk.
(C). NTFS Write
NTFS write is another open source application that allows you to activate read and write support for NTFS hard drives or storage media on Mac OS X version 10.9 or later. As soon as you connect any NTFS formatted media it automatically detects it and pops up a new window asking you to remount the media in read & write mode. It does not require any third party drivers to run on Mac OS X system because it uses OS X’s native NTFS support. ( Source : https://www.thefanclub.co.za )
To install and use NTFS Write
- Download NTFS write DMG installation file or from its GitHub project download page.
- To allow the install of the software go to: System Preferences > Privacy & Security > General. Then click on the lock in the bottom right-hand corner to unlock the options. Then select “Allow apps downloaded from: Anywhere”
- Double click on the DMG file to open and install it.
 |
| Enable write access to NTFS drive using free software |
- After the installation is complete, reboot/restart your computer.
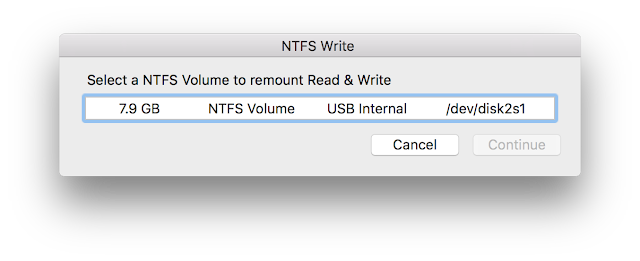 | |
|
- Now when you connect any NTFS formatted media it automatically detects it and pops up a new window asking you to remount the media in read & write mode. Select the disk volume you would like to activate read and write support for and click continue to remount.
- The volume will be unmounted and remounted with write access support enabled and open in Finder. It also add a Desktop shortcut to your storage volume.
Note:- Certain NTFS formatted media cannot be mounted in read write mode due to some errors or being incorrectly unmounted. It is always recommended to safely remove the media from windows or Mac and run check disk on windows to repair the media in case of NTFS file system errors before connecting them to a Mac OS X system.
3. Use terminal command to enable native NTFS read write support
It is a little-known fact that Mac OS X includes a native NTFS driver to read and write onto NTFS formatted drives. However, this feature is disabled by default but can be enabled easily using some terminal commands. To enable writing to a NTFS formatted drive, you have to edit the system’s hidden “/etc/fstab” file that handles the drives and partitions connected to the Mac OS X system. Just like all UNIX systems, Mac OS X also uses such configuration file to determine what it should do with certain drives. This file, “/etc/fstab” is not always present by default but will override the “read-only” flag on a per-drive basis if found. This method requires that you enable access on a per-volume basis – so if you have multiple NTFS drives you will need to repeat this process multiple times. Also note that, it is not a recommend method by Apple so it may or may not work on some systems or there may be some limitations or unknown behaviors with the driver, so use it with caution.
OPTION 1
Follow the below steps to enable the native NTFS read write support using terminal command
1. Open Terminal by navigating to Applications > Utilities > Terminal or press Command+Space, type Terminal, and press Enter.
2. Type the following command into the terminal to open the “/etc/fstab” for editing in the nano text editor.
sudo nano /etc/fstab
 |
| Terminal command to enable write access to NTFS drive |
3. Now add the following line to fstab, nano editor, replacing the word “DRIVE_NAME” with the name of your NTFS drive (be aware that it is case-sensitive):
LABEL=DRIVE_NAME none ntfs rw,auto,nobrowse
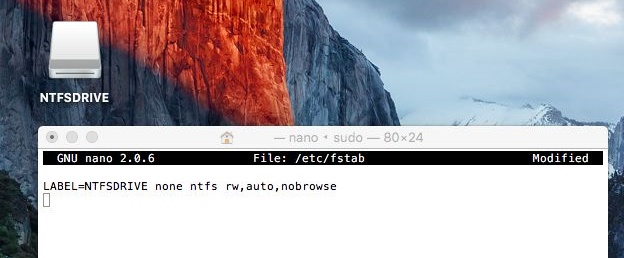 |
| Make NTFS drive writable on Mac |
4. Press Ctrl+O to save the file, and then press Ctrl+X to close the nano editor.
Note:- If you have multiple NTFS drives you will need to add a different line for each. If your DRIVE_NAME is made up of two words separated with a space, for example, “MY DATA”, you have to replace the space with escape sequence “40”. For example,“MY DATA” will be typed as “MY40DATA”.
Also Instead of using Label and the drive name in your terminal command, you could use the UUID (universal Unique Identifier) of that NTFS formatted drive to enable full read write access on it . So instead of typing command “LABEL=DRIVE_NAME none ntfs rw,auto,nobrowse “ we can use the following command line.
UUID=Universal_Unique_Identifier none ntfs rw,auto,nobrowse
 |
| Enable write access to every NTFS partitions under Mac OS X |
In order to get the UUID, Connect the NTFS drive to the Mac, then type the following command string at terminal:
diskutil info “/Volumes/DRIVE_NAME” | grep UUID
With the resulting UUID, type the following command to append the UUID with NTFS read and write support to “/etc/fstab”:
sudo echo “UUID=ENTER_UUID_HERE none ntfs rw,auto,nobrowse” >> /etc/fstab
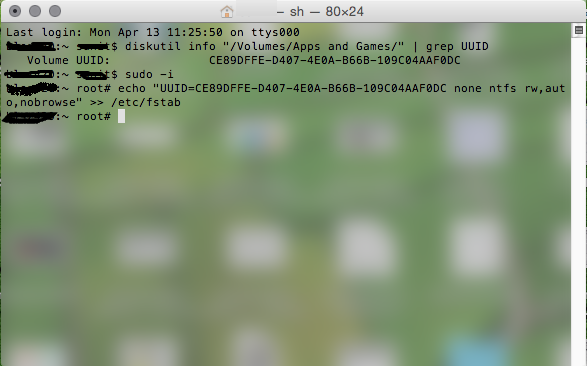 |
| enable full read- write access to windows NTFS format on Mac |
5. Now plug in the NTFS formatted drive to the computer, or unplug it and reconnect it, if it was already connected – it won’t pop up automatically and appear on your desktop by default, but you can get access to it in the /Volumes/ directory or by entering the following command at Terminal.
open /Volumes
In the folder /Volume, you should see the mounted NTFS volume, and you can now copy files to it. If you need to access this volume more frequently, you can drag it to the sidebar, or make an alias of it in the location of your choice.
OPTION 2
Another Manual Method using mount command
Making a disk available to use in operating system is called “mounting” in UNIX style. This simple command-line utility takes a few arguments or flags and connect a raw disk drive to a folder in Mac, called mount point. When the NTFS drive is connected, Mac OS X calls a utility called mount_ntfs that resides in the /sbin folder, and you can call it, too. Although OS X always tells mount_ntfs to mount NTFS drives in read-only mode, we can tell it to mount it in read-write mode by using the “-o rw” flag. When Mac OS X gets a new drive connected, it automatically creates a mount point with the name of the drive in /Volume folder. For example, a Seagate drive mounts as “/Volumes/Seagate Backup Plus” by default. But in order to mount the drive in read-write mode you have to create this mount point “/Volume/Seagate Backup plus” yourself.
Here are the steps to mount an NTFS drive in read/write mode:
1. Plug in the drive and let Mac OS X mount it read-only.
2. Look in the Finder to see the name of the drive. For example, Seagate external hard drive will have the name “Seagate Backup Plus”.
3. Open the Terminal and type the following command to get necessary information about the drive. Replace the “Drive_Name” with the name you see in finder and make sure to use quotation marks around it.
diskutil info “/Volumes/Drive_Name”
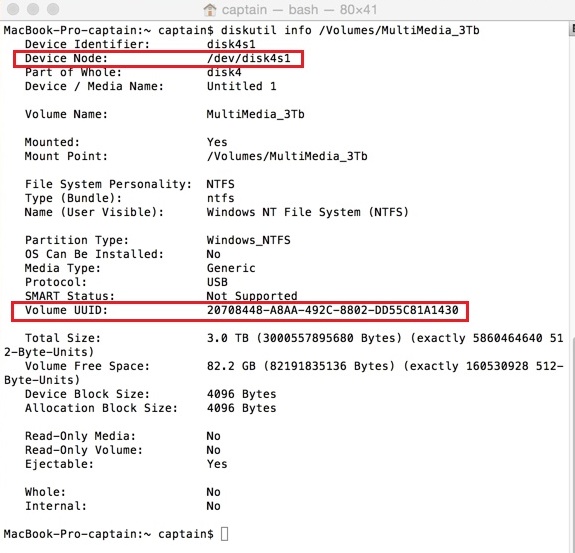 |
| Allow native NTFS write support on Mac |
4. Note the “Device Node” entry, which will look something like “/dev/disk4s1”. This is where the raw partition is mapped by the operating system, and where the filesystem driver will read its data from.
5. Eject the drive, using option-click in Finder or with the hdiutil command in Terminal:
hdiutil eject “/Volumes/Drive_Name”
6. Now you must create the mount point yourself again by typing the following command:
sudo mkdir “/Volumes/Drive_Name”
7. Finally, use mount_ntfs with the node name you spotted before and the mount point you just created to mount the drive in read-write mode using the following command.
sudo mount_ntfs -o rw /dev/disk?s? “/Volumes/Drive_Name”
8. Now unplug the NTFS formatted drive and plug it back in and you should be able to write to NTFS partition or copy files onto it.
OPTION 3
If the above solutions do not work, use the following terminal command to quickly unmount and remount the NTFS formatted drive in read-write mode.
macbook:~ nsohail$ sudo umount /Volumes/UNTITLED
macbook:~ nsohail$ sudo mount -t ntfs -o rw,auto,nobrowse /dev/disk3s1 ~/ntfs-volume
The above syntax uses the argument of mount command to enable write access to NTFS partitions under Mac OS X, a brief description of this mount command and all of its argument is available at its man page.


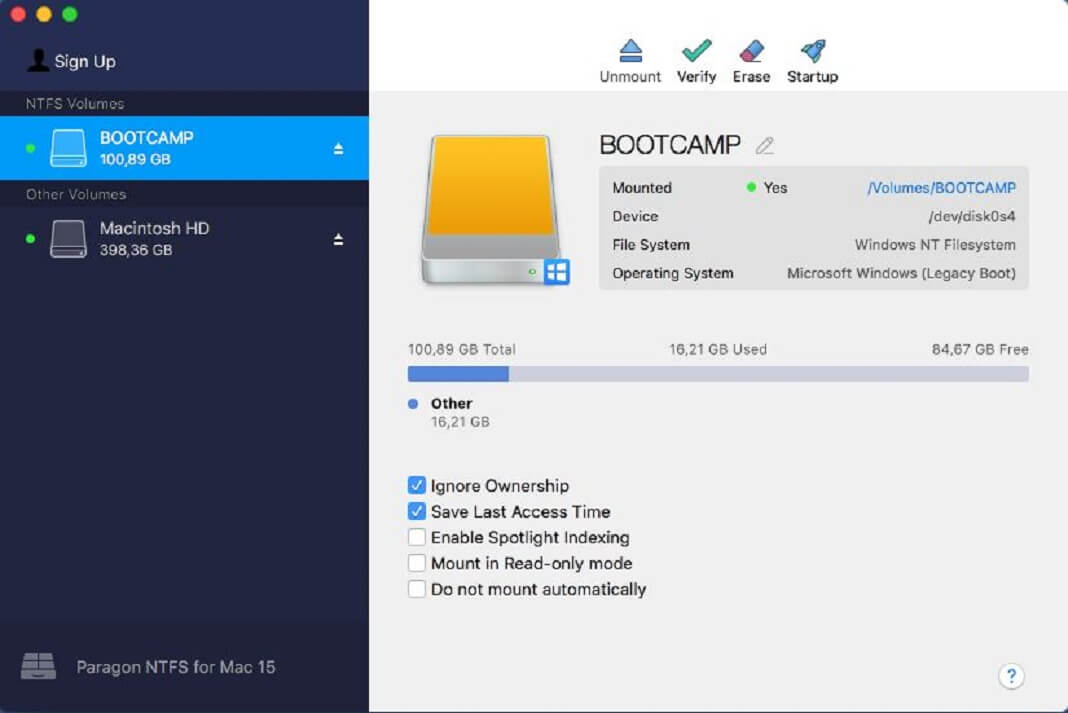


I searched and searched on how to make my 4TB hard disk work. I did this for days but no luck. Today I tried Option # 3 and it worked. Thanks a ton
The first native method worked. Thanks!