


 Header Through Cloudflare")


Apple in the recent WWDC presentation has broadcasted the latest versions of their operating systems including the macOS13 venture. This includes many new features, new tools, Safari Passkeys, and many more. If you are curious about these features and want to check all of them, in this article you will learn how to do it. This article will help you to know how to install and download the macOS 13 Ventura Developer Beta on your Mac. Before installing the macOS 13 Ventura there few other steps to follow and prepare the mac.
Also Read: Hands-On With macOS Ventura
Pre-Requisites for Installing macOS 13 Beta
Before you install the software you should be safe with all your data because beta software sometimes is buggy and it might cause some issues to the system like overheating, sometimes you might also lose the data, etc. So you should back up everything before installing the software. While the process of installing the software you do not need to worry about the data as you would have backed up. There are two methods by which you can backup. Before installing let us see how to backup.
Also Read: How To Install macOS Ventura On Mac
Back-Up Your Files with iCloud Drive
You can store all your data, documents, and files in your iCloud. You can access all your devices from which you have signed into the iCloud.
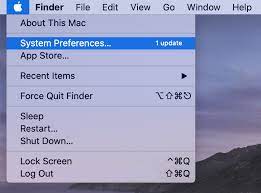
Click on the Apple Menu which is present in the top left corner of the screen. Under the Apple menu, select the System Preferences option.
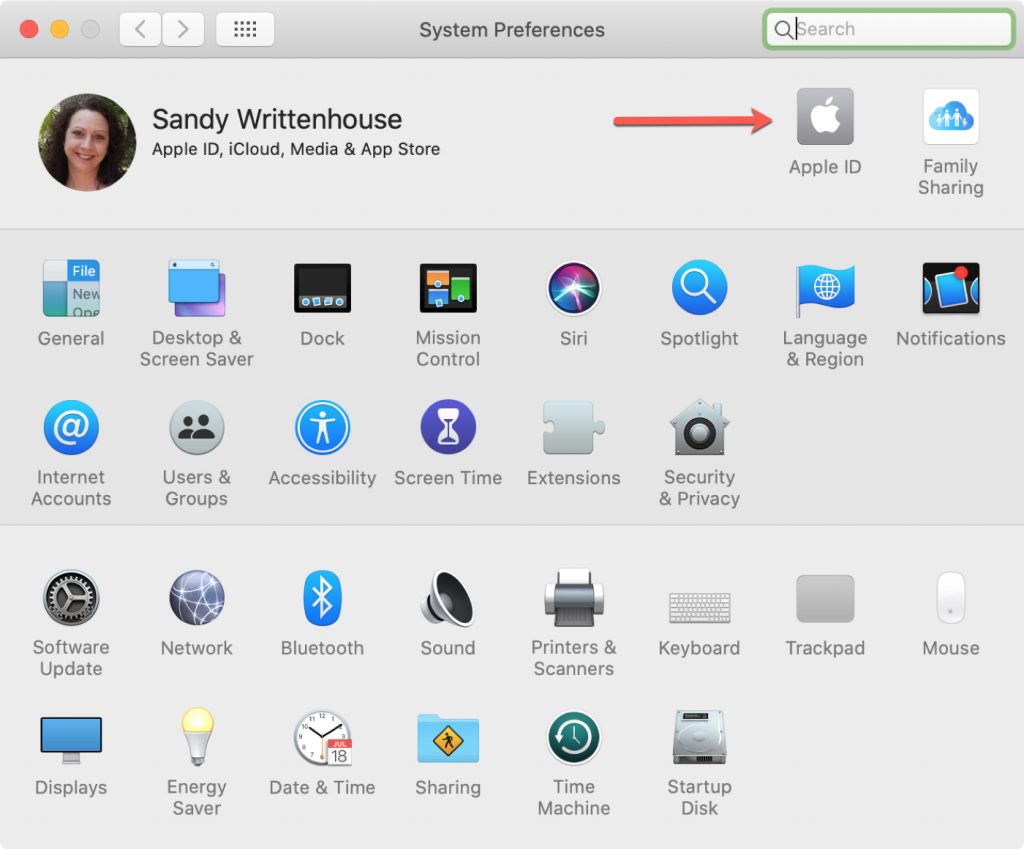
You will get a menu in the system preferences. At the top right, you can see the Apple id with the apple icon. Click on the Apple id.
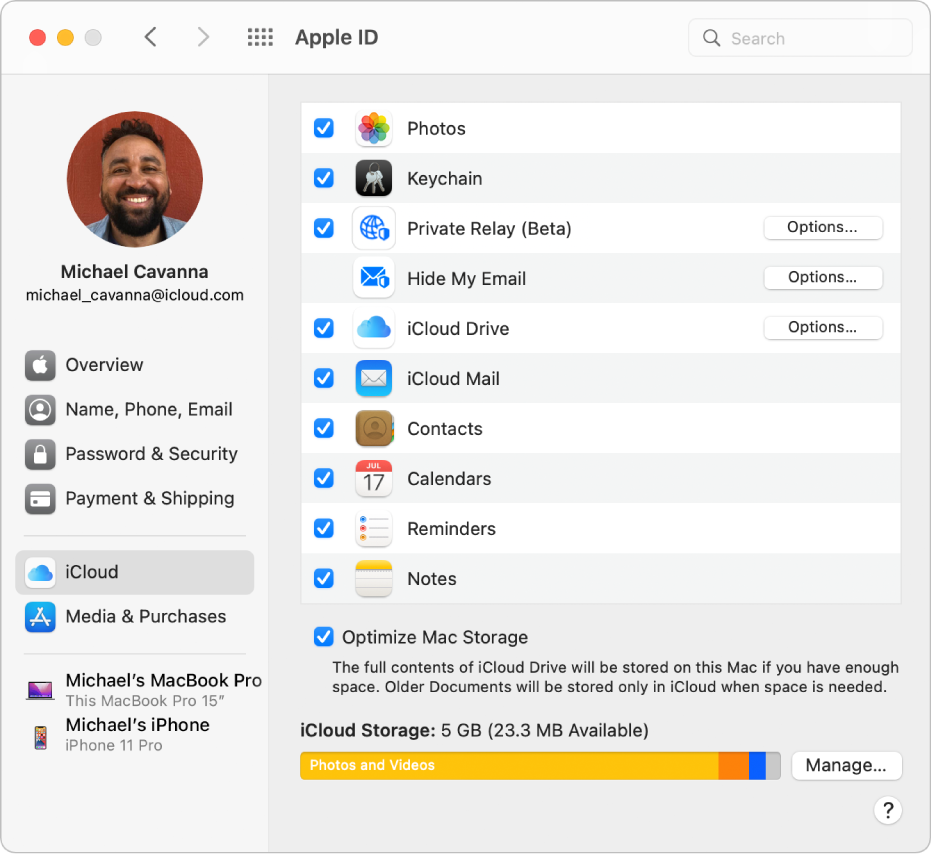
In the left sidebar, select the option iCloud. When you click on iCloud you get a list of options. Make sure that the iCloud drive option is turned on. Besides the iCloud drive click on the Options.
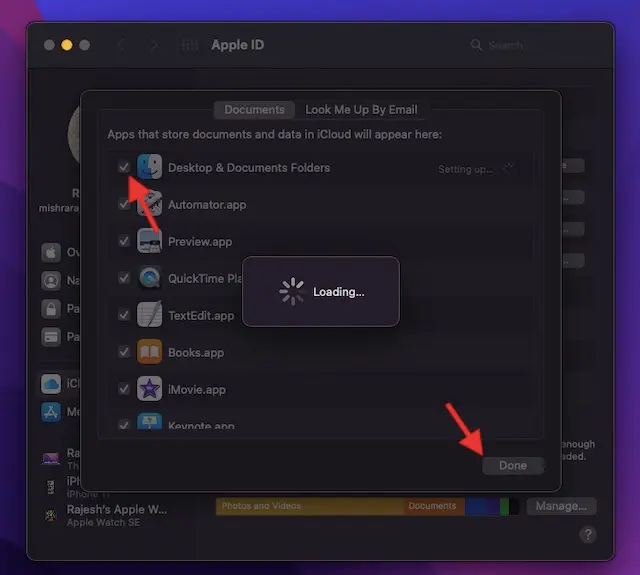
Now you can see all the files and apps you want to backup and store them in the iCloud. Select the Desktop & Documents Folders and click on Done to finish the backup.
Back-Up Your Mac with Time Machine
Another way of backing up is with the time machine. You can backup documents, photos, videos, files, etc.
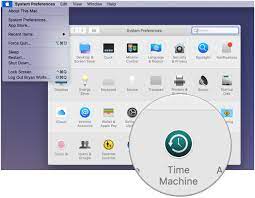
First plugin or connect any external device like a pen drive, USB, or any other to your Mac. Next, you should launch the Time machine with the help of System Prefernces. To launch it, click on the Apple menu present at the top left corner of the screen and select the System Preferences option.
Under the system preferences menu, at the bottom, you will be able to see the time machine option. Click on the Time machine option.
Under the time machine icon, click on the Select Backup disk option.
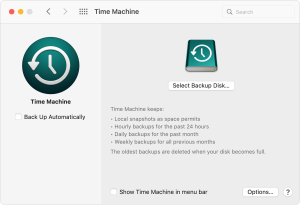
Now select the name of your disk and then click on the Use disk option to backup your device. This will backup everything present on your Mac.
Also Read: macOS Ventura: How Is It Different From All Other versions
Download macOS 13 Ventura Developer Beta Profile on Mac:
After backing up all the files, documents, and everything on your Mac, you can download and install the macOS 13 Ventura Developer Beta. Also, make sure that your Mac is compatible to download the Ventura beta. The older model of the Mac including the 2017 and 2016 MacBook does not support macOS Ventura.
Open the browser on your mac and search for developer.apple.com. Click on the Account and sign in to your developer account. Enter your Apple Id and proceed.
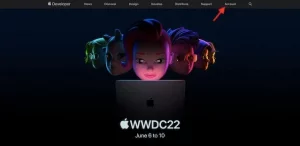
After you sign in, in the left side bar click on the Downloads option.
Under the Downloads scroll down and search for the macOS 13 beta. Besides the macOS 13 beta option, you can see the Install profile option. Select that option.

You will get a pop-up box on the screen asking the question Do you want to allow downloads on ‘developer.apple.com’?. In this box, select the option Allow for installing.

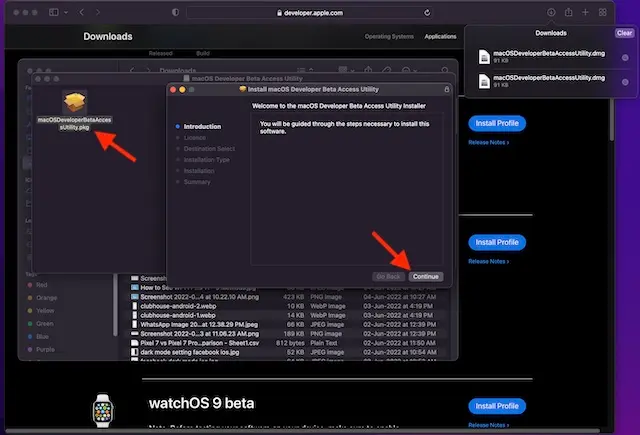
Now open the Finder and select the Downloads option. Then select the macOS 13DeveloperBetaAccessUtility.
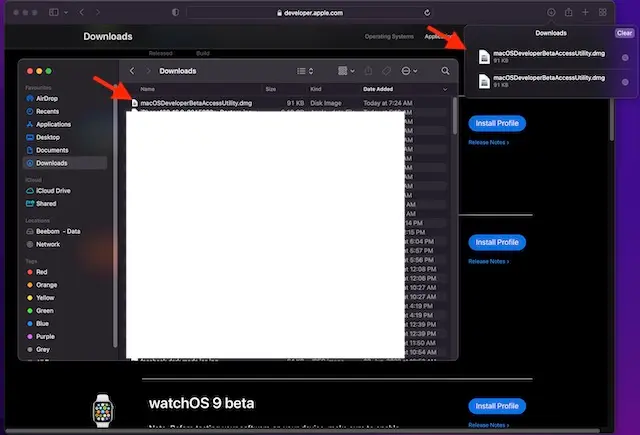
To run the macOS Ventura developer beta installer, double click on the macOSDeveloperBetaAccessUtility.pkg and click on Continue.
You will get a pop-up box to agree the Apple’s terms and conditions. Click on the Agree option.
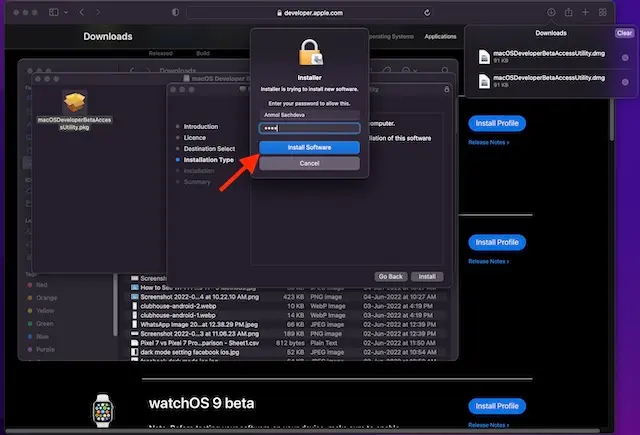
You will get the prompts, just follow that and finish the installation process. At the last step, you need to enter the Administrator password and click on the Install software option. This will download the macOS 13 beta.
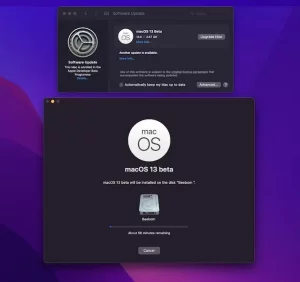
Once the macOS 13 developer beta software is next step is to install it. You will get a prompt box asking you to install it.
In the macOS 13 beta installer, select the Continue option to proceed.

Again you will get the prompt box to agree the Apple’s Terms and conditions. Select the Agree option. After you agree, click on the Install option. Just follow all the instructions to install the macOS 13 beta on your Mac.
After all the installation and downloading process is done, you will get a prompt box asking you to Restart the system. Click on the Restart option.
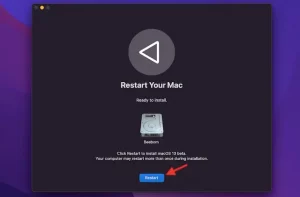
This installation and rebooting of your mac take some time. After it rebooted you can see the macOS 13 wallpaper and the lock of the screen. You can also customize all the features you wish.
Also Read: macOS Ventura: 6 Amazing Features Introduced
Conclusion:
Now you got to know how to install and download the macOS 13 Ventura Developer Beta on your Mac. I hope all your doubts get cleared and you got useful information regarding the topic.


