Are you playing a game, watching a video or doing anything on your Windows 11 PC’s display and want to show it to others on any other display? Then Miracast is the answer. In this article, you will learn how you can connect your Windows 11 PC to a wireless display ( any Miracast-capable display) through Miracast.
Miracast allows you to connect your Windows 11 PC/Device to any other external display wirelessly. It is a wonderful app for screen-mirroring. After the connection is successfully established, you can easily extend and enjoy the content from your Windows 11 PC to the external display.
Additionally, Working mode is the default mode in the Miracast technology. The other modes include gaming and watching videos.
Also Read: Miracast Not Working In Windows 11? Try These Fixes
What to Know:
- First Step: Installing Wireless Display on PC
- Steps for Connecting to Wireless Display
- When to use Miracast Adapter?
- Check if your PC supports Miracast
Note: Before proceeding with the Miracast, make sure that the external display you want to connect to is Miracast-capable.
First Step: Download Wireless Display on your Windows 11 Display:
First of all, install an application on your Windows 11 device for enabling the Wireless display function. Below is how to do it:
- Go to the System Settings. You can do it by pressing the key combination Windows+I. Else, you can also access the Settings through the Start Menu. Click on the Windows icon on the taskbar and tap the Settings icon there.
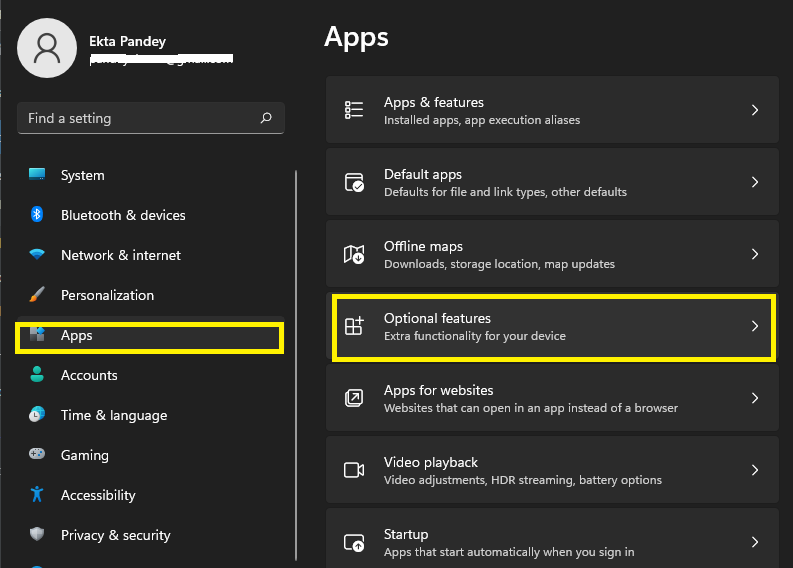
- Now, Click on Apps on the left pane.
- Tap Optional features on the Right-pane.
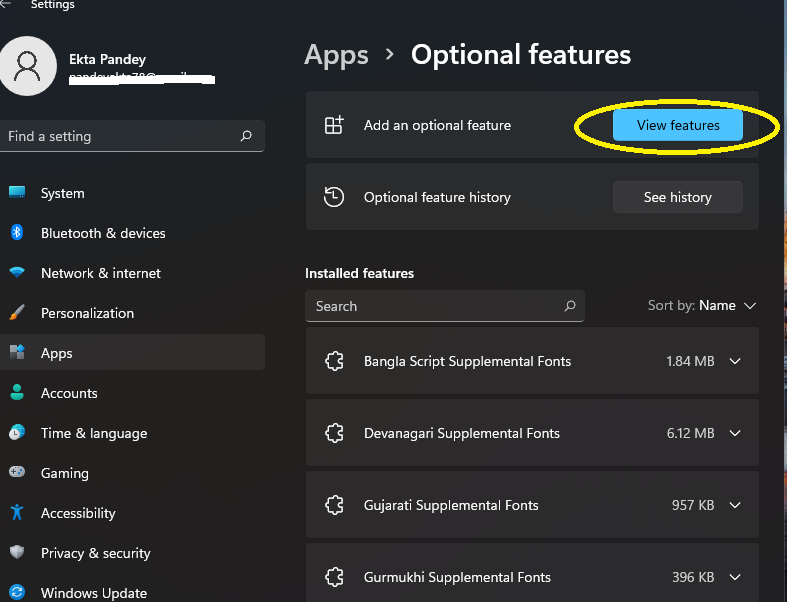
- Then, click on View features next to Add an optional feature.
- Search Wireless display in the Search box and under the Result Select Wireless Display( Check it).
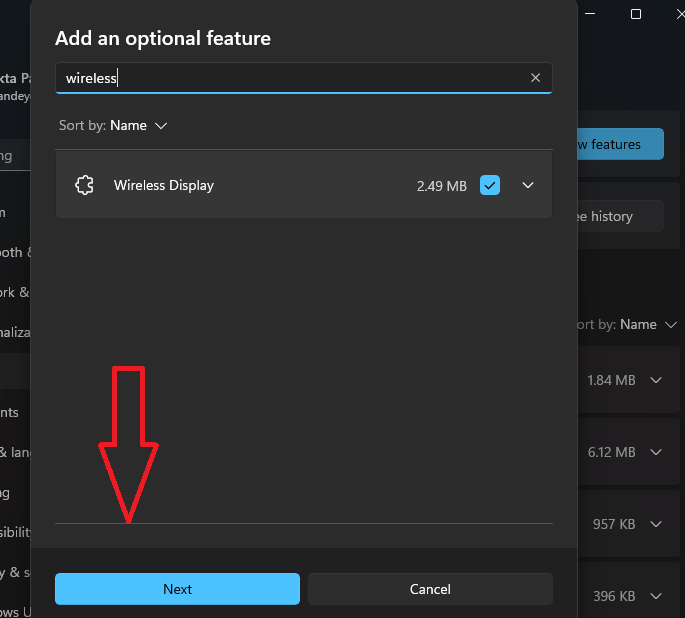
- Tap Next and then Install option at the bottom.
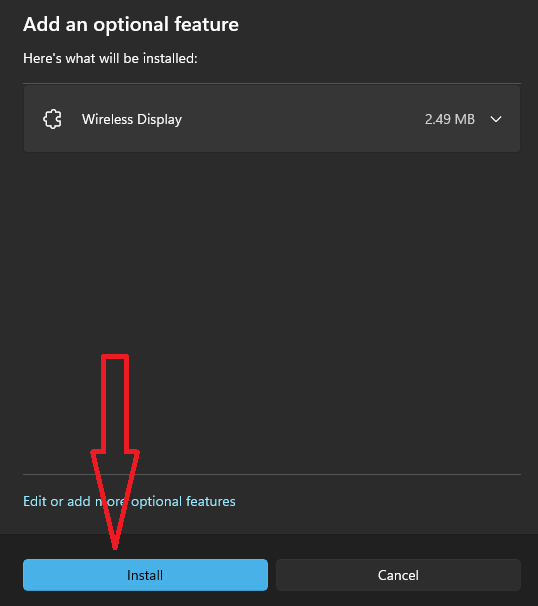
- The Wireless display app will start installing.
Now, make sure that the external device or display you want to connect to your windows 11 PC is ready for the connection.( By turning on the required connection options)
Also Read: How To Use Miracast To Mirror Windows To Roku?
Connecting Your Windows 11 PC with a Display(Wirelessly)
( Shortcut)
So, Without digressing much, let’s dive directly into the topic. The steps to wirelessly Connect your Windows 11 PC to any other external display are given below:
- First of all, the external display you want to connect your Windows 11 PC to must be turned on.
- Turn on Wi-Fi on your PC. Connecting your PC to internet is not mandatory. But, a turned on Wi-Fi is a pre-requisite for proceeding further.
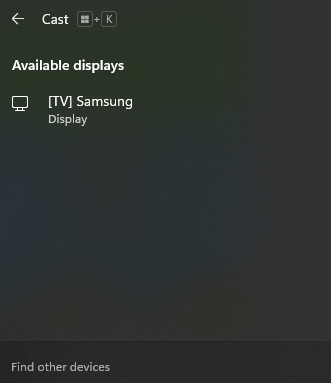
- Press the key Combination Windows + K on the keyboard.
- Now, the Cast window will launch and you will be able to see the list of devices which are available for connection.
Casting through Settings:
in case you are not able to use the above key combinations or your keyboard, you can do it through Settings too. Below is how to do it:
- Click-open the Windows icon on the taskbar of your device. Alternatively, you can also go the Settings by clicking on the Search icon on the Taskbar and searching Settings in the Search box.
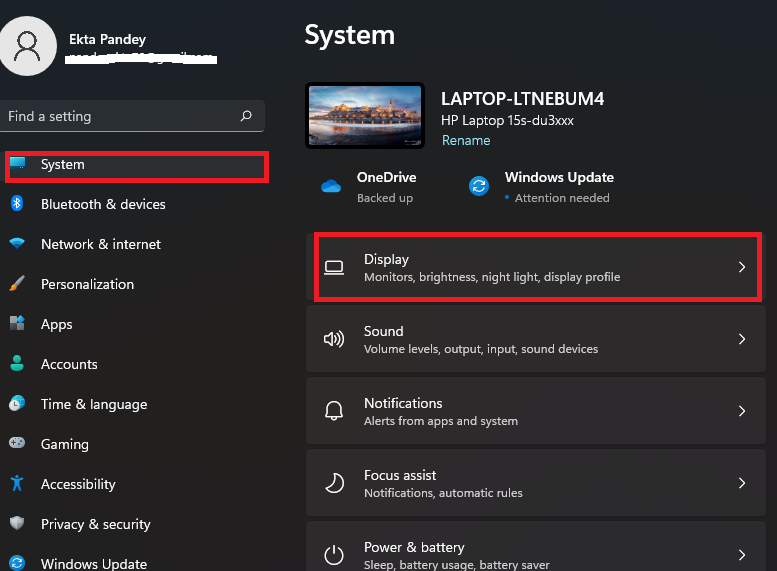
- Now, tap on the Settings icon which lead to opening of System Settings.
- Next, click on Display option on the Right side as given below in the picture.
- On the Right Pane, Scroll down and click on Multiple displays option.
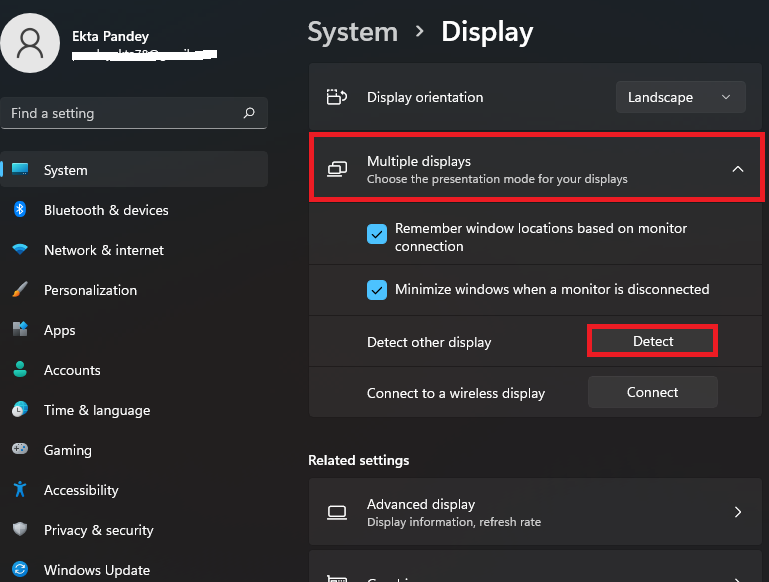
- Further, Tap the Connect button next to Connect to a wireless display under the Multiple Displays option.
- Now the Cast window will open up and you will be able to see all the available devices for Casting. Select the device you want to connect to from the list.

This way you can easily connect the display of your Windows 11 PC to any external display such as TV screen, projector or another PC.
When to Use Miracast Adapter?
If your wireless display doesn’t support Miracast, you’ll need a Miracast adaptor (also known as a dongle) to enable wireless display connection between your Windows 11 PC and the External display.
Check if your PC is Miracast-supported
You can effortlessly check if your Windows 11 PC supports Miracast or not. Here, we will discuss a method to do so.
Check through DirectX Diagnostic Tool
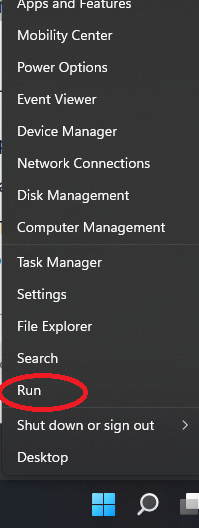
- Right-click the Windows icon on the taskbar and select Run from the context menu.
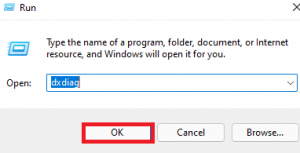
- Now, Enter dxdiag and click OK.
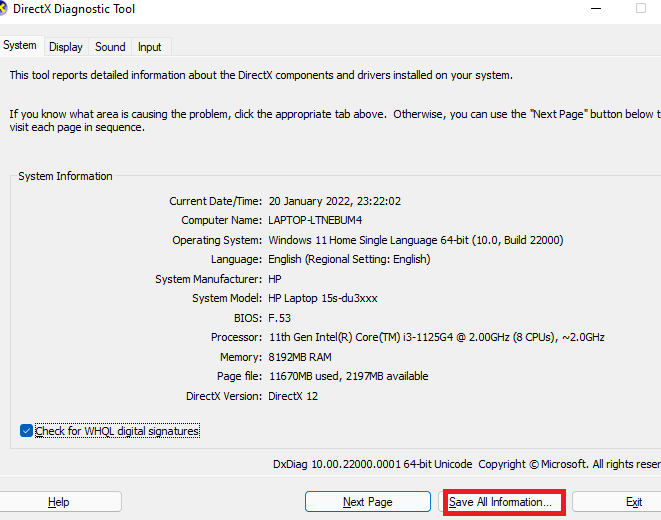
- DirectX Diagnostic Tool window will open up. Click on Save All Information at the bottom.
- Save the file to the Desktop as given below.
- Go to the desktop and open the DxDiag file you have recently saved to view the result.
- If your PC supports Miracast, you will se the result as
Miracast: Available, with HDCP as given below.
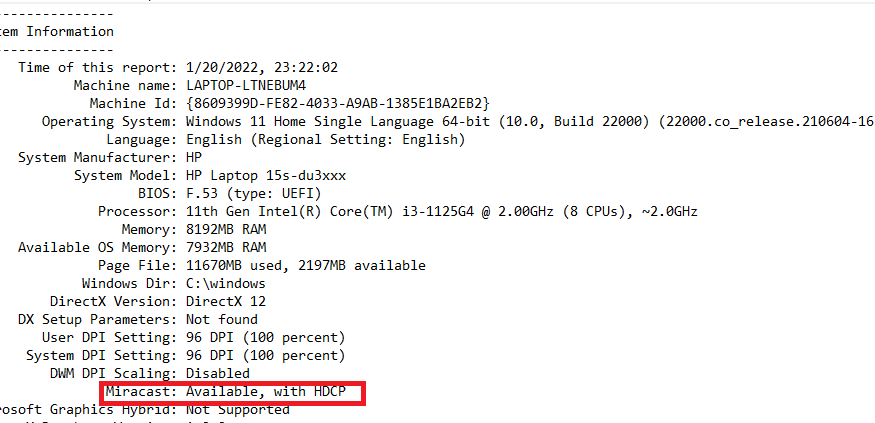
- If Miracast is not supported, you will see the result as Not Available.
- If your know your device’s Model number and brand name, you can check it’s Miracast-Supportability on this link: https://www.wi-fi.org/product-finder-results rel=”nofollow”
Summing up
So, hope you find this article helpful. Here, we have discussed ways to connect a windows 11 PC to a wireless display through Miracast technology. Additionally, way to check your PC’s supportability with Miracast is also discussed later in the article. Miracast technology is a great way to connect a wireless display with your Windows 11 PC and extend as well as cast display.
Also Read: 5 Ways To Fix Game Stuttering On Windows 11


