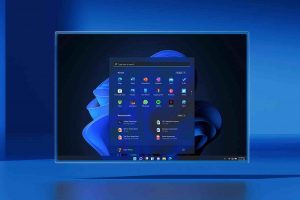
If you have done a recent upgrade from Win 10 to Win 11, you might notice that your taskbar isn’t quite as customizable — or as useful — as it once was. The old, familiar Start menu, with its changeable Live Tiles, is no longer available. The search box is no longer located in the taskbar but must be reached by first going to the Start menu, which is an additional step. (Though many may regard the fact that Cortana is no longer automatically included in that search field to be a plus.)
Another thing to note is that the taskbar is now permanently anchored to the bottom of the screen, so if you want it on top or on either side, you’re out of luck.
The taskbar is a critical element of Windows 11 and has a lengthy history in earlier versions of the OS. The Start menu, search tool, file explorer, and widget panel buttons are all included on the ribbon. You may also use the taskbar to add shortcuts to your favorite programmes.
The default taskbar in Windows 11 can only hold a limited number of shortcuts. There will be less space for micro windows if you add more shortcuts to it. As a result, adding a second taskbar to Windows 11 would be a fantastic way to free up some space. And Linkbar allows you to do just that.
Also Read: How To Turn Off The MSN News And Weather Feed From Taskbar In Windows?

How to get Linkbar and extract it
Linkbar is a free program that allows you to customize the taskbar on Windows 11. You may even use it to create multiple new taskbars. Then, instead of the default shortcut, you can add additional programme shortcuts to the new taskbar.
To start:
1. To begin, go to Softpedia’s Linkbar download page.
2. Choose a file to download now. The option to save the Linkbar’s ZIP archive is available.
3. Then, in the file explorer, click the taskbar button that displays the folder icon.
4. Open the folder in which the Linkbar ZIP file is located.
5. To open the ZIP archive in the link bar, double-click it.
6. Within File Explorer, select the Extract All option.
7. Within the Compressed Folder Extract (Zipped) window, click the browse button and select the extraction destination.
8. Choose a file. Check the Show extracted files when done box to avoid manually opening the extracted folder.
9. Select the Extract Finish option
Also Read: How To Hide The Taskbar Search Icon On Windows 11?
How to create a new taskbar with a link bar
The links bar in Windows 11 can now be used to create a new taskbar. Double-click Linkbar64 to do so. To open the window shown below, go to the extracted Linkbar folder. The Linkbar EXE is a 32-bit system architecture in-folder replacement. Choose a file Radio button “Just for me” To choose a working directory on the taskbar, click the dots button. It is preferable to utilize your user folder for this. Then, as shown in the screenshot below, press the Creates A button to create a new blank taskbar.
When configuring the first taskbar, keep in mind that you can add more than one. To add a second or third bar for more shortcut space, simply double-click the Linkbar64 again. When you add several taskbars, they will stack up as illustrated in the image below.
Also Read: How To Make Network Connections Metered On Windows 11
How to Add Shortcuts to the Taskbar
Several shortcuts can now be added to the new taskbar. To do so, right-click on the link bar taskbar and choose New > Shortcut from the menu that appears. Choose browse Choose the software you want to add in the window that appears.
Click the next one button, type the shortcut’s name, and then click finish. To open the programme, click the shortcut on the taskbar’s link bar.
You can also drag and drop desktop shortcuts right onto the taskbar’s links bar. To do so, hold down the left mouse button while left-clicking on a desktop shortcut. Then, while holding down the left mouse button, drag the shortcut to the new taskbar.
Right-click on a shortcut and select delete to remove it from the links bar taskbar. Select the remove links bar option. If you wish to clear the entire taskbar, go to the links bar submenu. You can also modify the names of the shortcuts by using the context menu’s file rename option.
How to customize the taskbar’s link bar
After you’ve added a few shortcuts, you may explore the Linkbar’s other customization choices. Select Settings from the context menu of a link bar taskbar area. Taskbar position, look, shortcuts, separators, and auto-hide customization are all available in the Link Bar Settings box.
The Panel tab allows you to adjust the position of the link bar taskbar. Place your finger on the screen’s position. There is a drop-down menu. Then choose File the left and right, as well as the summit or lower Selection.
To alter the colour of the taskbar, select the backdrop colour check box. By selecting the dots button, you can select a colour from the palette. You’ll need to select Progressing Until All Changes Take Effect from the drop-down menu.
In the File face tab, there is also a taskbar transparency option. Tap the Transparency Drop-down menu to select it. In the drop-down menu, select translucently.
By altering the icon size of your link bar taskbar, you may fit more into it. To do so, first, choose a file. Below is a link to the tab. Then lower the file Icon size Selection value.
Linkbar taskbars provide you with a lot more room for shortcuts.
Anyone who needs more room for programme shortcuts would appreciate Linkbar. In Windows 11, instead of adding shortcuts to the default taskbar and desktop, you can add them to the Linkbar. In some aspects, the Links Bar taskbar is superior to the conventional Windows taskbar due to its numerous customization options.
Conclusion
Here it is. Although Windows 11 have made already several changes to it followed by the previous windows. But as per requirement, you can add the extra taskbar to windows 11.


