Apple pay released in 2014 when mobile payments had just entered the market. Over time, Apple users resorted to this mode of payment over others. Thereby making it one of the popular and trustworthy modes of payments.
Moreover, there are many benefits an Apple user can get from using Apple pay. First, tight security keeps all bank account details, purchases, and user transaction history secure, and apple does not allow vendors and small businesses to identify the source of their payment.
All your bank account details, credit card, and debit card details are only with the tech company. So you do not have to worry about getting anonymous calls or ads on your news feed based on your purchase history.
Apple also asks for fingerprint scans and face identification before allowing the user to make a payment. Secondly, once you connect your Apple pay with your credit and debit cards, you don’t need to enter them for every online purchase you make. With a one-click setup, Apple Pay will do it for you.
Thus, if you own any Apple device, it makes complete sense to use the Apple Pay feature and save yourself from inconvenience.
Read: How To Boot Intel Mac Into DFU Mode?
How To Set Up Apple Pay On Your iOS Device?
Step 1: Go to the Settings app on your iPhone/iPad or iPod Touch.
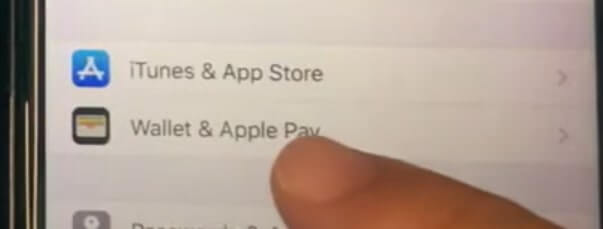
Step 2: Next, scroll down and choose the option Wallet and Apple Pay.
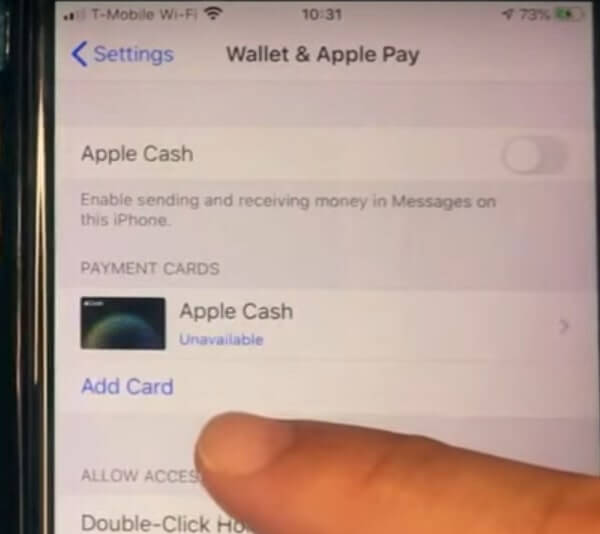
Step 3: When you open that option, you will find several options. Click on Add Card.
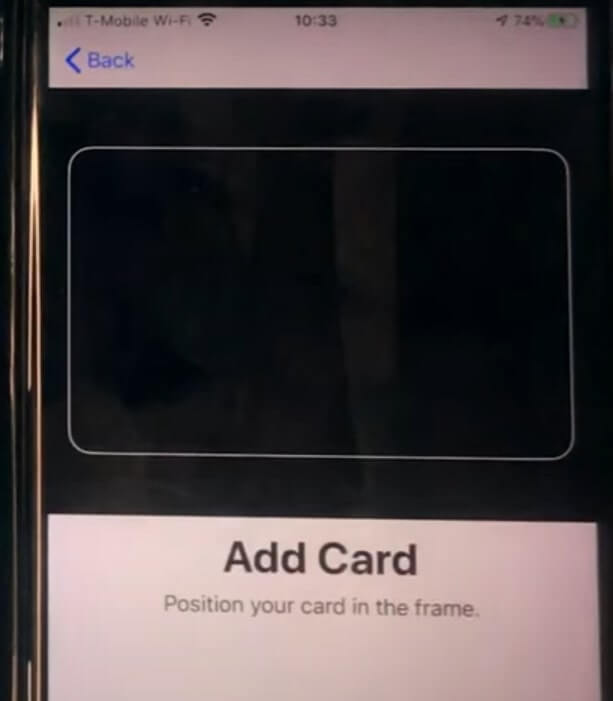
Step 4: Here, you will get two options to choose from. First, add your credit and debit card photo. Second, add your Apple Card details.
Thus, if you already own an Apple Card, enter the security digit, and you’re good to go.
Step 5: However, if that’s not an option for you, click on Credit or Debit card.
Step 6: After you click on it, a popup will appear to let you know that you can send and receive money via iMessage.
Set Up Apple Pay On iOS Device
Step 7: Moreover, click on Continue.
Step 8: If you already have an Apple Pay card associated with your device, it will ask you which one you would like to use. And if you don’t have that, click on Add a different card.
Step 9: Furthermore, you will get two options to do the same. Firstly, you can click a picture of your credit or debit card. Secondly, click on Enter Card Details Manually.
Step 10: Next, Apple Pay will ask you to enter details like your name and card number.
Enter Card Details
Step 1: After you type in your name and sixteen-digit card number, click on Next from top-right.
Step 2: Now, Apple Pay will ask you to enter your card expiration date and the three-digit security card number.
Step 3: Furthermore, click on Agree to Terms and Conditions.
Step 4: Apple Pay will ask you to verify the bank depending on what type of bank you’re adding. So make sure to add your phone number and email that is connected to your bank account.
Step 5: Click on Next, after which you will receive an activation code from your bank.
Step 6: Enter the activation code. Then you will see the messaging displaying your card activation is successful.
Step 7: Furthermore, click on Done.
Must Read: How To Install macOS Monterey Using Oracle VirtualBox?
Final Part: Set Up Apple Pay
Now go back to the main Wallet and Apple Pay screen, where you will be able to see your debit or credit card appear. Furthermore, switch on the Apple Pay option that will allow you to send and receive funds.
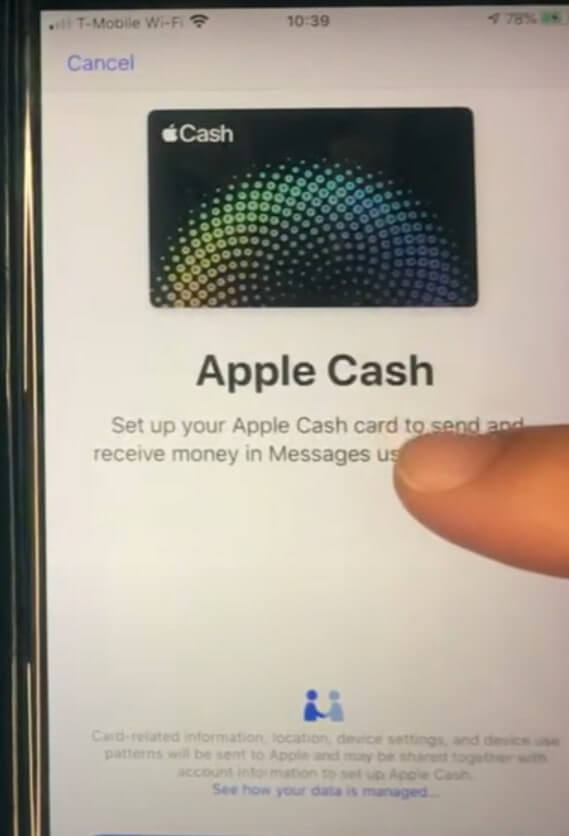
Next, Apple Pay will ask you to enter your Apple ID and password. So go ahead and enter those details. Tap on Sign in. Once it accepts your credentials, you will see a popup that says Apple cash. For this, you need to set it up for use.
How To Set Up Apple Cash?
- Click on Continue on the Apple Cash page.
- Another popup will appear saying that Apple Cash is Set Up.
3. Finally, click on Done.
After you do that, your Wallet and Pay screen will appear and show the balance in your Apple Pay. Now you can go ahead and use your Apple Pay. However, do remember to register before starting the process. Once you register, your digital card will also have the registration mark on it.
To use this, take your iOS device close to a payment terminal, and your Apple Pay will automatically pop up. Furthermore, you will need your fingerprint or Face ID to complete the payment process.

How To Send Money Using Apple Pay?
Step 1: Go to your iMessages and click on the tiny App button in Blue.
Step 2: After you do that, a few options will pop up. One of them will be Apple Pay.
Step 3: Click on Apple Pay, and it will pop up with a message to request or pay as well as the amount.
Step 4: Finally, click on Pay and add the amount using the plus sign or minus sign.
Remember that you can only send money to someone through iMessages on their iOS device.
How To Set Up And Use Apple Pay On Apple Watch?
Step 1: Following the above message, set up your Pay on your iPhone or iPad.
Step 2: Open the Apple Watch app on your iPhone and click on My Watch.
Step 3: Furthermore, select Wallet and Apple Pay. Here, you will see all the credit and debit cards you previously added to Pay.
Step 4: In addition, add a default credit card or debit card to your Pay. To do that, click on the default card and select the card you want to use regularly.
How To Remove Credit Card Using Apple Watch?
Step 1: Open your Apple Watch and click on the credit card you want to remove.
Step 2: Furthermore, scroll down and press delete. You can also do this from your Apple Watch app on your iPhone.
Step 3: Tap on My Watch and select Watch and Apple Pay. Then tap on the card you want to remove and select Remove this card.
How To Pay Using Your Apple Watch?
Hold your Apple watch near the payment terminal and double press the button under the digital crown when shopping outdoors.
Moreover, your watch will give you a prompt to do this when it is time to pay. The terminal will make a beeping sound, and therefore, your transaction will be complete.
This is how you can make purchases without having to take out your big iPhone from your pocket. It is inconvenient when you are in a hurry, and there is a long queue behind you. Furthermore, you will change your shipping address, card details and add more cards from my watch.
Conclusion
Once you set it up, you will save yourself from a massive amount of time wastage in the future. Moreover, it is secure and is a great way to use for online payments. As we carry our smartphones everywhere, we go, and thus, it makes sense to digitize your payments as much as you can.
Also Read: How To Unlock AirPlay For Monterey On Mac?


