Windows are known for their unique characteristics and user-friendly interface. While they offer ease of use and familiarity, like any other computer system, issues can still arise. One common problem that Windows users may encounter is when their drive fail to seen on the Windows system. There can be various reasons behind this occurrence.
So for today’s article, I would like to talk about why the drives you used or added to your machine need to be showing up as intended. There may be errors, physical or on the software side of things. All things, of course, have a certain percentage of getting fixed. This guide is for you, especially if it is a simple software problem.
Reasons for your Drive not being seen.
There can be multiple reasons why your Drive is not seen on Windows. Let me tell you most of it.
Physical Reasons:
Incorrect Installation or Insertion.
One of the most common possibilities of your Drive not being scanned or seen by Windows is that you may need to install it. There are different types of drives, such as a Harddrive, Solid State Drives, and NVME drives. Double-check your application of the Drive, for you may not have installed it correctly.
Physical Drive Damage.
Another common issue may have caused your Drive not to be scanned by Windows. Maybe your dream is dead or corrupted on a physical level with physical damage. Some parts of it may work, but some latter parts are more damaged. So even if it works. Your Windows machine still does not scan it.
Faulty Cable.
A quick fix sometimes would be just changing your cable. There are so many people mistaking their Drive as a faulty or dead drive but actually. It is just their cable because that is the defective part, not the Drive.
Also Read- 6 Best File Downloaders for Google Drive
Software:
Incorrect BIOS Settings.
Sometimes when installing drives (depending on the motherboard), There would be different available settings in the BIOS, such as RAID-0, RAID-1, and more. Also, there are times when there are only usable SATA spots on the motherboard with an IF-ELSE feel, for example. If the user uses the NVME part, some SATA ports would not be available for use. There are multiple different kinds, brands, and types of motherboards. Check the manual of your motherboard.
Unassigned Drive.
Unassigned drives happen often, especially when the user has a lot of Harddrive that they use on their computer. The initial computer scans these unassigned drives, which must be assigned to your Windows machine. Later in this article, I will show you ways to monitor, check and set your Drive to be visible on your Windows machine.
Corrupted Drive.
Your Drive may be corrupted. I have placed it here in the software section of the possible problems. Since corrupted drives can be caused by overuse or physical damage to the Drive, this is on the software department, for there are software fixes that may lower the overall usable storage of your Drive. But it can make you use your Harddrive like it is brand new.
Also Read- How to Download Files From Google Drive?
What can I do?
There are multiple different steps that you can take on to have your Drive scanned on your Windows Machine. Of course. With the physical side of things, there is only so much we can do. I cannot provide full details of how you can fix a broken hard drive. Here let me tell you some.
Easy Physical Fixes.
There are many things that you can do in a physical way to fix your Harddrive.
1. Check if you have inserted or installed your Drives well. Sometimes they need to be plugged in, and you thought the drives were correctly plugged in.
2. It would be to check if your cables are faulty. Switching the wires to a different one may fix the problem.
3. Shake your hard drive if it sounds hugely loose. Ask the shop or the person you got them from. It may have physical damage that is not easily fixable.
4. Suppose your Drive has actual damages. Just don’t use it. It may cause more problems in your system.
Easy Software Fixes.
There are ways to check if your hard drive is still healthy, usable, and workable on your Windows machine. Here are some tips.
#1. Disk Management can be the key.
A thing that many users need to correct is that they need to check if the system sees the Drives you have installed. But sometimes, they need to be partitioned correctly, or no letters are assigned.
So open Disk Management by clicking the start button.

And search for Disk Management.
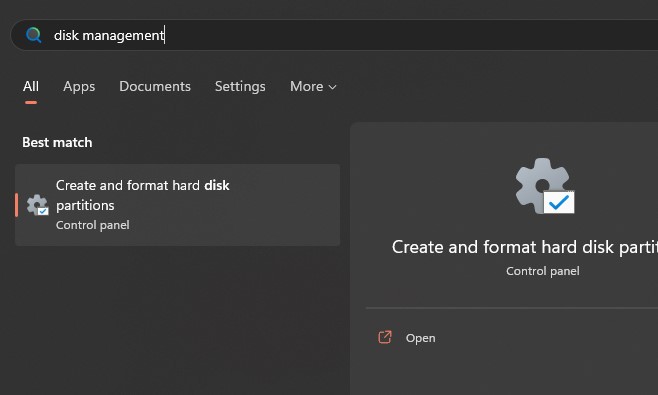
Open the Create and format hard disk partitions. You will then be presented with a window that shows you all the detected drives by your Window machine.

Check the bottom portion and see if the number of Disk matches all The number of Drive you have installed.
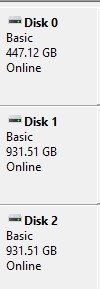
Let us say there are three. The above image should be the number of segments of the Disk that should be present. Let us tell you installed 3 Drives if only Disk 0 and Disk 1 are available. Then there might be something wrong with your Drive on a physical level.
#2. Assigning Drive Letter through CMD.
Honestly, so many people forget that sometimes if you just built a computer, it does not auto-assign a letter to your Drive. So you would not see it on your File Explorer or list of drives. There is a way to assign a Drive letter through CMD with the DiskPart function. Here let me show you.
#1. Go to your start menu and search for a run.

#2. Open that and type “diskpart.”
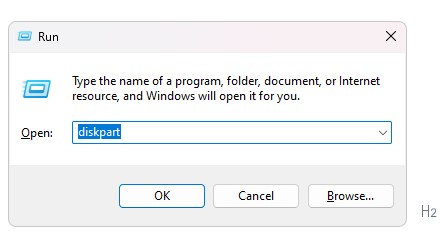
#3. Open that and type in the list volume.
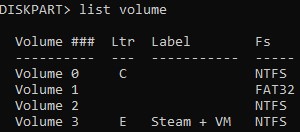
#4. Select the volume without a Letter (Ltr) by the command select “volume volume#“.
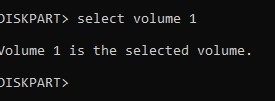
#5. Now type. “assign letter=letteryouwant” and change “letteryouwant” to the letter you want to assign on your drive.
Now that you are done with that, you should see your Drive on your Windows machine as something that you can locate and have easy access to.
#3. The easier way to Assign a Drive Letter.
Another way to assign a drive than going to the command prompt is using a program. This article is not sponsored in any way, shape, or form. It is a program that I recommend, for it has many valuable features connected to your hard drive.
The program that I would be recommending is called the Paragon Hard Disk Manager. It is a trusted program that a lot of consumer uses. This program allows you to fiddle with drive settings and backup and recovery, which is helpful to those who have many important files within their drives. The primary use that we will be using this application for today, though, is for Assigning a drive letter. As easy as the cmd or command line version of assigning a letter to a drive. Some may think it is still complex, intricate, and scary since it is done on CMD.
In this program, you can access the same functions, but more basic, for it is in a graphic format and not using any command.
This application is just for ease of use and ease of mind. Not necessarily a necessity for PC users. Also, it is to be noted that this program is paid. It cost around 80$. You can acquire this software at https://purchase.paragon-software.com/tour/hdm17-en/.
To use it. Simply open the application.
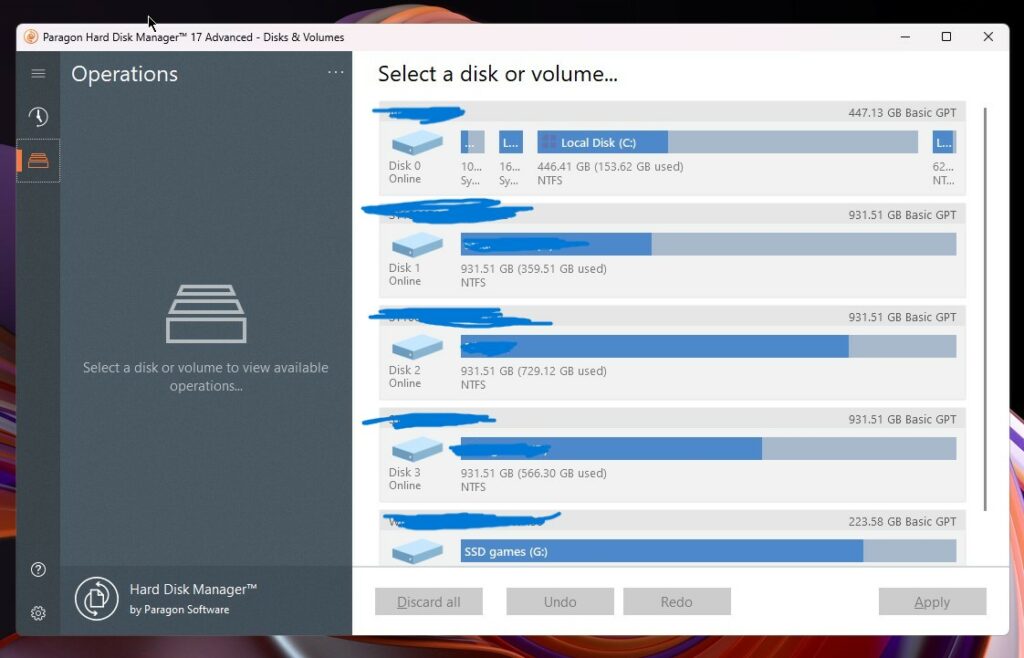
Select a space that is yet to have a letter assigned.
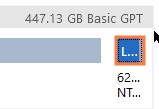
On the left side, you can assign or change the drive letter.
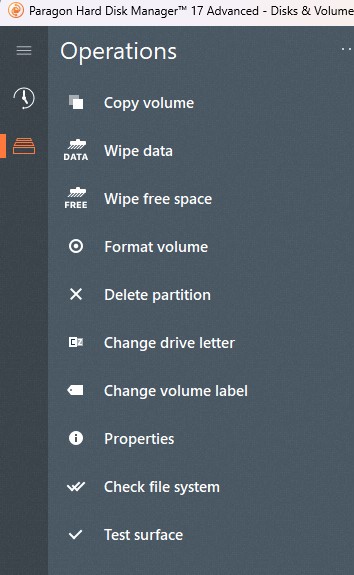
Press the change drive letter or assign.
The image or window below would pop up.
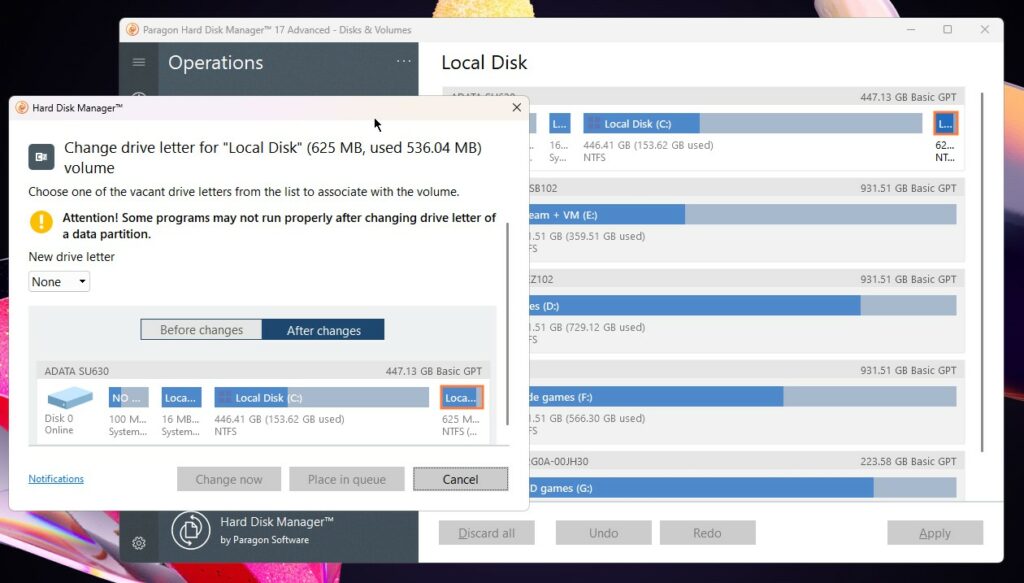
Now press the new drive letter and pick the letters available from the drop-down menu.
Then press Change Now.
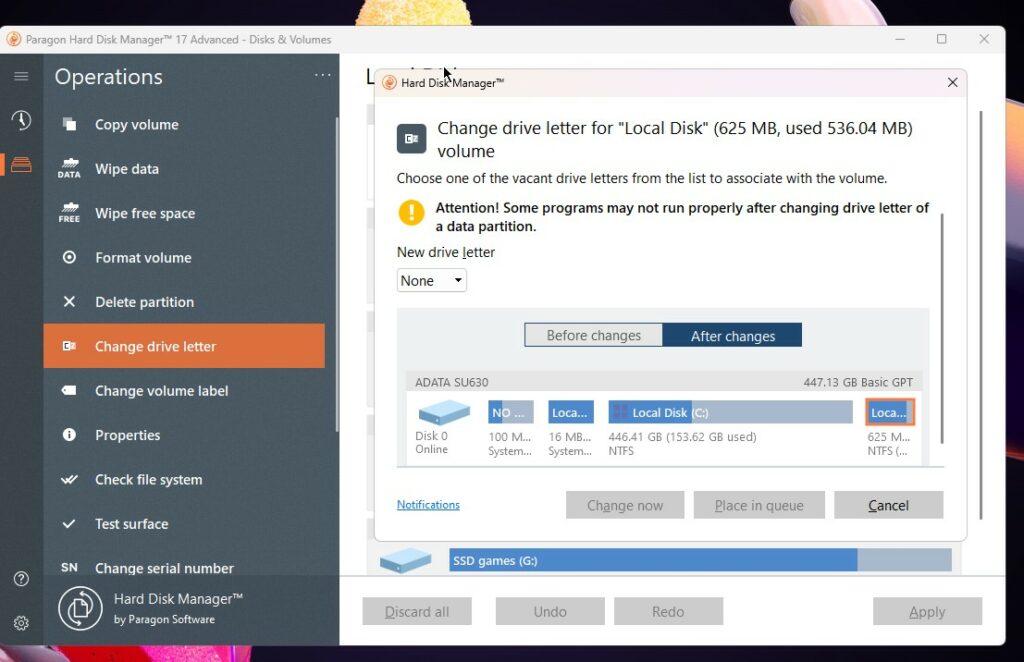
Now that is the easiest way to assign a drive letter.
The biggest hurdle is that most beginners are in the computer zone. They need to remember that some drives (especially when you have a lot on your computer) would show slowly, and they would need a manual assigning of letters. Hence this is why it is the most significant focus of this specific article. You should also take good care of your drives and check some of their physicalities. Cables can be damaged over time. Though, it is one of the culprits as well when Windows is not seeing your Drive. BIOS can be a big thing too. But that depends on your hard drive or the type of Drive and motherboard (or system) you have. If you have further queries, please comment on this article so we can help you with your Drive missing problems.


