Earlier, it was impossible to think of using iTunes on Chromebook due to the incompatibility between two distinct ecosystems by Apple and obviously Google. But in 2023, everything is possible. Although, you can use iTunes on Windows or Mac operating systems. But iTunes is not compatible with Chromebook. Worry not, as there is a way you can make it happen and use iTunes quite smoothly on your ChromeOS.
In this article, I will provide you with a step-by-step guide on how to install iTunes on Chromebook in 2023 and use it without any hassles.
Instructions to Install iTunes on Chromebook in 2023
1. Enable Linux and Set Up Wine on Your Chromebook
Google made a groundbreaking move by introducing Linux on Chromebooks through its innovative Project Crostini. Since then, this feature has been a game-changer for a variety of users – from curious students eager to learn to code, to software developers and even IT administrators. The inclusion of Linux on Chromebooks has proved to be a godsend for many.
In simple words, you can utilize apps that are made for Linux on your ChromeOS after you install Linux on your Chromebook.
To start utilizing Crostini on your Chromebook, first, you require to tap on the clock icon located at the bottom right corner of your screen. After that, select the Settings icon and scroll down until you find the Linux development environment option. If this option is not available, it means that your Chromebook does not support Crostini and you will need to follow a different set of steps. However, if the option is there, simply click the Turn On button and then click Install in the following window to activate the feature.
Follow the steps below if you do not have the Linux development environment option.
1.1. Enable and Set up Linux
Installing Ubuntu, a distinct kind of operating system, concurrently with your Chromebook’s system is needed to perform that. Thankfully, Crouton is a tool that can assist you in setting up this particular environment on your Chromebook.
Step 1
Start by backing up all the data on your system as installing Linux will erase everything on your Chromebook. When you’re ready after backing up all the necessary data. The first step is to turn off your Chromebook. Next, hold down the Esc and Refresh keys and then press the Power button. You will see the recovery screen appear, where you need to press Ctrl + D. Then, when you’re asked if you want to turn off OS verification, just press Enter. From that point forward, whenever you start your Chromebook and see the OS verification screen, you’ll need to press Ctrl + D to proceed.
Step 2

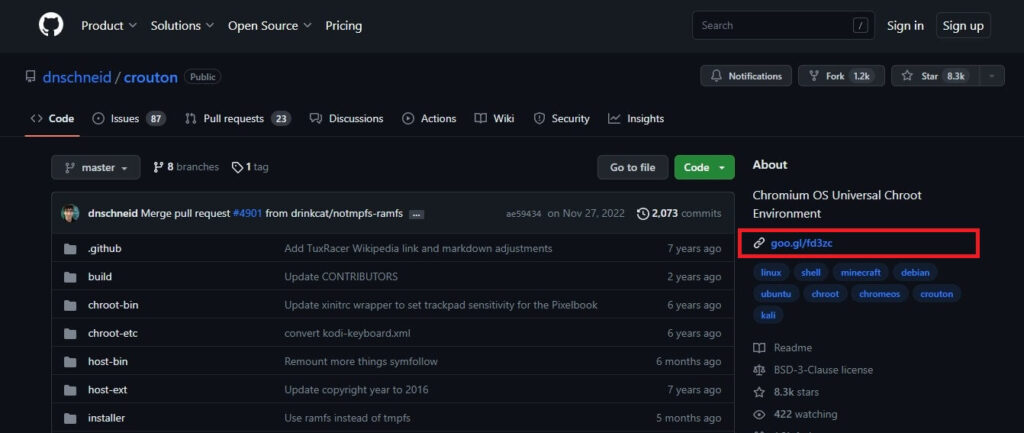
To acquire Crouton for your Chrome OS, you can effortlessly navigate to the Crouton website on the GitHub page and opt for the link found on the right-hand side of Chromium OS Universal Chroot Environment. Once you have successfully downloaded Crouton, accessing the Chrome OS terminal is required. Only press Ctrl + Alt + T, then jot down “shell” and press Enter to launch the shell.
After that, paste the following command and press enter to run it:
sudo sh ~/Downloads/crouton -t xfce
Also, if you are using Pixel Chromebook or if you are using a touchscreen Chromebook, paste the command below:
sudo sh ~/Downloads/crouton -t touch,xfce
Step 3
After the installation is concluded, you might be requested to create a Linux username and password. Note that the installation process could take up to 10 minutes to finish.
And finally, paste the following command to enter your Linux Desktop:
sudo enter-chroot startxfce4
Now, whenever you want to utilize Linux while booting into Chrome OS, you’ll require to enter a specific command into the terminal. Ubuntu Linux runs concurrently with Chrome OS, allowing you to effortlessly switch between the two operating systems whenever you desire. Use Ctrl + Alt + Shift + Back or Ctrl + Alt + Shift + Forward to switch between Chrome and Ubuntu.
Also Read- iTunes Home Sharing Not Working In macOS Ventura [Fixed]
1.2. Set Up Wine on Your Chromebook
So, now that you have enabled or set up Linux on your Chromebook. The Wine App is an open-source compatibility layer that allows for the execution of Windows applications on certain POSIX-compliant operating systems like Linux, Chromebook, and Mac. Instead of emulating Windows’ internal logic, Wine rapidly translates API calls into POSIX calls.
Chromebook users often favor utilizing Wine because the laptop lacks the necessary drivers to run Windows applications smoothly. Having a Wine App on Chromebook eliminates the need for complicated workarounds to get Windows-based programs up and running on the device. Additionally, Wine is freely available, making it an accessible and cost-effective solution for Chromebook users to enjoy.
Step 1
You need to toggle to turn on the option of Linux development environment. You have to open the Terminal on Linux. On your Chromebook launcher, you will find the Terminal option in your Linux apps folder and paste the command below:
sudo dpkg --add-architecture i386
Step 2
Now you need to add the Repository key. To do that, you have to paste each command and press enter after pasting each command given below:
sudo mkdir -pm755 /etc/apt/keyrings
sudo wget -O /etc/apt/keyrings/winehq-archive.key
https://dl.winehq.org/wine-builds/winehq.key
Step 3
Now you have to download the source file of WineHQ by pasting the following command on Terminal:
sudo wget -NP /etc/apt/sources.list.d/ https://dl.winehq.org/wine-builds/debian/dists/bullseye/winehq-bullseye.sources
Step 4
Now to update the Repository Linux app, simply paste the following command:
sudo apt update
Step 5
Finally, install the Wine for Chromebook, paste and run the following command by pressing enter:
sudo apt install --install-recommends winehq-stable winbind
Now, once prompted, confirm the installation of Wine on your Chromebook by pressing the “Enter” key again.
Step 6
Now to install additional packages for wine on your Chromebook, in the terminal paste this command winecfg and press enter.
After launching the Wine app, a pop-up window will display. Simply tap on the “Install” button multiple times. Although Wine is now installed, it’s recommended to integrate a specialized file manager system. To do so, paste the following command and hit Enter:
sudo apt install nemo
Voila! Wine is now installed on your Chromebook!
Now, the upcoming steps are easy and quick to follow, so stay focused to enjoy using iTunes on your Chromebook.
Also Read- 4 Ways To Fix “iPhone Is Disabled Connect To iTunes” Error
2. Download iTunes

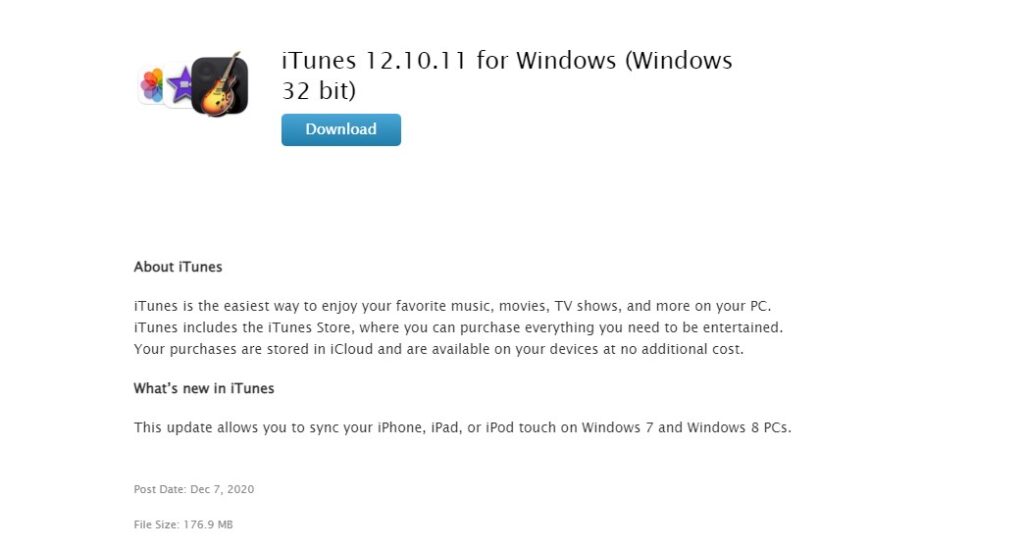
To assure compatibility with Chromebook, it’s instructed to download the 32-bit version of iTunes as the 64-bit version is not supported.
Simply download the iTunes Windows 32-bit version from the Apple page and then select the place to download the file on your System.
Now, once the iTunes Setup file has been downloaded, it’s recommended to relocate it to the Linux files directory and designate it a unique title that’s straightforward to recall. For instance, you could rename it to something like iTunesSetup.exe.
Also Read- How To Disable iMessage Without iTunes Account
3. Install iTunes on Chromebook in 2023
Keep in mind that, in the command given in step 1 you need to substitute “iTunesSetup.exe” with the name you have allocated to the setup file. Besides, supersede “username” with the authentic name of your Chromebook.
- First, you require to open the Linux Terminal window and enter or paste the following command to launch the iTunes installation process:
WINEARCH=win32 WINEPREFIX=/home/username/.wine32/ wine iTunesSetup.exe. - After that, you have to follow the on-screen instructions in the iTunes installation window that appears and click Next to continue.
- Now on the Installation Options window, click Install and if you see a pop-up window informing you that AutoRun turned off, click Yes and then wait for the installation process to complete.
- Once the installation process finish, tap Finish to exit the installer.
Eventually, after the installation procedure is concluded, you are authorized to access iTunes on your Chromebook by proceeding to the Applications option and launching it from the Linux apps section.
Also Read- How To Fix iTunes That Won’t Open On Mac?
4. Make a shortcut for iTunes on your Chromebook
- Initiate by opening the File Manager and proceeding to the Linux files directory.
- After that, tap on the three dots icon found at the top right-hand corner of the window and select Show hidden files from the dropdown menu.
- Now you need to proceed to the path: .local/share/applications/wine/Program Files/iTunes
- Then, you have to look for the desktop file and right-click on it and then select Open with Text Editor.
- Now find the line that starts with Exec= and jot down or paste the subsequent code after it:
env WINEPREFIX="/home/your_chromebook_name/.wine32" wine "/home/your_chromebook_name/.wine32/drive_c/Program Files/iTunes/iTunes.exe - After that, you require to hit Ctrl + S to save the file and then close the text editor and keep in mind to replace your Chromebook name with the actual name of your Chromebook.
Ultimately, you should now be capable to locate iTunes in the apps menu or dig for it in the search bar of your Chromebook.
By pursuing the steps drafted in the guide, you should now have successfully installed iTunes on your Chromebook. This will authorize you to access and relish all of the features of iTunes, including playing music and videos, syncing your Apple devices, and downloading media from the iTunes Store.
Also Read- Fix- Your Account has been Disabled in the Apple Store and iTunes
What other apps does a Chromebook run besides iTunes?
Here are some alternative apps to iTunes that you can utilize on your Chromebook:
- Spotify
- Wink Music
- InstaDj
- Youtube Music
- Gaana
How well does iTunes perform on a Chromebook?
Regardless of whether you have a low-end or high-end Chromebook, installing with the aforementioned method may result in below-average performance. You may encounter app crashes and other problems as well. So it’s better that you look for alternatives like Spotify, Gaana, etc…
Also Read- Unable to open iTunes-The iTunes Library file is locked on a locked disk


