Customization and personalization have forever been significant features of Windows, so it is foreseen that the trend will continue with Windows 11. If you want to personalize your Laptop and give it more liveliness and character after installing a fresh copy of Windows 11, something as simple as switching to a different collection of fonts might work wonders.
You now have a new method on Windows 11 for downloading fonts in all languages at once. The operating system allows you to add and delete fonts as needed and includes a wide choice of fonts by default. This post will instruct you on how to concurrently download and install fonts for every language on your Windows 11 PC.
Also Read- How To Share OneDrive Files And Folders In Windows 11
download fonts for all languages
There are two methods you can utilize to download fonts for all languages:
1- Download Fonts for All Languages from Windows Settings
2 – Download Fonts for All Languages Using the Control Panel
Method 1: Download Fonts for All Languages from Windows Settings
Follow the simple below to download fonts for all languages using your system settings on Windows 11:
Step 1: Proceed to Settings by tapping on the Start option
Step 2: There you will see the Personalization option
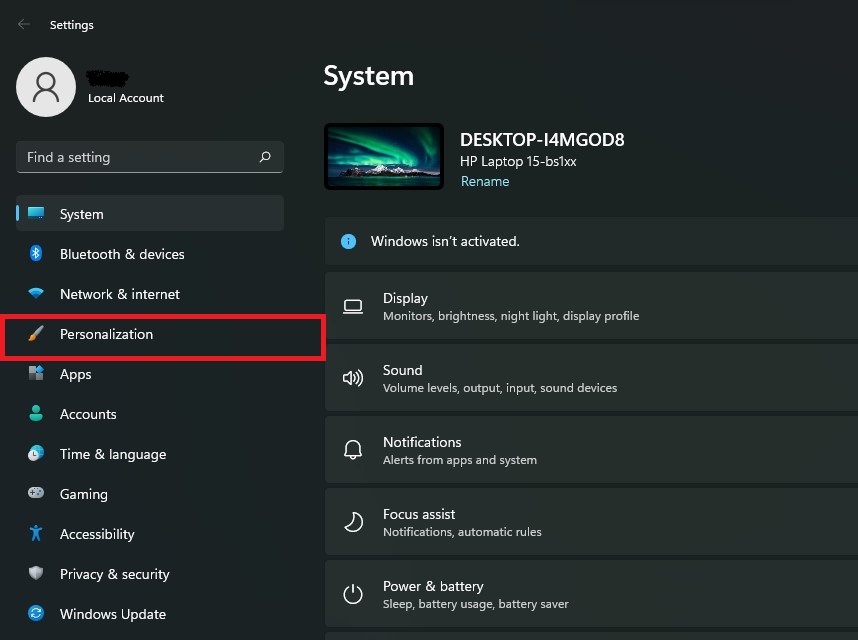
Step 3: Scroll down, and select Fonts located on the right window

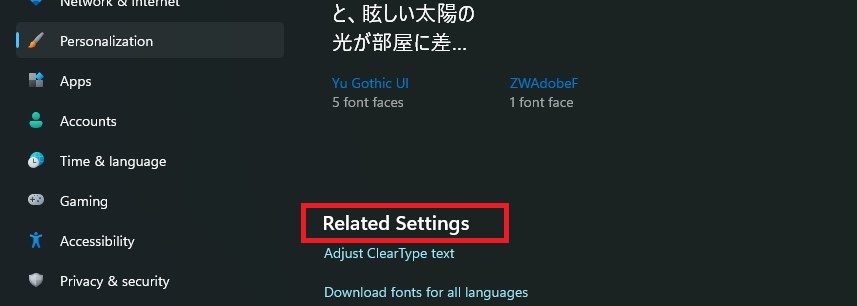
Step 4: Once you are in the Fonts window, scroll down and locate Related Settings. Under Related Settings, you will see Download fonts for all languages
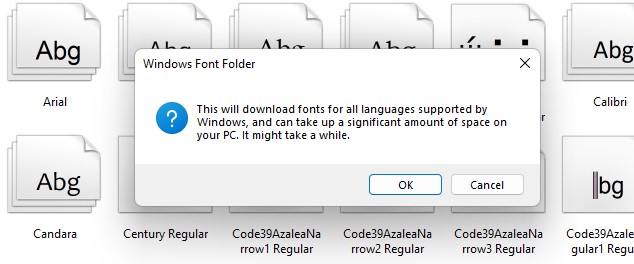
Step 5: You will then see a window, just Click on Ok
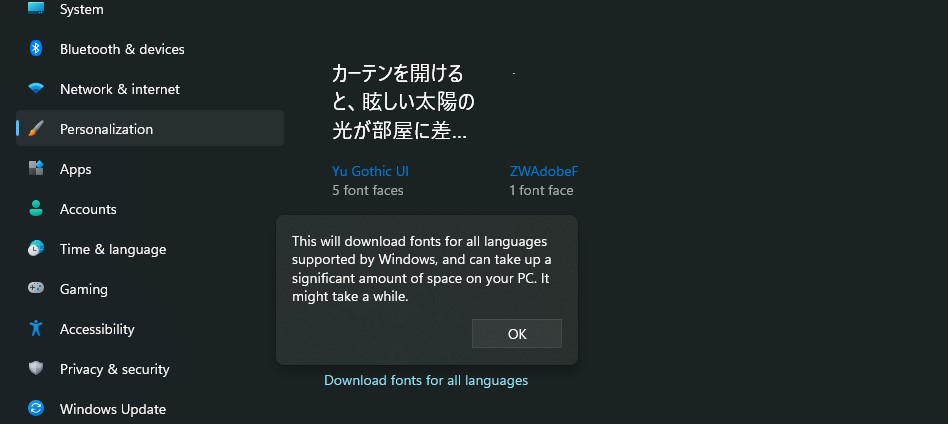
That’s how you can download fonts for all languages from System Settings.
Method 2: Download Fonts for All Languages Using the Control Panel
Down below are some simple steps you can follow to download Fonts for All Languages Using the Control Panel:
Step 1: On the search located in the Taskbar, type Control Panel, and then select it
Step 2: On the Control Panel, locate Fonts and tap on it
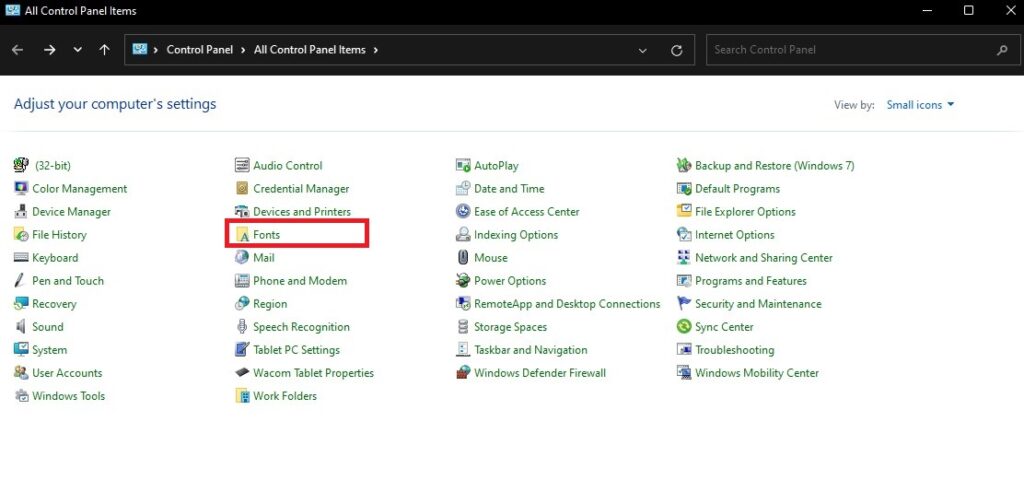
Step 3: In the fonts page, on the left panel, you will see Download fonts for all languages
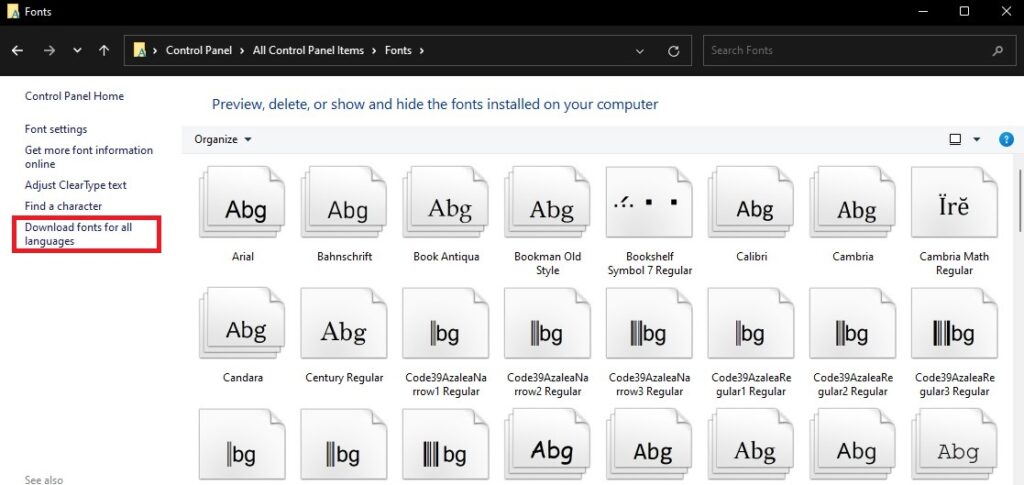
Step 4: Finally, you will be then prompted to Windows Font Folder, just click Ok and your font will start downloading.
That’s it! Now you can enjoy new fonts and make your work more intriguing on your Windows 11.
Also Read: How To Enable Or Disable Changing Desktop Background In Windows 11
Download Fonts from External Sources on Windows 11
In addition, you can install fonts from external sources as well such as Adobe or Google Fonts. You can simply install fonts from an external source by just double-clicking on it and then on the top panel you will see the install option just click on it and you’re good to go. But, there are two more methods that you can use to install font.
To do that, follow these steps:
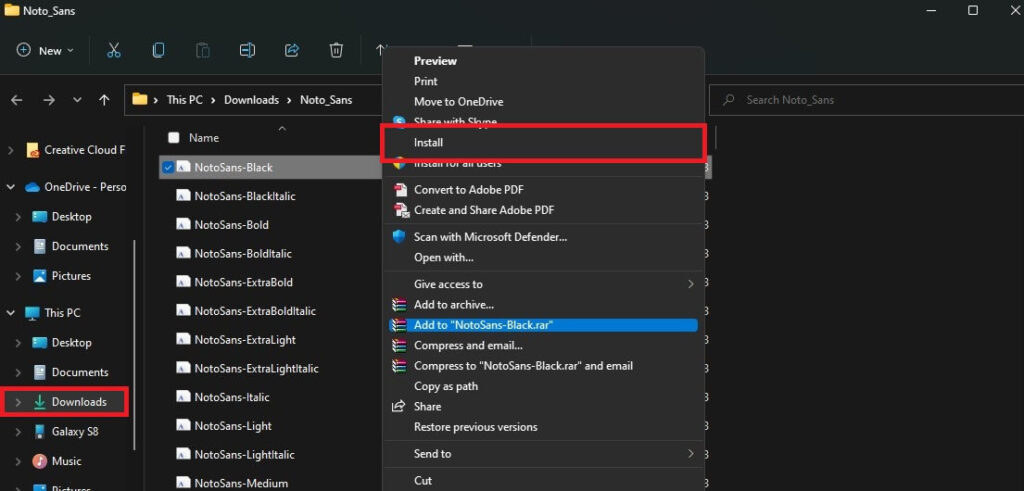
Method 1: Using File Explorer
Go to your file explorer > Downloads > Right-click on your desired font > Click Install
Method 2: Using Windows Settings
Step 1: First, Go to Settings > Personalization > Fonts
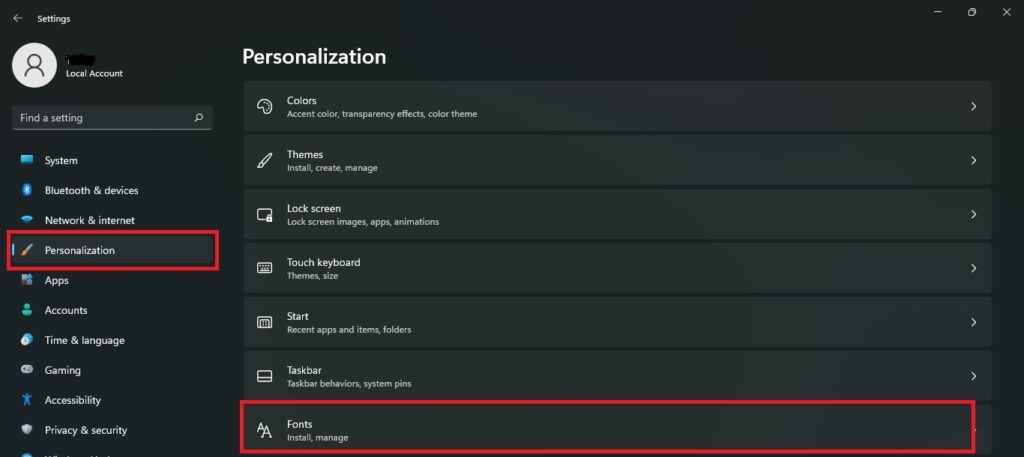
Step 2: There, you will see an Add fonts option. So, just Drag and Drop your favorite fonts there to install them.
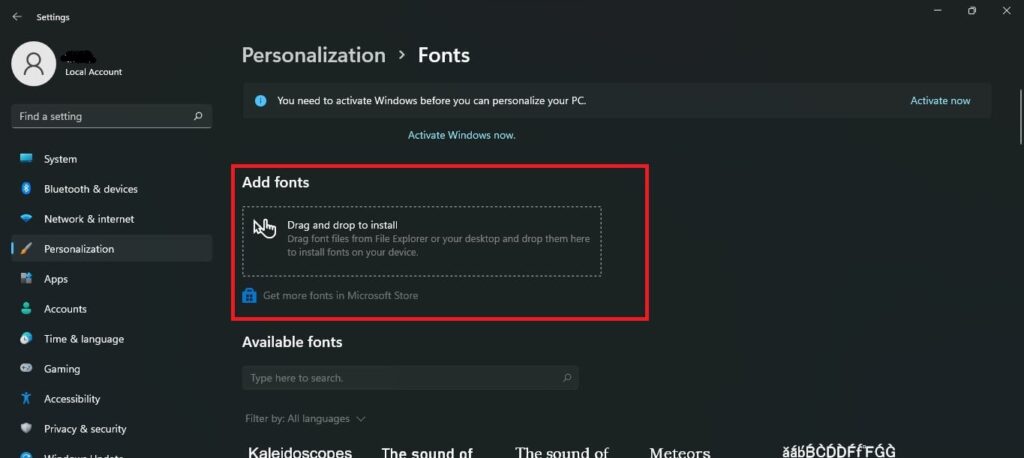
Furthermore, if you want to save space on your windows or are no more interested to use some of the fonts that you have downloaded, you can uninstall them with these simple methods. You can uninstall these fonts with the following 2 methods.
Also Read- How To Share OneDrive Files And Folders In Windows 11
Uninstall Your Downloaded Fonts
Follow the methods below to uninstall your desired fonts:
Method 1: Uninstall Fonts Using Windows Settings
Here is what you need to do:
Step 1: From the Taskbar, Click on Start then tap on Settings
Step 2: Go to Personalization.
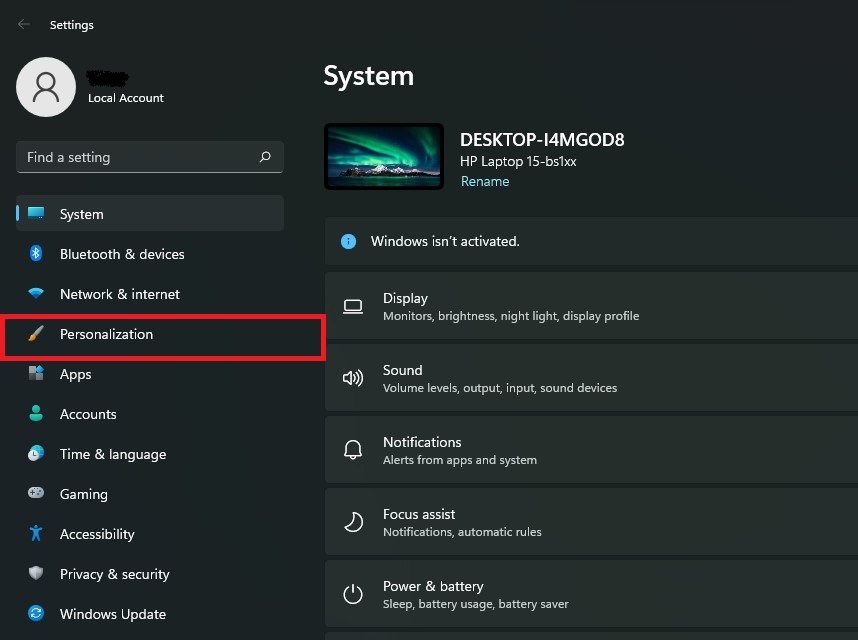
Step 3: Tap on Fonts that are located under Available fonts
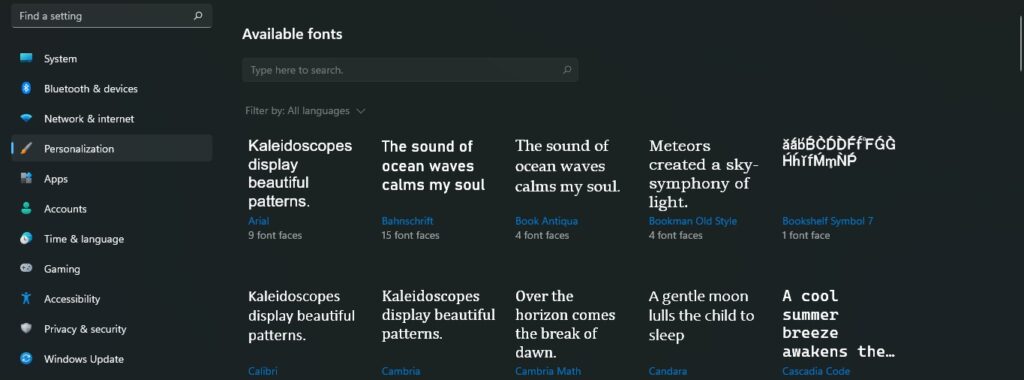
Step 4: There, you will see Uninstall option, simply click on it.
Method 2: Uninstall Fonts Using Control Panel
Follow the methods below to uninstall your desired fonts from Control Panel:
Step 1: Go to Control Panel, then click on Fonts
Step 2: Click on the Font you want to delete, and there you will see an appealing option on the top panel that says Delete. Click on it. Then a confirmation prompt will pop up click yes and your font will be deleted permanently.
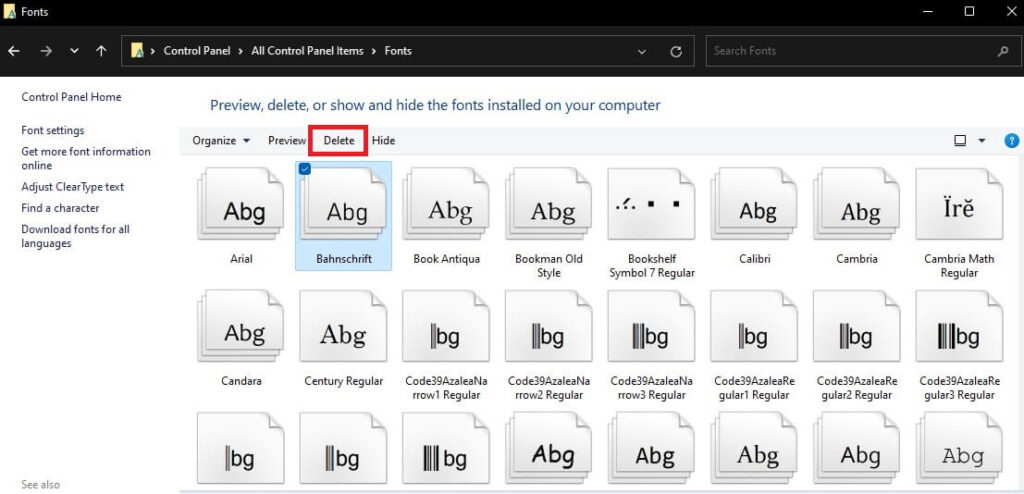
There you have it. Your font has been removed from your computer!
Also Read: How To Add Open Desktop Background File Location Context Menu In Windows 11


