Windows Spotlight is a fabulous feature of Windows 11 that automatically changes the wallpaper on the lock screen of your Windows device and displays various images from Bing. It is a great way to discover new pictures and photos from all over the world. Although you can view and enjoy the images, many people are not aware of how to save Windows Spotlight Images in Windows 11. This blog post covers how to preserve Windows Spotlight photos in Windows 11.
We will discuss the various methods that you can use to save the spotlight images in Windows 11 and provide step-by-step instructions on how to do it.

Also Read: How To Add Or Remove Hibernate On The Power Menu In Windows 11
How to Download Spotlight Images on Windows 11
Here is what you need to do to download Spotlight collection images onto a Windows 11 computer.
1. Open File Explorer on your Windows 11 computer.
2. Select the View tab at the top of the File Explorer window.
3. Check the box for the “Hidden items” option.
4. Navigate to your user folder. It is usually located in C:\Users\[Your Username].
5. Look for the “AppData” folder and open it.
6. Open the “Local” folder inside the AppData folder.
7. Look for the “Packages” folder and open it.
8. Look for the “Microsoft.Windows.ContentDeliveryManager_cw5n1h2txyewy” folder.
9. Open the folder and look for the “LocalState” folder.
10. Inside the LocalState folder, you will find the “Assets” folder.
11. Open the Assets folder, and you will find all the Spotlight images downloaded to your computer.
12. Select the images you wish to download and then right-click “Save As” to save the images to your computer.
Also Read: Microsoft Unleashes Windows 11 Insider Preview Build 25284
Method 1: Locate Previous Spotlight Images
1. Click the File Explorer icon in your taskbar to launch the File Explorer window on your computer.
2. Navigate to the folder that contains the Spotlight images. If you don’t know where this folder is, you can search for it by typing "%LocalAppData%\Packages\Microsoft.Windows.ContentDeliveryManager_cw5n1h2txyewy\LocalState\Assets" into the File Explorer address bar.
3. You can search for the images after finding the folder. The “Search” bar at the top of the File Explorer window can be used for this. If you type “.jpg” into the search box, all files with the.jpg extension will be displayed.
4. If you want to narrow your search even further, you can type in specific keywords such as “Beach” or “Mountain” to bring up only images related to those topics.
5. Once you’ve located the images you’re looking for, you can open them in your preferred photo viewer or editor.
Also Read: Lenovo Updates Its Hybrid Learning Portfolio With Windows 11 Laptops
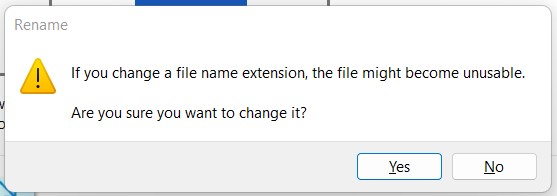
Method 2: Change The File Extension To A Usable Image File
1. First, identify the Spotlight image file type. Most Spotlight images are saved in the .jpeg file format, but some may be saved as .png or .bmp files.
2. Once the file type has been determined, you can utilize a file converter to alter it to the required one. You can choose from many online file converters or download a desktop tool if you’d prefer.

3. Select the file you want to convert and choose the new file type. For example, if you are converting a .jpeg file to a .png file, select the .png option.
4. To start the conversion, click “Convert.” Depending on the size and complexity of the image, this could take a while.
5. Once the file has been converted, you can use it in your project.
Method 3: Automatically Download Spotlight Images Using Third-Party Software
Even though using the procedures above makes it easier to find older Spotlight Images and turn them into valuable files, doing so repeatedly might take time and effort.
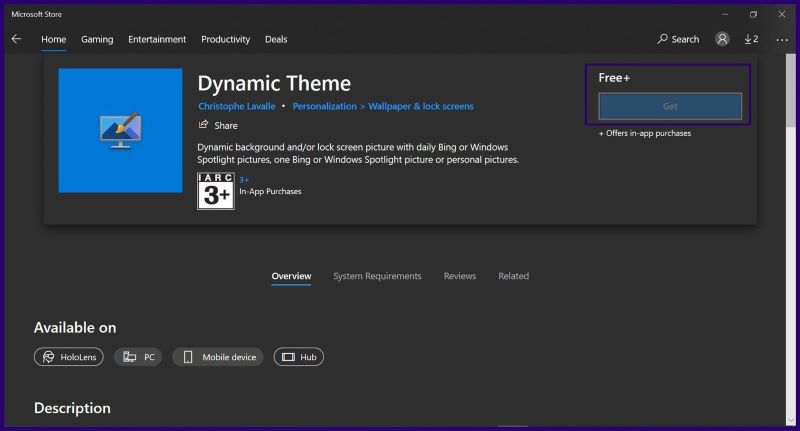
Although Windows 11 lacks an automated download capability, you can get around this by downloading third-party software from the Microsoft Store. The actions to take are as follows:
1. Select images from the Spotlight Images directory: Choose the Spotlight images you want to download by navigating to the Spotlight Images directory of your chosen operating system.
2. Download the images: Once you have selected the images you want to download, click the download icon or drag and drop the images into the folder you want to save them in.

3. Install the Spotlight Image Downloader: Install the Spotlight Image Downloader if needed. This will allow you to download images from the Spotlight Images directory easily.
4. Select the download options: Select the download options, such as resolution and format.
5. Download the images: Once you have selected the options, click the download button to start the download process.
6. View the downloaded images: Once the download process is complete, you can view the downloaded images.
Also Read: How To Enable Tabs For File Explorer On Windows 11
Wrapping Up
These are all the ways you can save Windows Spotlight Images in Windows 11 to enhance the experience of the lock screen of your device. if you have any further questions, do let us know in the comments below. With this, signing off.
Also Read: 3 Steps To Adjust Touchpad Sensitivity In Windows 11


