With the release of macOS Ventura, Apple has made it possible to use the Mail app to stop an email from being sent or to send it later. However, there are constraints, so I will explain how to make the most of them and how to get past the ones you can’t.
The new features in Apple Mail depend a lot on temporary mailboxes that the app makes and uses. To accomplish certain goals, such as when you hit the Send button, email always requires.
What happens next is something you might not have seen if you have a fast internet connection or if you usually use Mail without the program showing you all of its mailboxes. You may not have paid much attention to the changes, but you may have noticed a new inbox, Outbox, pop up at some point.
You may always see your inbox in Mail, even if no messages are waiting to be sent; however, the Outbox will only appear if messages are waiting to send that have yet to be sent.
What to do if you accidentally send an email to Apple Mail
1. Unsending an email requires the Sidebar (the left column of Mail that displays all the mailboxes) to be shown. You can’t take back an email once it’s already been sent. If the Sidebar isn’t visible, you may bring it into View by selecting View> Show Sidebar or pressing Control + Shift + S on your keyboard.
2. You may retract an email you just sent by clicking the “Undo Send” link that appears at the Sidebar’s end. You have 10 seconds to revoke the email before it is sent. If you don’t click the link within a certain amount of time, it will change to a “Sending mail” notice, and the email will be sent without you ever seeing it.
3. Before the timer runs out, click the Undo Send option to cancel sending the message.
4. If you accidentally send an email and then decide to cancel it, the email will open in edit mode. Delete the message, make changes, and then send it again.
Apple Mail’s Scheduled Sending Function
1. You may send your message by selecting the down arrow next to the Send button when you have finished writing it. A calendar of available times will appear in a pop-up. You can pick one of the available options or select Send Later to send the message at a later time.
2. When you click the Send Later button, a calendar where you can pick the time and date will open. When you’re ready to set a time, click the Schedule button.
3. If you have an email scheduled to be sent later, it will be moved to a Send Later inbox on the Sidebar. (If you’ve never scheduled an email, this inbox may not appear for a few minutes.) At the predetermined time, you may access the email you planned to send later and make any necessary changes.
4. Keep in mind that sending out planned emails requires the Mail program to be open and running.
Explore one of the most exciting new features in macOS Ventura and see how it stacks up to Monterey by reading our in-depth comparison.
The best way to change the time of a Send Later message
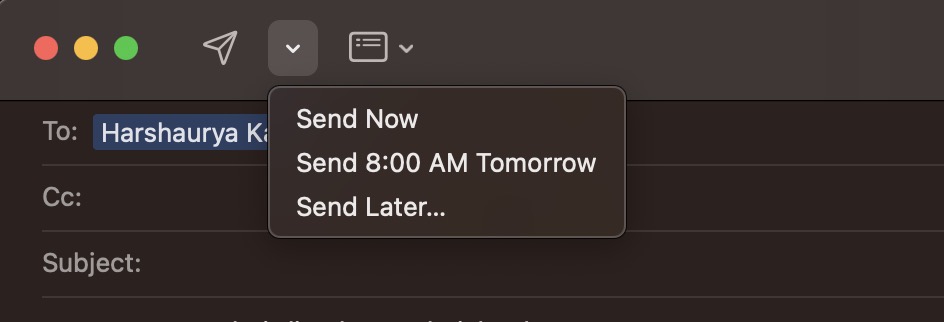
Clicking on a suggested time rather than entering your own is surprisingly simple. You can adjust the scheduled sending time of a message if you do this or for any other reason.
1. Launch Send Later
2. Click the message twice to open it.
3. Check the top of the message for the time it is set to go out.
4. To make changes, select the Edit option.
Everything you did to schedule the message remains the same.
Follow up
Regarding the following functionality, this is not something you can change. After a few days. If you have yet to receive a reply to an email you sent, Mail will move it to your inbox, where it will join messages you’ve received.
This is done in a random fashion (presumably utilizing machine learning), and you have no say over which emails are selected or why. Until there are user-accessible settings, such as the Remind Me menu above, that you can choose for specific emails you’ve sent, this function is mostly ineffective.
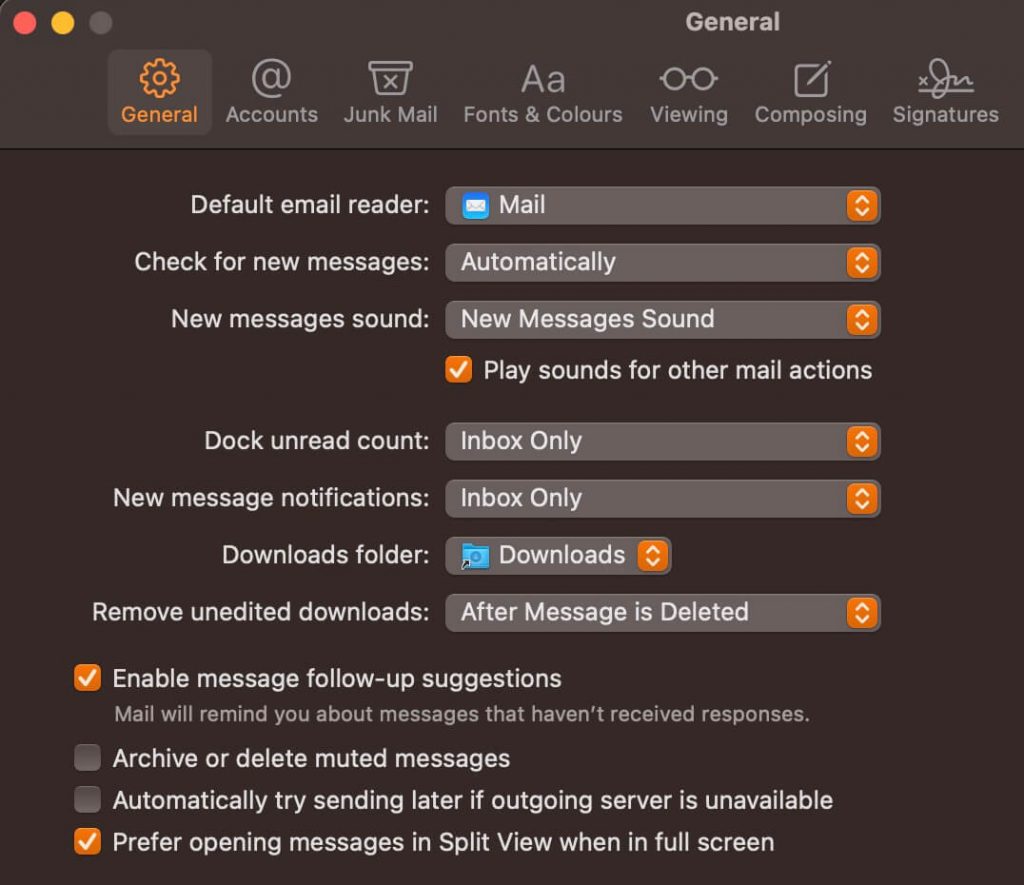
When using a Mac, you may disable it by going to Mail > Preferences > General and deselecting the option to Enable message follow-up recommendations.” On iOS and iPad OS, you can turn on or off Follow-Up Suggestions by going to Settings > Mail and then scrolling down to the Messages section.
Email reminders can be set.
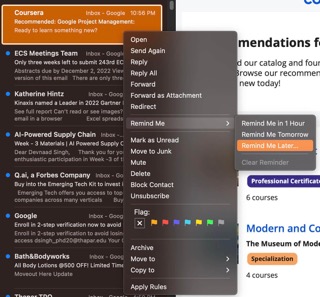
Using the reminder tool, you can set an incoming email to show up again in your inbox in an hour, tonight, tomorrow, or at a certain date and time that you choose. Right-click on the email you want to choose and then make your selection.
To cancel an email reminder, simply right-click the email, select “Clear Reminder,” and the reminder will be removed.
If you’re using iOS or iPadOS. Press the Reply button in the bottom-right corner of the screen, then tap Remind Me.
Apple Mail’s new feature keeps everybody from blowing away with its power and customization options. The lack of flexibility in this tool makes it straightforward despite its crudeness.
Since a long time ago, it has been possible to reschedule or cancel a message that has already been sent. The capability is built into Gmail, and the third-party email application SaneBox has made it available for Apple Mail and other clients.
Even if you need help finding it helpful enough, switch to Gmail or pay for SaneBox. You’ll still use it since Apple has baked it into macOS Ventura. Since it exists and is straightforward, it is simple to find and employ.
Once you start using Undo Send and Send Later, you’ll be amazed at how often you use them.


