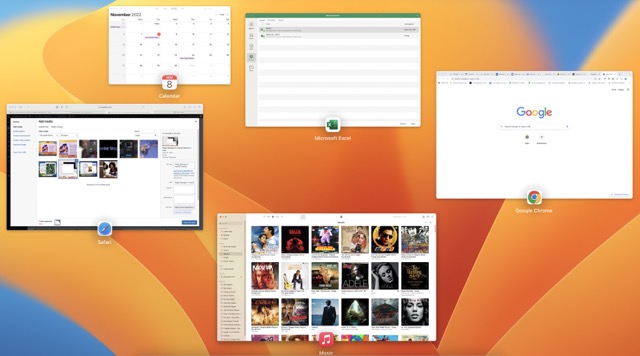
Apple’s new Stage Manager app for Macs was released alongside macOS Ventura. It’s a novel approach to app management that streamlines your ability to switch between open programs as you work. It is simple to move between applications, eliminating the need to hunt for the appropriate window.
Apple describes the new function as “automatically organizing programs and windows so users can concentrate on the job at hand and yet view everything in a single glance with Stage Manager.”
An update to macOS Ventura is required before you can use Stage Manager on a Mac. This is how to activate Stage Manager in macOS Ventura, assuming you have previously upgraded your Mac.
What exactly is a Stage Manager?

macOS and iOS include a multitasking tool called the Stage Manager. This function helps you arrange your windows in a way that makes them more accessible, resulting in a less chaotic and more pleasant desktop experience.
A user may organize their workspace by dragging and dropping windows from the side over other programs. When you’re working in Stage Manager, the active app window will always be front and center. On the other hand, the recently utilized order of the remaining active app windows may be seen on the left.
All you have to do is take a look at the thumbnails to check whether you have any new messages or notifications without even having to open the program. Depending on the size of your desktop, you may be able to see as many as six thumbnails at once.
- The macOS Ventura Stage Manager makes it possible to provide undivided attention to a single window at a time.
- Places the other windows to the side of the screen at a ‘thumbnail’ size, allowing for simple identification.
- Continually upgrades parked windows in the backdrop.
- Clients of the same program parked their windows together.
- Makes it possible to divide your screen into many windows so you may work on different projects at once.
- When clicked, the active window is replaced by the parked window.
#1. Macintosh Stage Manager: How to Enable It
1. Hover the mouse cursor over the top of the display and choose the Settings icon.
2. Select the Stage Manager option.
3. A pop-up window will appear with information on Stage Manager and an opportunity to activate it. Stage Manager may be activated by selecting that option. Stage Manager may now be used.
4. The currently active app will be front and center, with the other applications shown on each side in a minimized state.
The Stage Manager option may be added to the Menu Bar by selecting Settings > Control Center > Stage Manager, and then toggling the Show in Menu Bar switch.
#2. Managing your programs and windows with Stage Manager.
The currently active program will take up most of the screen, while the sidebar will display thumbnails of the other apps.
- Each preview represents the current state of the application you recently used, and they appear in the order in which you first used them.
- By clicking the app icons, users may quickly switch between them.
- The main window may be resized and relocated by dragging the title bar or an edge.
Simply by dragging a window thumbnail into the primary window, you may form a window group. - You may also use the Shift key in conjunction with clicking on the thumbnail. Also, you may separate any window from the bunch by dragging it to the side.
- Pressing Command-H will hide the app’s thumbnail and any open windows.
Hold down the Command key and tab to reveal a hidden window of an application.
#3. Stage Manager’s activation prompts a number of changes.
1. when you enable Stage Manager, the applications you’ve used most recently will be shown on the left.
2. when Stage Manager is running, any disks or servers that were previously visible on your desktop will be hidden. However, you may access them once again by clicking on the desktop.
3. Stage Manager can only display a maximum of six applications or “spaces” in the screen’s sidebar. Each program, however, supports numerous windows, all of which take up the same physical real estate (though there is no obvious indication of this).
4. Stage Manager cannot be used when an application is in full-screen mode (activated by selecting the green button in the upper left corner of the window). If you drag a window to occupy the entire screen, the app icons may be hidden. However, you may access them again by shifting the mouse pointer to the left side of the screen.
Just launch an app and start working on it to get started using Stage Manager. When you switch to a new app, the current one will shift to the left side of the display. Launch more apps until each of the six slots is full.
Simply clicking on a different program from the screen’s side will switch the active window to that one. To access a different instance of an app that you have already opened, just click the app’s icon again.
#4. Spaces: How to Use Them
iOS app folders are referred to as “Spaces” in Apple’s Stage Manager.
- To get the program you wish to use in the space, just drag it from the sidebar and drop it onto the desktop while you keep the first one running.
- To install yet another program, simply start from the beginning.
- Use the applications as you normally would, and to switch to a different place or program that isn’t now visible, use the tabs down the side of the screen.
Stage Manager on macOS Ventura has some strange behavior, despite the fact that the operating system is still very new. You can’t even quit programs or access context menus by right-clicking on them in the left-hand sidebar.
Even so, Stage Manager is a great addition to macOS and provides you with a new method of controlling the windows on your computer. It will be interesting to see whether Apple makes any more improvements to it over the following several months.


