In this guide, we have explained how to successfully downgrade macOS Ventura beta to macOS Monterey.
Apple has left no stone unturned to make the latest macOS Ventura, the most advanced version of macOS. Flaunting the Stage Manager, Spotlight, quick actions, and advanced Mail app features to undo and schedule emails, Ventura is worth a shot. However, macOS Ventura is still in the beta phase, which means it is packed with bugs and glitches that are bound to affect its performance.
As a result, many users might be thinking about reverting to macOS Monetary and waiting until the public version of macOS 13 is rolled out. If you are one of those users who want to downgrade their OS, you are at the right place. In this step-by-guide, we have explained how to successfully downgrade from
macOS Ventura beta to macOS Monterey using different methods. Keep scrolling below to check them out.
Also Read: Apps Crashing On macOS Ventura? Try These Fixes
Time Machine backup method to downgrade to macOS Monterey
First, check out the method to downgrade your Mac using the Time Machine backup.
- Connect the Time Machine hard drive with the Mac.
- Click on the Apple Icon and choose the Restart option.
- The boot selection screen appears on your Mac, choose one of the following options:
- On Apple Silicon Mac: Long press the power button until the startup screen appears. Choose Options followed by Continue.
- On Intel-based Mac: Long press the Command + R keys until the Apple logo appears.
Choose Restore from Time Machine Backup and click the Continue button. - Next, choose the Backup source and press Continue.
- Now you will have to choose the most recent macOS Monterey backup and hit the Continue button.
That’s it! This process can take some time so you will have to be patient.
Downgrade using the macOS recovery method
If you haven’t backup up your Mac on Time Machine there is no need to worry. Luckily it is possible to go to macOS Monterey from macOS Ventura using the macOS Recovery method. Let’s see how to go about it.
Note: Before you begin, your Mac should be able to access an internet connection.
- Power off your Mac completely.
- Now power it on and press one of the following key combinations until the Apple logo flashes on the screen.
Command + R: For reinstalling the latest macOS version on your Mac.
Option + Command + R: Upgrade your Mac to the latest macOS version.
Shift + Option + Command + R: Reinstall the factory version of macOS. - Enter your login details and press the Continue button.
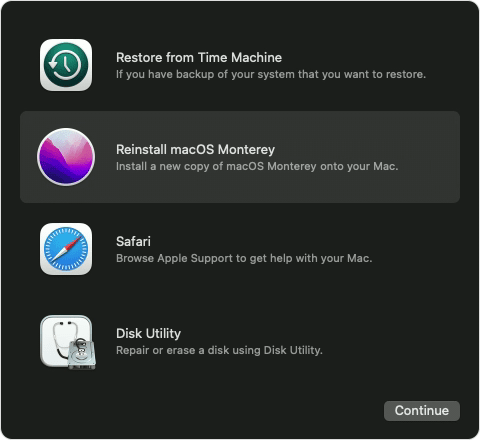
- Press the next button and choose the Reinstall macOS option.
- Now press the Continue button and follow the on-screen instructions.
- Choose the disk and provide the Mac password if asked to do so.
- Wait until the installation process ends.
Note: During the installation process, do not put your Mac to sleep or close it. When the installation process will finish, the login screen will appear on the screen.
Also Read: How To Download macOS Ventura Developer Beta 3
Bootable installer method to reinstall macOS Monterey
Let’s see how to reinstall macOS Monterey using a bootable installer. The steps are different for Intel-based Mac and Apple Silicon Maps. So, we have mentioned them separately.
How to reinstall macOS Monterey On Intel Mac
Apple added a T2 security chip in the Intel Macs to improve security aspects. Hence it will stop you from installing macOS Monetary using the bootable installer method. So let’s first disable external boot protection.
- Restart your Mac and at the same time press the Option key.
- As soon as the boot selection screen appears release the key and long press the Command + R keys to access the recovery mode.
- On the recovery screen, go to Utilities and choose startup security utility.
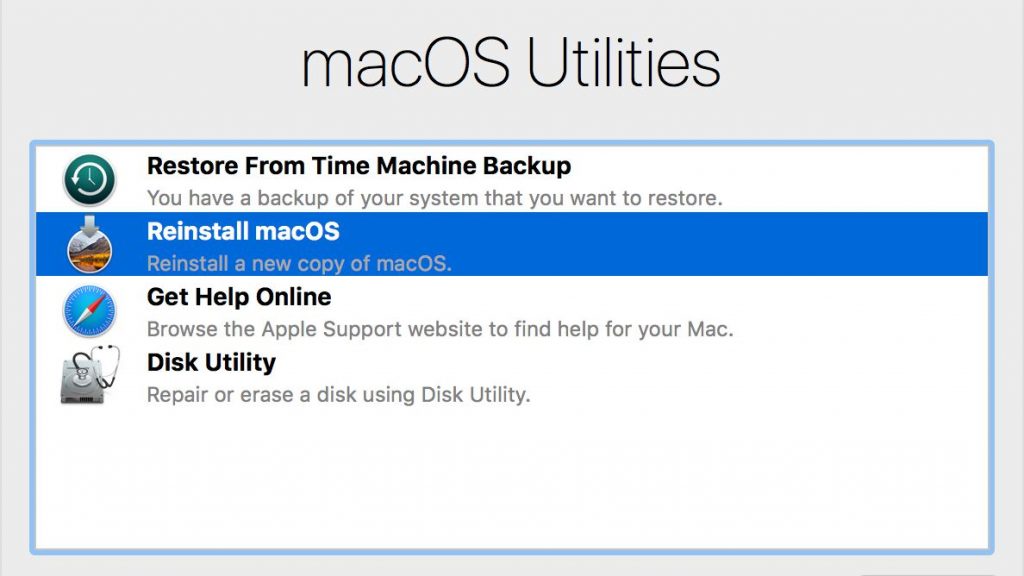
- Provide your Mac password and choose to Allow booting.
Now the external boot protection is disabled on your Intel Mac. Now let’s commence the installation process of macOS Monterey with the help of the Bootable installer method.
- Restart your Mac and long press the Option key until you see the boot selection screen.
- Choose a USB installer and enable the verification to choose the external disk option.
- Next, choose Disk Utility and press continue.
- Now choose Macintosh HD and press the Erase button followed by Erase Volume Group.
- After the process gets completed press the Done button.
- Next, choose Disk Utility and select the Quit Disk Utility option.
- Now Install macOS 12 on your Mac and press the continue.
- Press Agree on the pop-up window and choose Macintosh HD.
- Finally, press the Continue button to successfully install macOS Monterey.
This process can take quite some time and upon completion, the usual setup screen will open in front of you.
Also Read: Why macOS Ventura Is Important to Get
On Apple Silicon Mac
- Power off your Mac completely.
- Now hold down the Power button until the loading startup options are visible.
- Choose the USB installer option followed by the Continue button.
- Now press the Install macOS Monterey button and choose Quit install macOS.
- Next, choose Disk Utility and press the continue button.
- Now click on Macintosh HD (hard drive) and press the Erase button to confirm the action.
- Wait until the installation process is complete and then hit the Done button below.
- Next, choose Disk Utility and choose the Quit Disk Utility option.
- Now activate your Mac and click Exit the Recovery window.
- On the next window, press the Agree button and choose Macintosh HD followed by the Continue button.
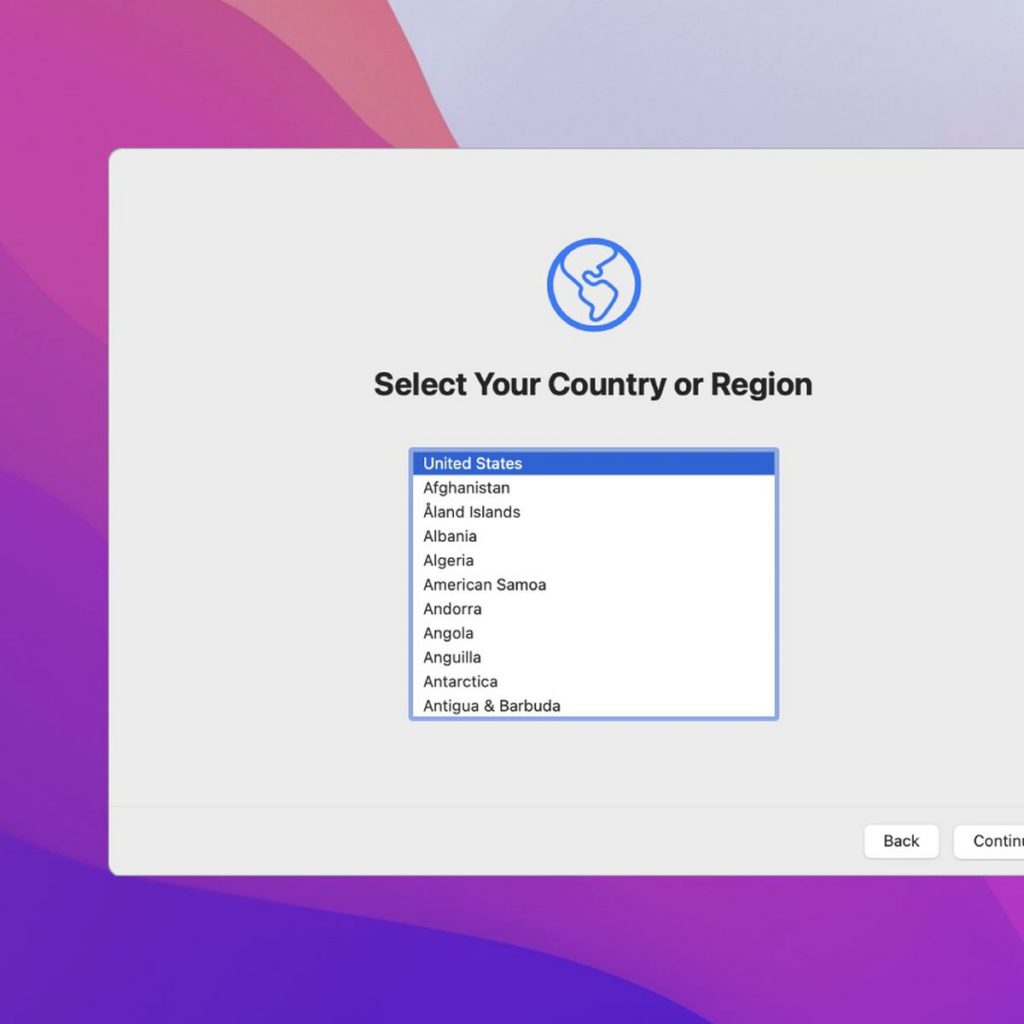
- Finally, choose the Startup Disk and press the Restart button.
- Once the process finishes, the macOS setup screen will appear on the Mac.
Also Read: 6 Common macOS Ventura Problems And Solutions
Conclusion
That’s how you can downgrade from macOS Ventura beta to macOS Monterey when you encounter problems. If you need any other help, feel free to reach out to us.


