If you are wondering what is taking up space on your system, you can find quick answers using the storage article in this article. Here we will going to talk about both Windows 10 and 11 and will discuss multiple ways to check storage consumption on windows. You can check what’s taking up space drive on each of the operating systems.
Moreover, with windows 11, you get a detailed overview of each item that consumes your storage space on the windows. In addition, the new Windows 11 provides you with useful features which are easy in features to deal with the storage management issue like Storage sense, Disk Clean up, and many more. Here, you will learn the steps on how to use the storage setting to understand the space usage on windows 11. Let us check out the different ways and steps to do the needful.
1. Click on the start menu on the taskbar, search setting, and click on Settings.
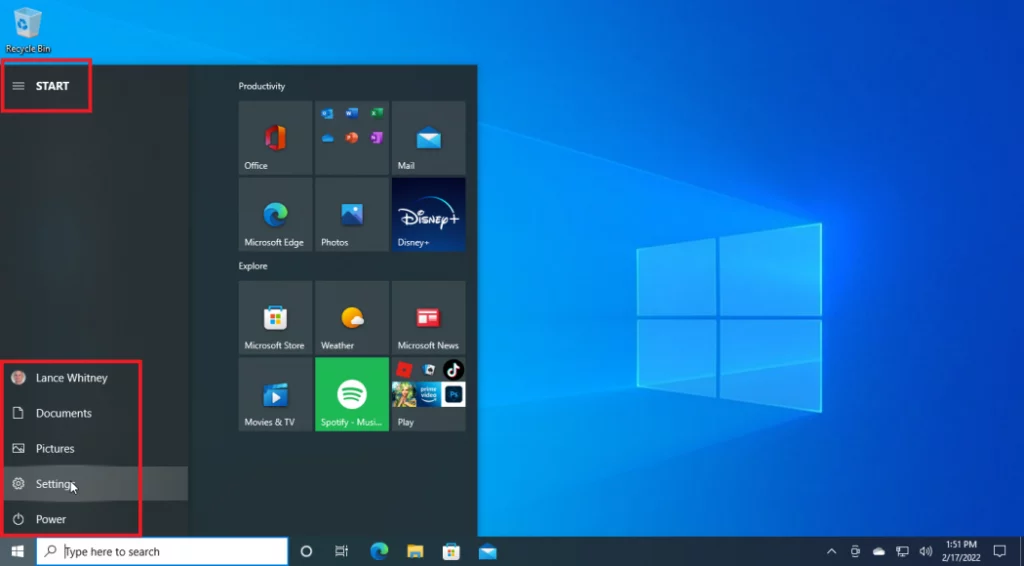
2. Now, on the settings page click on the System option which will be in the first option.

3. Once you get in the System option select the storage option at the end.

4. Here, windows 11 will display the Windows installation drive, most of the time the C: Drive (local disk (C:).
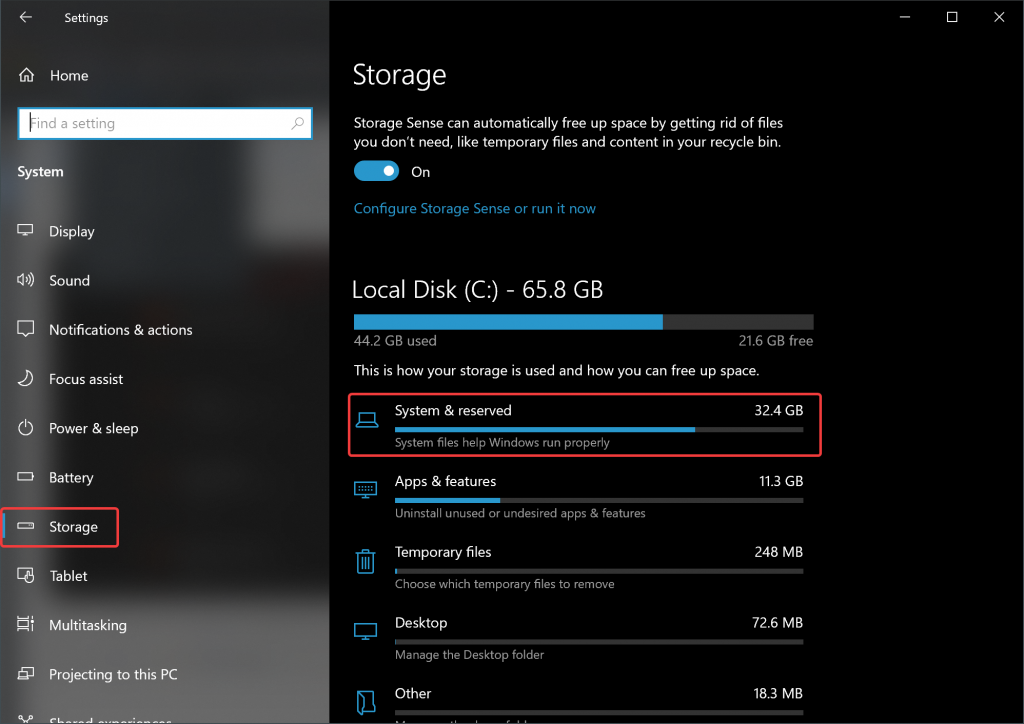
5. Here, the pane will display the types of files using the storage space. You can view different categories by selecting the Show More Categories. (It will be shown in blue color which is present on the bottom left side).
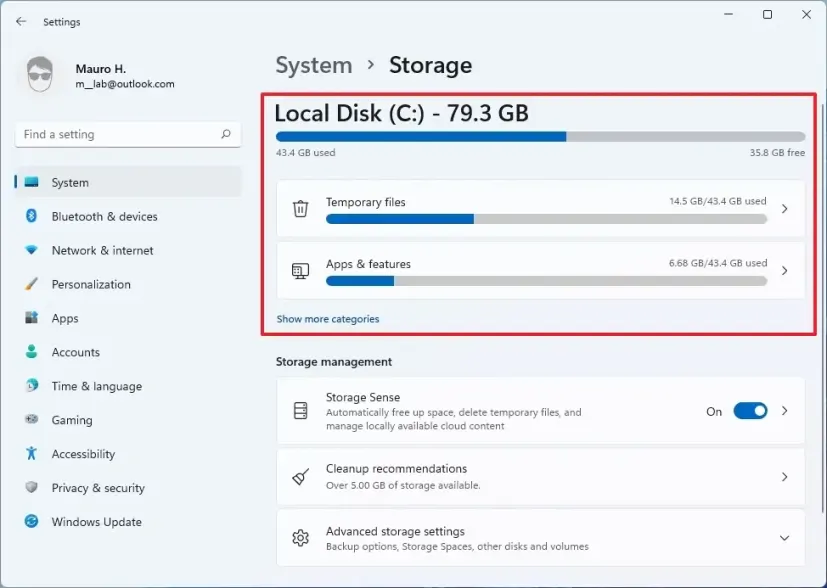
6. If you are willing to check the storage consumption of the other drives, now select the
Advanced Storage settings option which is shown in the last.
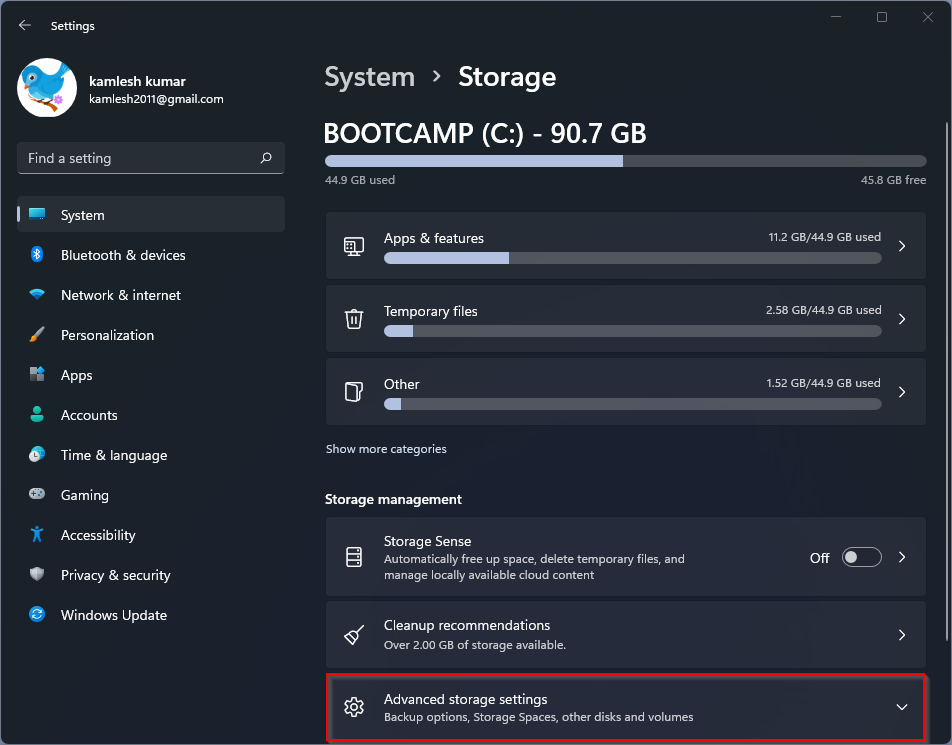
7. Once you select Advanced Storage settings you get the drop-down list, then select on the Storage used on other drives which is the first option in the drop-down list.

8. Now from the next page you can select the drive which you want to check.
Once you are completed the steps given above, you will have an idea of what kind of files are using the space on the drive.
Also Read: New Sound Recorder App In Windows 11: First Impression
How to Optimize Storage on Windows 11?
However, if you are willing to free up the storage on Windows 11, you are requested to configure Storage Sense. It analyses your device and helps in cleaning up the junk file and then the recycling bin at regular intervals.
Also Read: How To Check If Your PC Is Compatible With Windows 11 22H2
Check what files are taking up space using WinDirStat.
It is a more advanced drive usage viewer that allows you to see what files are exactly taking the storage from the user’s desktop or the hard drive.
Install WinDirStat on Windows 11
Here are some steps on how you can install WinDirStat on windows 11.
1. Go to start from the taskbar. Search for Command Prompt and press enter, now click on the Run As Administration option.
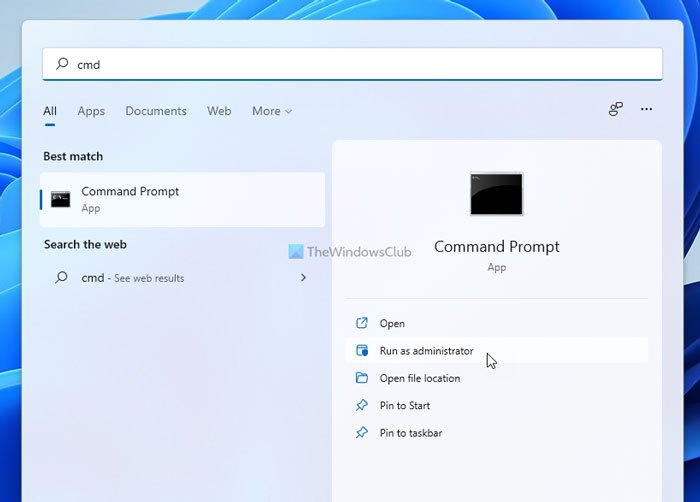
2. Now type the given command to install WinDirStat on windows 11 and press the enter
button on your keyboard. The command is winget install WinDirStat.WinDirStat .
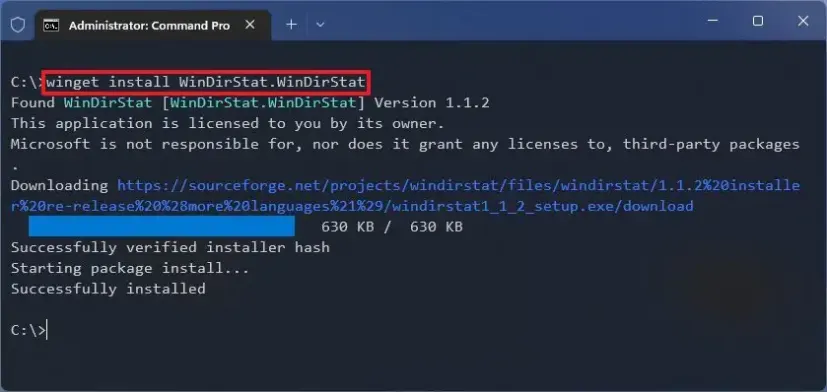
3. Once you are completed the steps given above, you are eligible to use the app for
Scan the entire drive and you can get the report of the current hard drive usage.
Also Read: Third-Party Software To Replace The Windows 11 Start Menu
How To View files taking up space on Windows 11
To understand what files are taking the space on windows 11, to understand follow the steps.
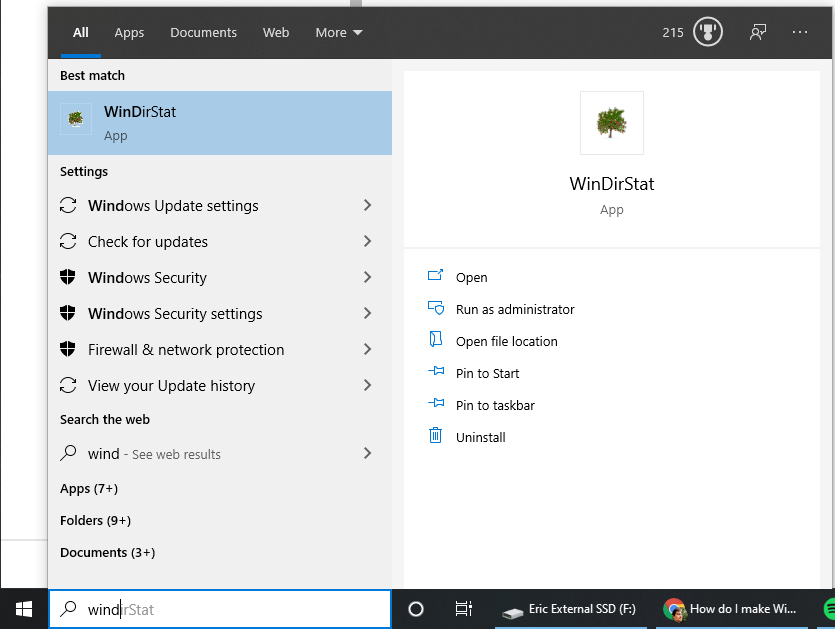
1. Go to start from the taskbar. At the start, Search for WinDirStat and click the result shown in the app.
2. Now you should Select the Individual Drives option. Now you need to select the drive you want to choose or see the file that takes the space on your windows.
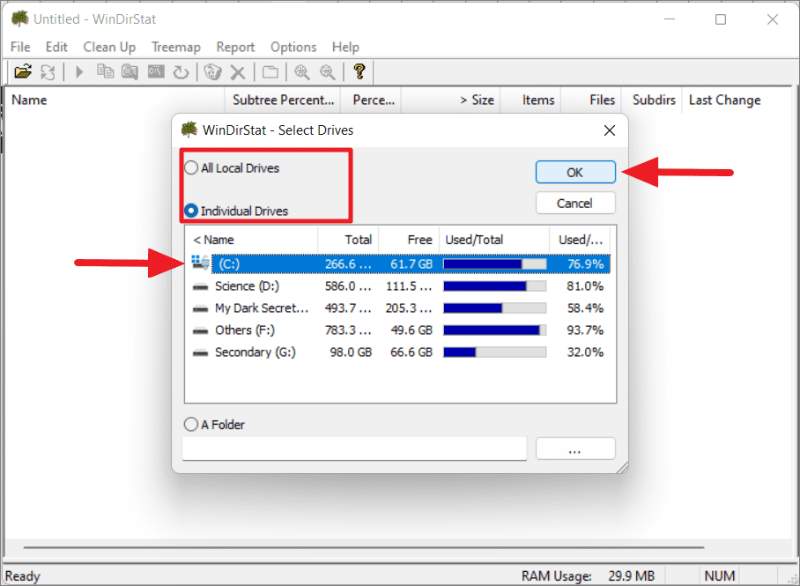
3. Once you select the file click on the OK button shown there.
Once you complete the shown steps above, WinDirStat will start scanning the drive that you have chosen. It shows a graphical report which allows you in understanding which files are taking up most of the space on the drive or the windows.
You will get a structure like a tree that lets you understand which files are consuming the lot of place in the drive on the top left side. Here you can elaborate and drill down to know the file using the most space in the drive. On the top right side, you can see the file extensions using the most space in the drive which has been selected by the user.
You can find the graphical view representing each file as a rectangle, the bigger the size the bigger file and this can be seen at the bottom of the page. Every size has its own color which helps you understand the extension list. You can delete the file using a lot of space in one specific file using the WinDirStat.
Hope this article helps you and if you have any suggestions then please let us know in the comment section. Happy Reading!
Also Read: Disable Quick Settings Through Registry Editor In Windows 11


