In this article, we have explained the step-by-step process to run JAR files on your Mac device.
JAR is a package file format that is a collection of Java class files, associated metadata, and other resources clubbed in a single file. If you are tech-savvy and frequently use the internet, you are likely to come across JAR files. Sometimes you may need to run these files but unlike Windows 11 it is not an easy task to decompress .jar files on Mac. This is because Mac does not have inbuilt programs that can decompress or execute these files.
To help you run .jar files on Mac, you have decided to put together this comprehensive guide explaining the complete process to execute .jar files.
So, let’s end the chit-chat and get straight to it!
Also Read: 11 Ways To Fix macOS Monterey 12.3.1 Battery Drain
Check if Your Mac has Java
For the uninitiated, to run JAR files, you have to ensure that Java is pre-installed on your Mac. Both JRE (Java Runtime Environment) and JDK (Java Development Kit) can be compatible programs. Follow the steps below to see if Java is present on your Mac or not.
- Bring Up Spotlight search on your Mac by clicking its icon.
- Now type Terminal in the Spotlight search bar and click on the first search result.
- When the command line launches, type the following command and press the enter key
java -version
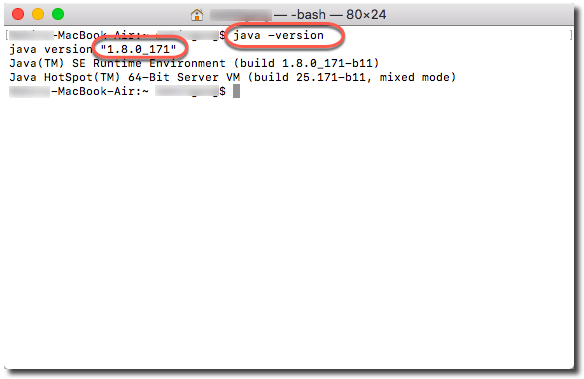
- If Java is not installed on your Mac, you will receive a message stating ‘No Java runtime present, requesting install message’.
- Now press the OK button present on the pop-up.
- If JDK/JRE is already present on your Mac, you will see its version.
Also Read: Syncing Memoji From iOS To macOS
Download Java on Your Mac
If Java is not already installed on your Mac, you need to install it on your Mac. If your Mac already has Java, skip this step. So let’s begin:
- First of all, you need to launch the Safari browser on your Mac.
- Now visit the Oracle official website.
- You will be taken to the download page of the latest Java version. To view all the available packages for different OS, keep scrolling.
- To download Java for your Mac, go to the macOS tab.
- Look for the .dmg installer link present below the Download column.
- Tick the checkbox preceding the ‘I reviewed and accept the Oracle Technology Network License Agreement for Oracle Java SE’ message and press the Download button to confirm.
- On the pop-up that opens, choose the Save File option and hit the OK button.
- Wait until the file gets downloaded on your Mac. The download speed will depend on the speed of your internet connection.
Also Read: Mac Stuck In Verbose Mode? Try These Fixes
Install The Java File
Now you have to install the .dmg file on your Mac. You will have to permit Mac to install non-Apple files for installing it.
Let’s see how can you grant permission to Apple:
- Click on the Apple icon and then select System Preferences.
- Now choose Security & Privacy option.
- Switch to the General tab and press the Lock icon present on the bottom left corner.
- Provide your password and press Open Anyway.
- Once again, press the Open button for confirmation.
Also Read: [Fixed] Mail Images Not Displaying In macOS Monterey
Let’s begin to install the Java setup file on your Mac:
- First of all, navigate to the Download folder and look for the .dmg file.
- Double click to launch the file. A folder with a Java .pkg file will appear. Double-click it.
- An installation wizard will open up.
- Click Continue followed by the Install button.
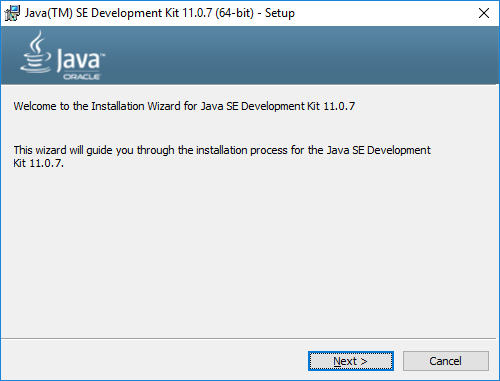
- Provide your password and press the Install Software button to initiate the installation process.
- When the file is installed, a message will appear on your screen stating Install Succeeded.
- Press the Close button.
Also Read: The Best MacBook Deals for April 2022
Run .jar Files on Mac
Now that Java is successfully installed on your Mac, it’s time to run JAR files. You can either navigate to the location having the JAR file or execute the files via the Terminal window.
Let’s see how to launch the JAR files from the folder:
- First of all, open the folder containing the JAR file
- To extract the file, right-click the file and choose the Open option.
- If a warning pop-up appears, press the Open button once again.
Let’s see the Terminal method of executing the JAR files on your Mac.
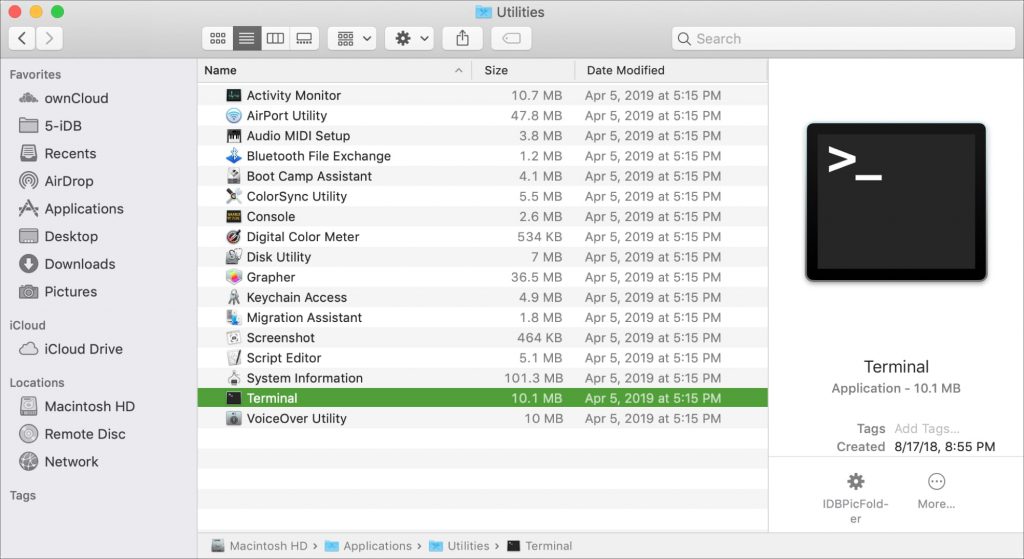
- First of all, click on the Finder icon present on the Dock.
- Now choose the Application option from the left sidebar.
- Now choose Utilities followed by Terminal window.
- When the Terminal window opens on your Mac, type the following command.
- You need to replace the FILENAME attribute with the name of the JAR file.
java -jar FILENAME.jar
Also Read: 17 MacBook Pro Tricks You Should Know
Conclusion
That’s all in this guide. If you follow the steps carefully, you will be able to install JAR files on your Mac without any issue. In case you face difficulties in running the JAR files you can update the JAVA version on your Mac.


