Introduction
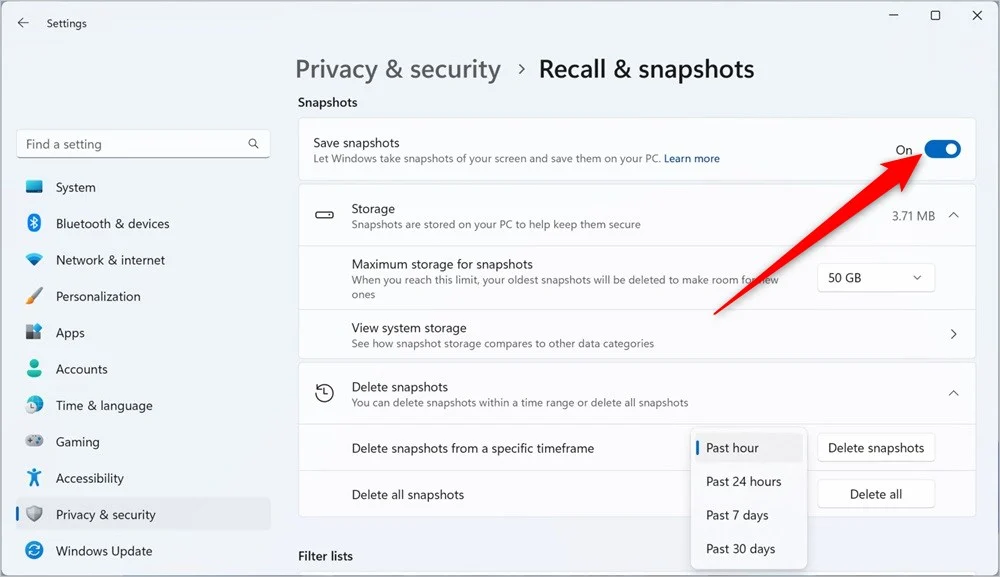
Managing system storage is an ongoing challenge for many Windows 11 users, especially when dealing with system-generated snapshots like System Restore points and File History versions. These snapshots, also referred to as Recall Snapshots, can accumulate over time, consuming valuable disk space. This guide provides a comprehensive walkthrough on how to check the space used by these snapshots and offers tips on managing them effectively to ensure optimal system performance and storage efficiency.

Understanding Recall Snapshots in Windows 11
Recall Snapshots are created by Windows to allow users to revert their system or files back to a previous state. They are part of Windows’ System Protection features, which include System Restore and File History. These features are essential for recovering from system errors or data corruption without resorting to a complete system reset.
Also Read- How To Uninstall Or Reinstall Recall In Windows 11
Why Monitor Snapshot Storage Usage?
Monitoring the storage usage of recall snapshots is critical because:
- Storage Management: Ensuring that your storage does not get overwhelmingly occupied by restore points.
- System Performance: Large amounts of restore points can sometimes slow down system performance during backups.
- Data Integrity: It helps in maintaining data integrity by making informed decisions about which restore points are necessary and which can be deleted.
Step-by-Step Guide to Viewing Storage Used by Recall Snapshots

Step 1: Accessing Advanced System Settings
- Open Settings: Press
Win + Ito open Settings. Click on “System” and then “About” at the bottom of the sidebar. - System Properties: On the right, under “Related settings,” find and click on “Advanced system settings.” This action opens the System Properties dialog box directly on the desktop.
Step 2: Navigating to System Protection In the System Properties dialog:
- Select the ‘System Protection’ Tab: This tab contains all settings related to system security and restore options.
- Choose Your Drive: The System Protection tab will list all available drives and their protection status (either ‘On’ or ‘Off’).
Step 3: Managing Disk Space Usage
- Configure Settings: For the drive you are interested in, click on “Configure” to open the configuration options for System Protection.
- View Current Usage: In the configuration window, look for the “Current Usage” section which shows the amount of space used by system protection snapshots.
Step 4: Adjusting System Restore Settings To manage the space allocated to System Restore:
- Adjust Max Usage Slider: You can use the slider under “Max Usage” to set the maximum amount of disk space for storing system protection snapshots.
- Delete Older Snapshots: If the disk space used is too high, consider removing older snapshots by clicking “Delete” beneath the usage bar. This helps free up space but ensure you maintain enough restore points to safeguard your system against recent changes.
Also Read- How To Add Or Remove “Scan With Microsoft Defender” Context Menu In Windows 11
Best Practices for Managing Recall Snapshots
Regular Monitoring Regularly check the space used by Recall Snapshots to prevent them from consuming too much disk space. This can be part of your monthly system maintenance routine.
Balanced Configuration Adjust the disk space allocation for System Restore and File History to balance between having sufficient restore points and optimizing disk space usage. This balance might vary depending on how you use your system and the type of data you handle.
External Backups Consider using external storage solutions for backups or system images. This not only provides an additional layer of data protection but also conserves internal disk space.
System Cleanup Utilize built-in tools like Disk Cleanup to remove unnecessary files from your system, including old system restore points that are no longer needed.
Disk Management Tools Explore third-party disk management tools that provide more comprehensive features for monitoring and managing disk space, including detailed analyses of what files and snapshots are taking up the most space.
Conclusion
Understanding and managing the storage space used by Recall Snapshots in Windows 11 is crucial for maintaining an efficient, fast, and secure operating system. By regularly monitoring and adjusting the settings related to System Restore and File History, you can ensure that your system is not only protected but also optimized for performance. This guide provides the steps and knowledge needed to view and manage these snapshots effectively, helping you to maintain control over your system’s storage and performance. Remember, while it’s important to free up space, always ensure you have adequate system restore points to protect against unexpected issues.


