Adding more RAM to your Mac can make the computer run faster and be able to run more demanding software in the future.
As long as you use third-party RAM from companies like Crucial, the cost will also be very reasonable. Today’s Macs are a different story, and there are a lot of things you need to watch out for. That’s why we put together this guide.
Is it necessary to upgrade my RAM?
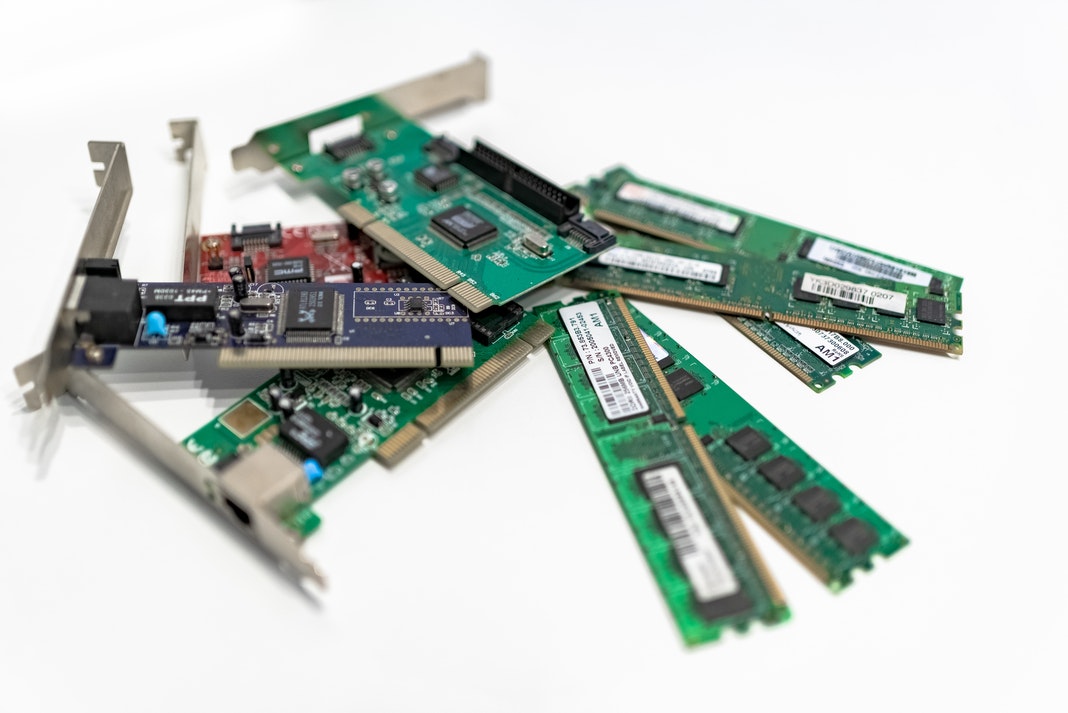
Random Access Memory (RAM) is a short-term storage medium that your Mac’s CPU can use to store things. You can think of it like this: It’s a short-lived place where data for processes is kept while you’re running them. Your CPU can get to the data stored in RAM much faster than it can get to data stored on a hard drive, for example. This means that it is very important for your Mac to work well.
Also Read:5 Steps To Fix Crackling Sound From Apple TV App In M1 MacBook Pro…
Can I Upgrade MacBook Pro memory?
It’s now clear that adding more RAM to your Mac could help. The next big thing is whether you will be able to do this. In some cases, the RAM in a MacBook can be changed by the user, in other cases it can be changed by a service centre, and in some cases it can’t be changed at all.
The biggest problem is that on few models, like MacBooks, the RAM is soldered on, making it nearly impossible to remove and dangerous to your computer. It might be possible to add more RAM to these models, but it’s a risky thing to do.
You can read more about adding RAM to different Macs below. Adding RAM to these Macs is possible:
Also read:Apple MacBook Pro: M1 Pro And M1 Max Explained
- MacBook: Only models from 2008 to 2011.
- MacBook Pro: 2009-2012 13in, 2008-2012 15in, and any 17in model can be updated. If your MacBook Pro has a Retina screen, you can’t change the RAM.
- MacBook Air: You can’t change the RAM in any of the MacBook Airs.
- iMac: Most of the time, you can change the RAM in most iMacs. There are a few exceptions: the 21.5in models from Mid-2014 and Late 2015 had their RAM soldered in place.
- The Mac mini : 2010 to 2012 can be updated, as can the Mac minis from 2018 that are still around.
- Mac Pro: You can do this with all models of the Mac Pro.
- iMac Pro: RAM can’t be changed by the user. if the memory in your iMac Pro needs to be changed, Apple recommends that you go to an Apple store or an Apple service provider.
Make sure that Mac RAM is compatible
Upgrade MacBook Pro memory. So, When you buy RAM, make sure it will work with your computer. Make sure you purchase a piece of hardware that will work with your Mac. Otherwise, you could spend a lot of time and money upgrading the RAM and end up with a computer that can’t be used at all.
This is why we think it’s best to buy from a store that specialises in Mac RAM upgrades. Check out other stores to see if you can get RAM for a better price than on these sites. To make sure you don’t buy something that’s a little different, search by SKU.
Also read: Apple To Replace Touch Bar In MacBook Pro With Apple Pencil Dock
Where can I buy RAM?
Crucial isn’t the only place to buy RAM. There are many other places to buy RAM. Keep in mind the general rule: cheaper means riskier.
Method 1: Straight from Apple (most expensive)
You can buy your RAM from Apple. Because there are compatible aftermarket versions that work just as well as the original and cost less, we don’t think it’s the best choice.
As of now, Apple doesn’t have a RAM department at all. If you want to buy 16GB or 32GB of RAM, you might have to go to Apple UK or Apple US and search for 16GB or 32GB of RAM there.
Method 2: Choose a reputable aftermarket supplier (less expensive)
We think this is the best way to buy your RAM: from a reputable aftermarket supplier. As with most things, you should buy RAM from companies that have been around for a long time and have good customer service.
It’s not easy to keep up with the changes in Apple hardware that are made by other people. MacUpgrades, Crucial, and OWC (via Megamac) are three of our favourite companies, so we use them often.
Also Read:Rumor: New MacBook Pros to feature UHS-II SD card slot, limited to 32GB RAM
Method 3: Certified refurbished RAM is cheaper but has a shorter warranty.
RAM that has been refurbished by Apple or another company that Apple has approved is called “certified.” People don’t buy refurbished RAM as often as refurbished Macs, but it does happen. It is common for refurbished products to come with a warranty, but this is often shorter than Apple’s warranty.
Method 4: Secondhand (least expensive by far, but riskiest)
We don’t think this is good. Make sure you do it right, and this is usually the cheapest way to get the job done One of the most risky things to do is to buy something without a warranty or return it. You could save a lot of money, or you could spend money on something that doesn’t work. It’s your own risk.
RAM upgrade for MacBook Pro
As long as your MacBook Pro was made between 2009 and 2012, this guide should help you.
Step 1: Unscrew the MacBook Cover.

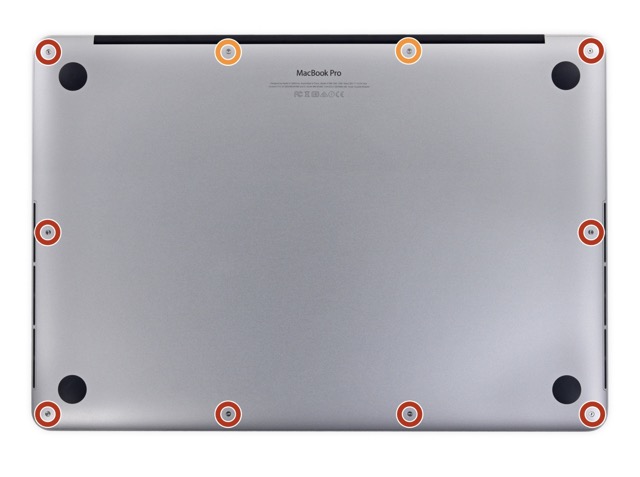
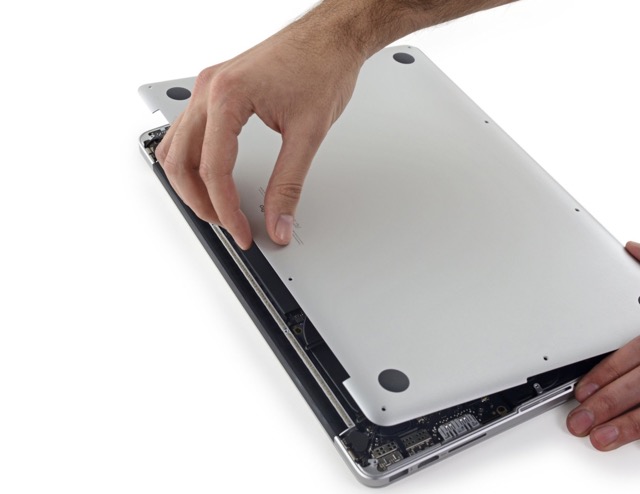
The first thing you must do is turn off your computer if it isn’t already on. Afterward, unplug your Mac from its power source and remove all of its accessories. A lot of screws are used to keep the bottom cover on your MacBook. Remove these with a Phillips head screwdriver.

Remember not to strip the screws when you remove them. The screws are small and easy to lose, so you might want a paper towel or something else to put them on.
Also Read: VPN Connection drops after closing the Lid of MacBook Pro
Step 2: Take the Old RAM out.
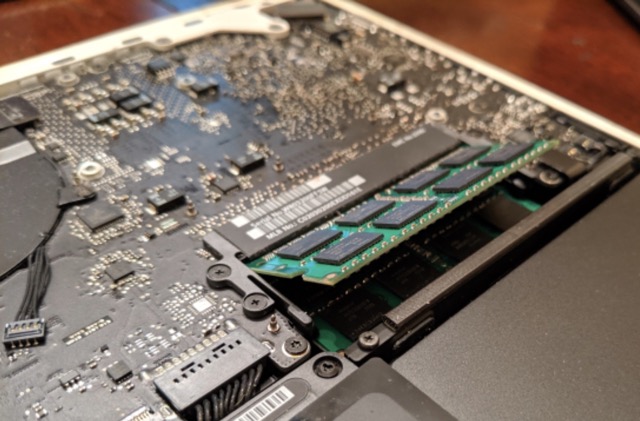
Afterwards, you must be able to see the RAM. It’s pretty obvious that MacBooks don’t have many parts that can be removed by the user. In the picture above, the RAM is the small green thing next to the Samsung drive.

There are two small clips on each side of our MacBook’s RAM that keep it in place, like this: When you gently push these toward the outside of the RAM, you can pull the stick out.
To free and remove the second stick of RAM, push the clips out again. Then put the old parts away.
Step 3: Put in the New RAM.
When you get your new RAM, line up the notch on the pins with the notch on the RAM seat. It will only go one way, so it shouldn’t be hard to find the right person.
Before pushing the RAM down, make sure the notches are lined up at about a 30-degree angle and push in gently. You’ll feel the RAM click into place when you do this. Once for the second stick, you’re done.
After the new RAM is in place, you can put the cover back on. There are other things to do, too. When you take apart your computer, it’s worth taking a minute to clean up any visible dirt. It’s best to get rid of any dust that has built up, especially in the fan.
To put the cover back on, line it up again and screw the screws back in.
Also Read:My Safari on Macbook Pro Shows a techsupport Security alert which keeps popping up
Step 4: Verify That the RAM is Recognized by Your Mac
After this, you can start your computer up again to make sure that the RAM is being recognized by the computer. A window called “About This Mac” should show the amount of RAM that has changed. Open the System Report and click the Memory tab to see more. That’s How you Upgrade MacBook Pro memory.
The last words
It’s done now. There’s a good chance that you want to add more RAM to your iMac or MacBook Pro, but you know how to do it. It’s a simple computer upgrade that will have a big impact.
You can check to see if it’s time to buy a new Mac instead of buying new RAM for an old one.


