We’re here to tell you about some changes that arrived in Windows 11 and here is a guide on the things you should prioritize when you install or upgrade to Windows 11. Make sure you don’t miss out so check these things out to set up your PC. We are going to discuss now the things to be done after installing windows 11.
Here are the things you should do after installing windows 11 after 2022 :
1. Check for updates
2. Sign-in options set-up.
3. Make sure your antivirus is activated and running.
4. Remove unwanted taskbar icons.
5. Personalization
6. New Microsoft store? Kinda?
7. Add the required keyboard Layout.
8. Create a system restore point.
9. Microsoft startup services.
10. Choose a power plan.
Note: So these are the points this post is intended to bring you the things that you should take care of after installing Windows 11.
Also Read: How To Add Or Remove Widgets In Windows 11
Now, let us discuss the things to keep in mind after installing Windows 11 in detail:
Check for updates:

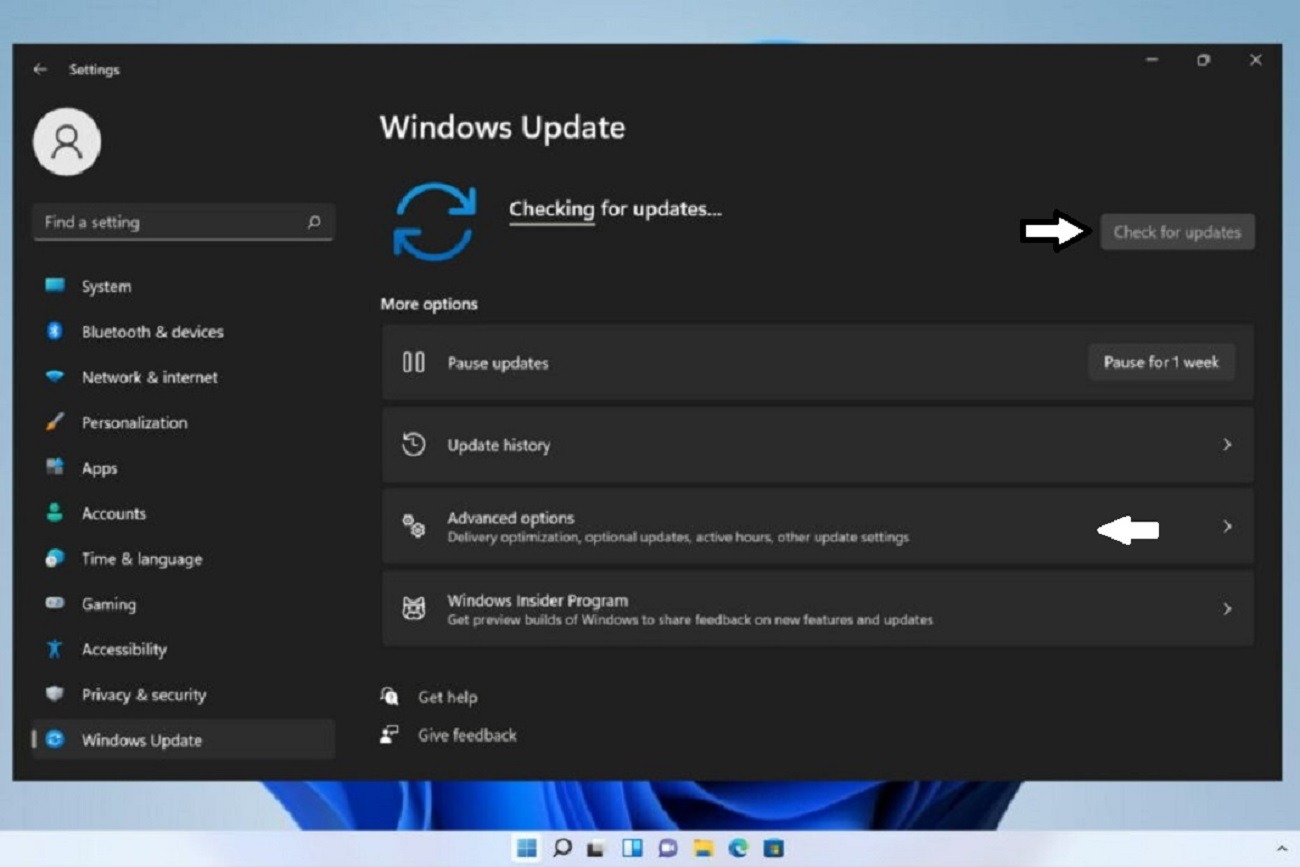
It is always recommended to install additional updates along with any major updates. So, after installation of Windows 11, make sure you install other available updates for your PC. You can simply open the Settings App and navigate to the Windows Update tab. Here, you can click on the Check for Updates button to scan for new and available updates and then download and install them. Additionally, there might be some pending optional updates that you can find under the Advanced options>Optional updates section. These optional updates are mostly related to your drivers and some new features. So, do check them and install them as they are needed to enhance your PC’s performance.
2. Sign-in options set-up:
To make it more difficult for people you don’t trust from accessing your PC, you may want to change your sign-in options. For this let’s open the Settings app and then just click on the Start Menu icon and select Settings and then in the left pane go to accounts then select Sign-in Options. When you are going through the process of installing windows 11 you may have already set up Password or Pin, here you can change your password and pin, and if you like you also have additional sign-in options to choose from including facial recognition, fingerprint recognition, security key or you could use your picture as password. Choose the Sign-in Option that you want and follow the instructions.
Also Read: How To Remove Fingerprint Recognition Sign-in In Windows 11
3. Make sure your antivirus is activated and running:
The antivirus software on a computer should be updated constantly since new viruses are constantly emerging. You should make sure that antivirus is activated on your PC. With new kinds of malware, trojans, and viruses emerging now and then, you must prevent your PC from such threats. In case, you use the default antivirus in Windows 11, you can configure Windows Defender and turn on active protection against malware and virus. You might not be as protected from cyber security risks as you might think if you delay updating your antivirus software. You may also be at risk of the latest threats that your security product is not aware of, even if it has already been installed.
Also Read: Unable to Create A New Folder In Windows 11?
4. Remove Unwanted Taskbar Icons:
See your new widget in the panel with any install of windows 11, you’ll find icons taking up space in your taskbar that you may not want in addition to widgets. There’s a search task view to work with virtual desktops and chat for Microsoft teams. To remove any of these, right-click any open space on your taskbar and select Taskbar settings. Then in taskbar items, click the toggle to the off position for each one that you want to remove.
Also Read: How To Fix Wi-Fi Disconnecting Problem In Windows 11?
5. Personalization: 
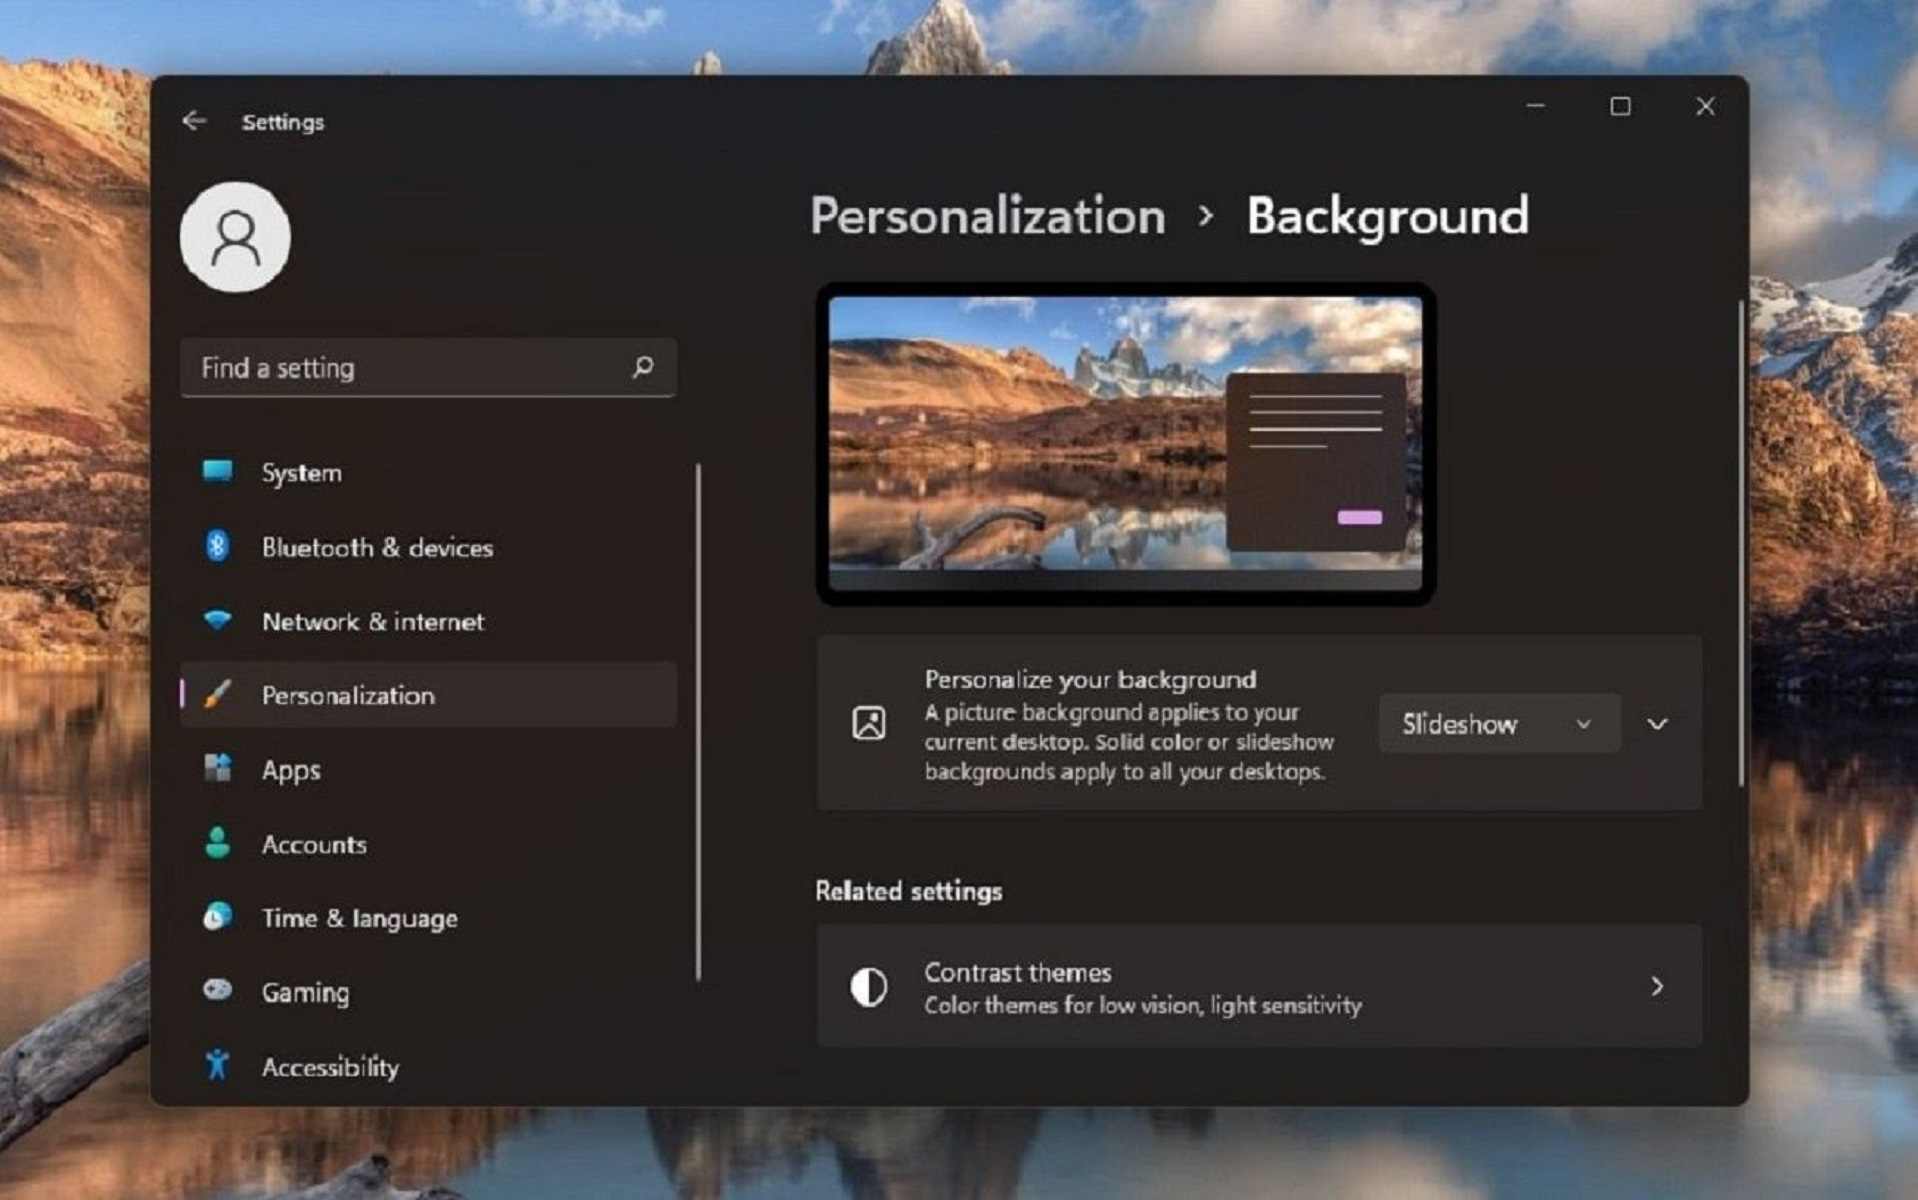
It is also necessary to personalize the look and feel of your PC to create the desired working environment for yourself. To customize your visual experience, using Windows 11, just right-click anywhere on your desktop. You can open up the Settings app and navigate to the Personalization section. From here, you can customize a lot of personalization features including background image, slideshow, accent colors transparency effects, color theme, Start menu, and more. Moreover, you should also configure Accessibility features like text size, visual effects, audio notifications, voice typing, and more.
6. New Microsoft store?Kinda?:
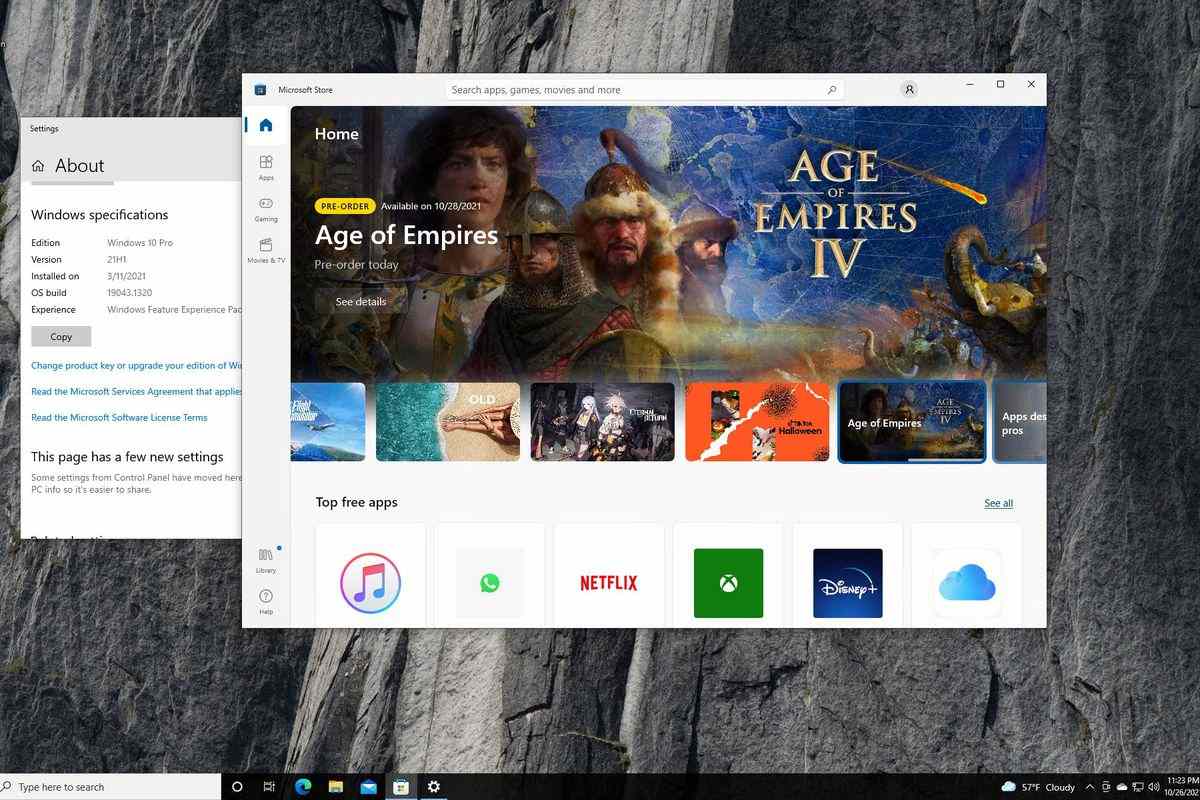
Next up let’s check out the new Windows store, they have the new Microsoft store available and you can get Android apps in it. So you can install things like TikTok or WhatsApp or Facebook messenger things like that, which is important. Go ahead and explore that and see what programs are available for your computer. Despite the fact they started trying to do this back in like 2012 with windows 8, they’re finally moving to a system where you can get all the programs. We’re not there yet but they’re working there, to where you can get all of your programs for windows from the Microsoft store all in one place, which is a bit more secure and you can keep them auto-updated. It’d just generally be an easier more unified way to get programs.
Also Read: How To Change Size Of Desktop Icons In Windows 11
7. Add the Required keyboard layout:
Windows 11 allows you to set up and add a new keyboard layout on your PC. If you are a multilingual person who loves typing in different languages, you can quickly search and install new keyboard layouts in Windows 11. To do that, go to the Language & Region section. Here, you can add languages and new keyboard layouts. After adding your favorite layouts, you can easily switch from one layout to another using the taskbar. In the future, if you don’t wish to use any keyboard layouts, you can easily remove them from your system.
8. Create a system restore point: 
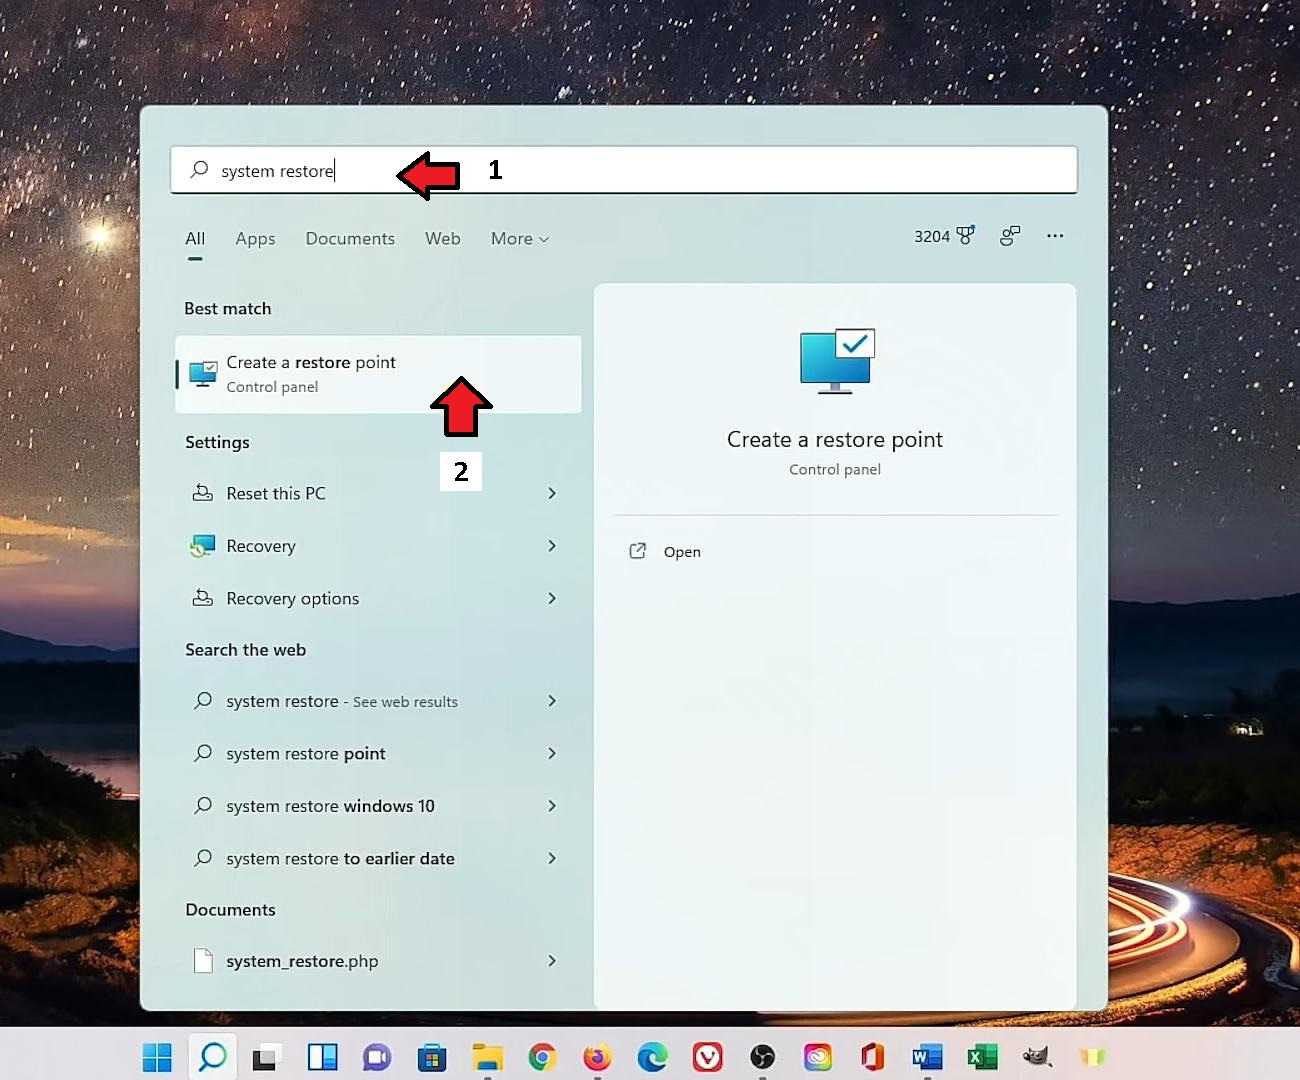
If you plan to make any changes that could have a negative impact on your system, it’s always best to create a system restore points to roll back those changes. To do this go to the Taskbar and select the search icon and type system restore and click on a restore point. Make sure the system protection tab is active, then click on your system drive. For most of you that’ll be your C drive, then select configure, if disabled, select turn on system protection. To adjust the amount of disk space used for restore points, move the slider to the right of max usage. When you’re done with that, click OK. Your PC will create restore points automatically.
Also Read: How To Factory Reset Windows 11 PC
9. Microsoft startup services:
Microsoft assumes that you may want all their services to load at startup, which could end up slowing down your boot time. To disable the Microsoft services you don’t use at startup, right-click the Start menu icon and select task manager. At the top select the startup tab services in this list owned by Microsoft, that you may find enabled including Microsoft to do teams skype, Xbox app services, Cortana, and one drive. For each service, you don’t use, that you didn’t want to enable at startup and select disable, and repeat the steps for each service you don’t use.
10. Choose a power plan:
The default power mode is set to balance. If you want to improve and get the best performance out of your PC, you should change your power mode by going to the Settingd>Sysytem>Power & Battery section. Here, set the power mode to best performance. Additionally, you can also set up screen and sleep and battery saver options.
Conclusion:
These are what we’d consider the things you should do when you first use your brand new windows PC. They may have not seemed like the most important things right away, but these steps can help ensure that your experience will be as seamless as possible.


