Learn about the troubleshooting methods that can help fix the low game FPS in Windows 11.
If you are fond of PC gaming, you know the most important reason for this is that high-quality graphics do not look that great on smaller screens. However, if your PC has a low frame rate, sadly you will not be able to enjoy the best games and graphics in general.
If you are unable to experience the best quality graphics on the current game you are going to play, you don’t have to worry anymore.
In this article, we are going to list down the troubleshooting hacks that can help fix the Low Game FPS in Windows 11. So, without much ado, let’s check them out.
Also Read: How To Optimize Windows 11 For Gaming
Update Your Drivers
The first and foremost thing to do is to update the drivers of Windows 11 PC. While normal Window users don’t have to worry much about doing it, games have to keep their drivers updated.
So let’s go ahead and update the graphics driver.
- Firstly, use the Windows+R shortcut to open the Run dialog box and type ‘devmgmt.msc’ in the command field.
- In the device manager window, expand the Display Adapters and then right-click the graphic driver listed here.
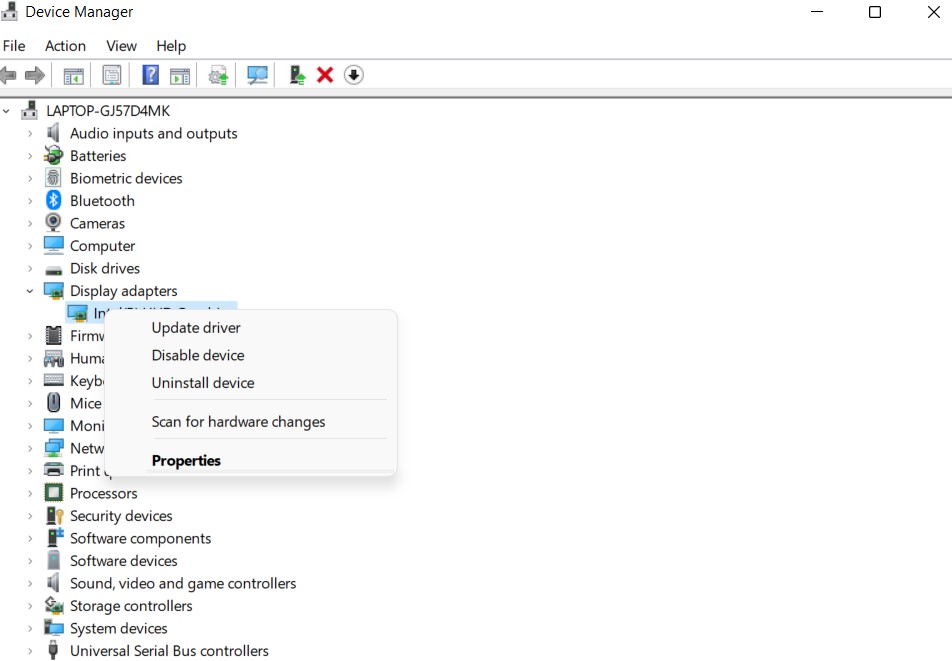
- Now choose the Update driver option visible here.
- Next, choose Update Drivers Automatically in the new window that opens.
- After the drivers are updated successfully, go ahead and restart your PC.
Also Read: How To Play Games Without GOG Galaxy In Windows 11
Close Unnecessary Background Programs
If you are experiencing low game FPS on your Windows 11 PC while playing the game, it’s a good idea to close all the apps running in the background.
Doing so will release a large number of resources that were occupied by them.
To do so, simply close all the windows open on your PC right now. If you want to close more processes, you can visit the task manager on your PC using the Ctrl + Shift + Esc shortcut.
Next, go to the Processes tab and examine the apps. Now see the apps that are consuming CPU, memory, or GPU resources more than normal.
End these tasks and then launch the game again.
Defragment Your HDD
If you have still not upgraded to SDD until now. Do it ASAP! However, if you are still using HDD, it is essential to defragment the disk.
Let’s see what to do:
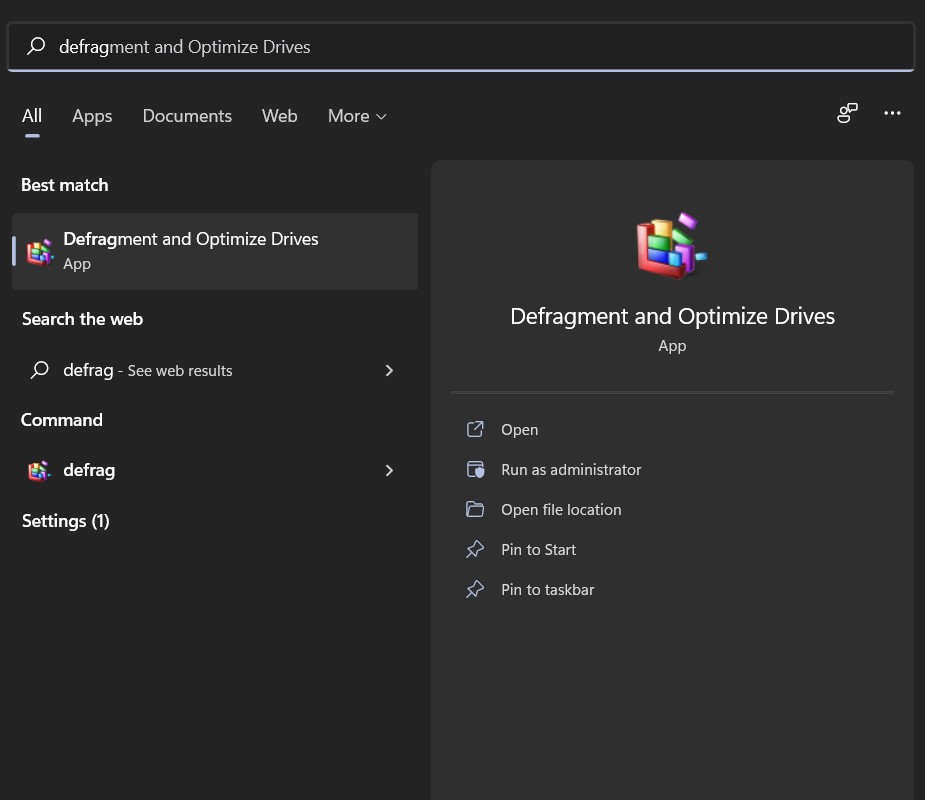
- Open the Start menu and type defrag in the search bar.
- Double-tap the Defragment and Optimize Drives option in the search bar and see when was the last time you defragged the disk.
If it’s been ages, do it now.
Also Read: Top 7 PC Games To Play In 2022
Adjust Power Options
Windows 11 has inbuilt power options that let you control the energy consumed by your PC. By default, the plan lets you balance the power consumption along with delivering average performance.
However, when you want to play games on your PC, it is essential to switch to a High-performance plan. Here’s how to do it:
- First of all, use the Windows+I shortcut to bring up the Settings.
- Now switch to the System tab and then choose Power & Sleep option.
- Next, choose the ‘Additional power settings’ option listed on the right side.
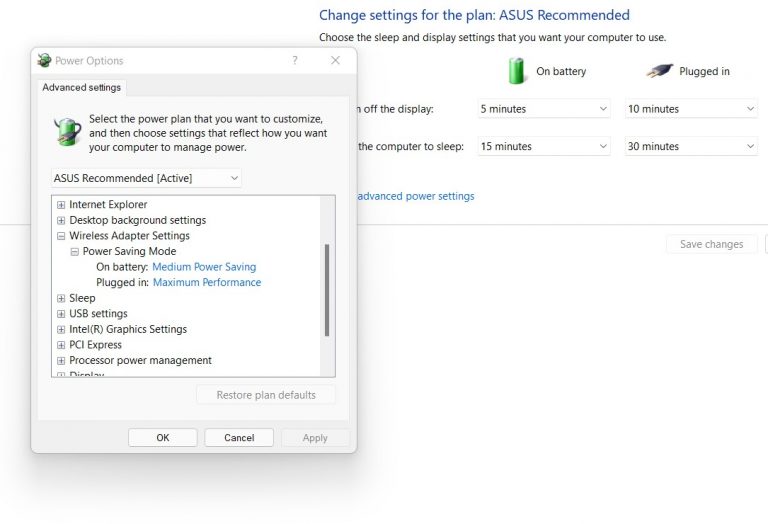
- When in the Power Options window of the Control Panel, click on the Show Additional Plans button. Now choose the high-performance option and save the settings.
Note: Choosing High-Performance Mode on your PC will increase power consumption and decrease battery life.
Also Read: Steam Overlay Not Working In Windows 11? Try These Fixes
Disable Visual Effects in Windows 11
Microsoft has introduced several visual effects in Windows 11. These effects make the menus and other elements look smooth but consume a lot of resources in return.
Since even the slightest of unwanted resource consumption affects gaming, it is essential to disable the visual effects in Windows 11 for good.
- First of all, go to the Start Menu and then enter the performance in the search bar.
- Now choose the Adjust the appearance and performance option.
- In the Visual Effects tab, you’ll see several graphical features that appear in the list.
- Here you have to click on the Adjust for best performance button. Doing so will disable all these effects. Finally, press the OK button.
Disable the Game Bar and Background Recording
Microsoft has introduced the Game Bar feature that lets you record the gameplay and even capture screenshots. While this is an impressive feature, it negatively impacts your Windows 11 performance while gaming. SO let’s best to disable the Game Bar.
- To do it, go to the Windows 11 Settings window.
- Next, access the Gaming option and then choose the Xbox Game Bar option.
- Here turn off the toggle for the Xbox Game Bar.
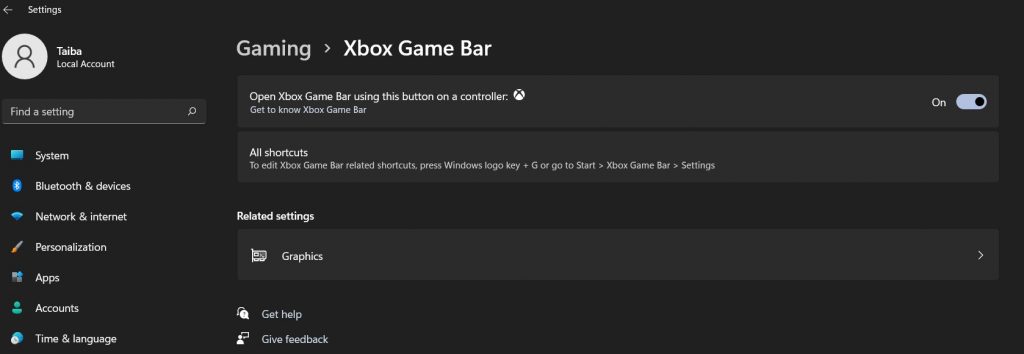
- Now go to the Captures tab and disable the switch for Record in the background while I’m playing a game.
Also Read: How To Build A Gaming And Streaming Setup In 2022?
Summing Up
Hope the Low Game FPS on your Windows 11 issue is fixed now and you can enjoy the game graphics as you should. Always remember, the more resources are available for the game, the better it will perform. With this, signing off!


