


![Apex Legends - Change Audio Language Without Changing Text [Guide]](https://www.hawkdive.com/media/5-Basic-Tips-To-Get-Better-On-Apex-Legends-1-218x150.jpg "The Apex Legends Digital Issue Is Now Live!")


Apple has made it simple to install windows 11 on Mac for a long time. Boot Camp allowed Intel-based Macs to dual-boot into macOS and Windows, which was useful for those who wanted to work in both environments.
Windows 11 was released some time ago and has been available to the public. Also, it generated a lot of talks, both positive and negative.
Many people who don’t use Windows have started paying attention to it. Many Mac users, for example, are eager to try out Microsoft’s newest operating system, Windows 11. This is the place to be for those who identify with that group. How to install Windows 11 on an M1 Mac will be covered in detail below. Let’s go in right now.
Solutions to install Win 11.
- Virtualization: VMware Fusion and Parallels Desktop are two of the most well-known software for running Windows and other operating systems on a Mac. However, only the Parallels Desktop has been updated to work with an M1 or M2-based Mac. Whether you upgrade from a previous version or purchase the Pro Edition, the price of the Parallels Desktop can vary from around $50 to $100.
- Emulator: QEMU is a free and open-source emulator that might be tricky to install and configure in its default form. You may run QEMU on your Mac using the UTM app with minimal configuration after skipping the first setup difficulty. Compared to Parallels Desktop, UTM’s feature set is more limited (more accurately, payment is optional).
What is UTM?
UTM is the perfect solution for those who want to use QEMU’s software but want an app with a more straightforward graphical user interface. UTM has a slick interface reminiscent of Parallels Desktop and can be set up without using the command line. Setup and installation of Windows are breezes while using UTM.
The Universal Translation Manager (UTM) is free on its website or for $10 through the Mac App Store. The only difference between the two is that the Mac Software Store app receives updates for UTM and that your purchase of the app directly supports the continuation of the development of the project. Keeping UTM up-to-date requires checking for and downloading updates manually if you’re using the free version from the developer’s site.
Tutorial: Installing Windows 11 ARM on an M1 Mac
- The UTM software may be used as a virtualizer and emulator. Is available on the Mac App Store and can be installed by dragging the app’s icon into the Applications folder.
- Microsoft’s Windows 11 ARM VM is available for free download on their site (a Windows Insider login is required; creating an account is quick and easy).

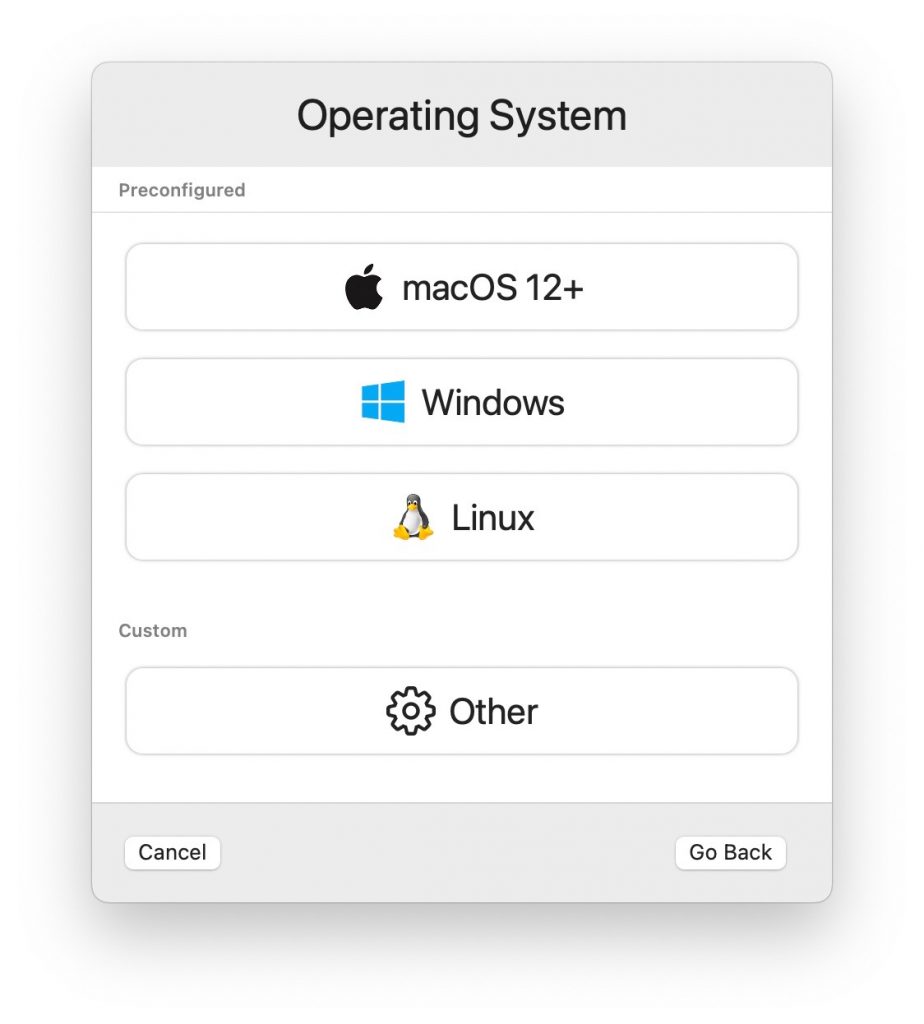
- When using UTM on a Mac, open the application and select the “+” button to set up a new VM.
- From the “I Want to” menu, select “Virtualize” and then “Windows.”
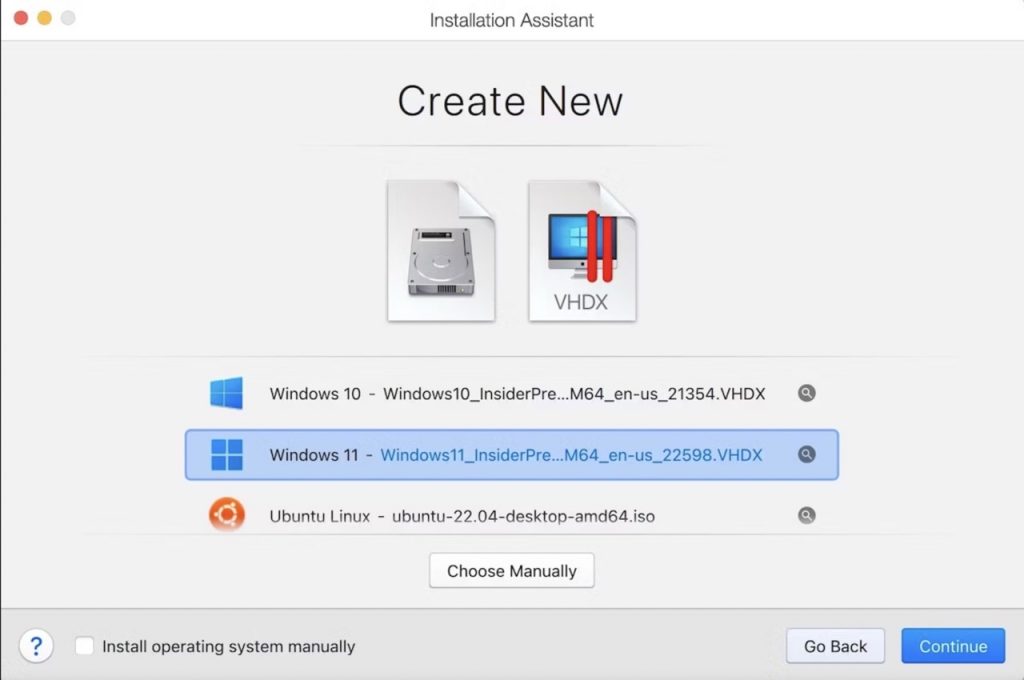
- Select “Import Image,” then “Browse,” and then locate the Windows 11 VHDX ARM image you downloaded before clicking “Next.”

Source: intego - It is recommended that 8GB of RAM or more be allocated to Windows 11 for optimal performance, after which you can click Next once more.
Click “Save” on the Summary screen.
- To begin setting up Windows 11, select the Play button
- Go through the standard Windows 11 installation steps of picking a language, an administrator account name, etc – Choose “No network connectivity” for now and let Windows 11 set itself up; networking and internet access will not operate until a separate setup process is completed, which we’ll discuss shortly.
- In a few moments, the M1 Mac will boot up with Windows 11 operating in a virtual machine.
- Download the SPICE Guest Tools ISO from the UTM website to enable network connectivity in the Windows 11 virtual machine.
- Click the disc icon in the toolbar of the active Windows 11 VM, pick CD/DVD Iso > Change>, and then navigate to the spice-guest-tools-xxx.iso file you downloaded.
- Using Windows Explorer, access the D: drive that was mounted, execute the SPICE Guest Tools installer and then restart the virtual machine.
- Windows 11 will automatically reconnect to the internet after the VM reboots.

Appstore - Then you have successfully installed Windows 11 ARM on an Apple Silicon-based Mac.

Remember that you won’t be able to connect your Windows 11 VM to the web unless you first install the SPICE guest tools.
Using Parallels
To virtualize a computer’s Desktop, Parallels uses its own patented technology. It was the only application available at the time that could make Windows 11 work on your M1 Mac.
- The one catch is that it requires a subscription fee. Go to Parallels’ main site and get the app to start.
- Once the app has been installed and launched, the Installation Assistant will be shown. Select the Windows ISO file you downloaded earlier, and then click Install Windows or another OS from a DVD or image file.
- After deciding how you’ll most frequently employ the app, press the Continue button. Just stick to the on-screen prompts, and the setup will be done in no time. Do this, and Windows 11 will install without problems on your M1 Mac.
Final Thoughts
When Windows 11 was released, there weren’t many options for getting it to run on a Mac. Much less the M1 Mac’s silicon-based processor. However, numerous ingenious modifications have emerged that make using the OS pleasurable. We sincerely wish one of these solutions would allow you to install Windows 11 on Mac OS successfully.


 In Windows 11")


